How do I install Impact in Blackboard Learn Original?
You can install Impact in Blackboard Learn Original.
If you have already installed the Impact Building Block, we recommend uninstalling the old version before installing the new version.
Download the latest version of the Impact Building Block here (version 2.3.185).
How do I install Impact in Blackboard Learn Original?
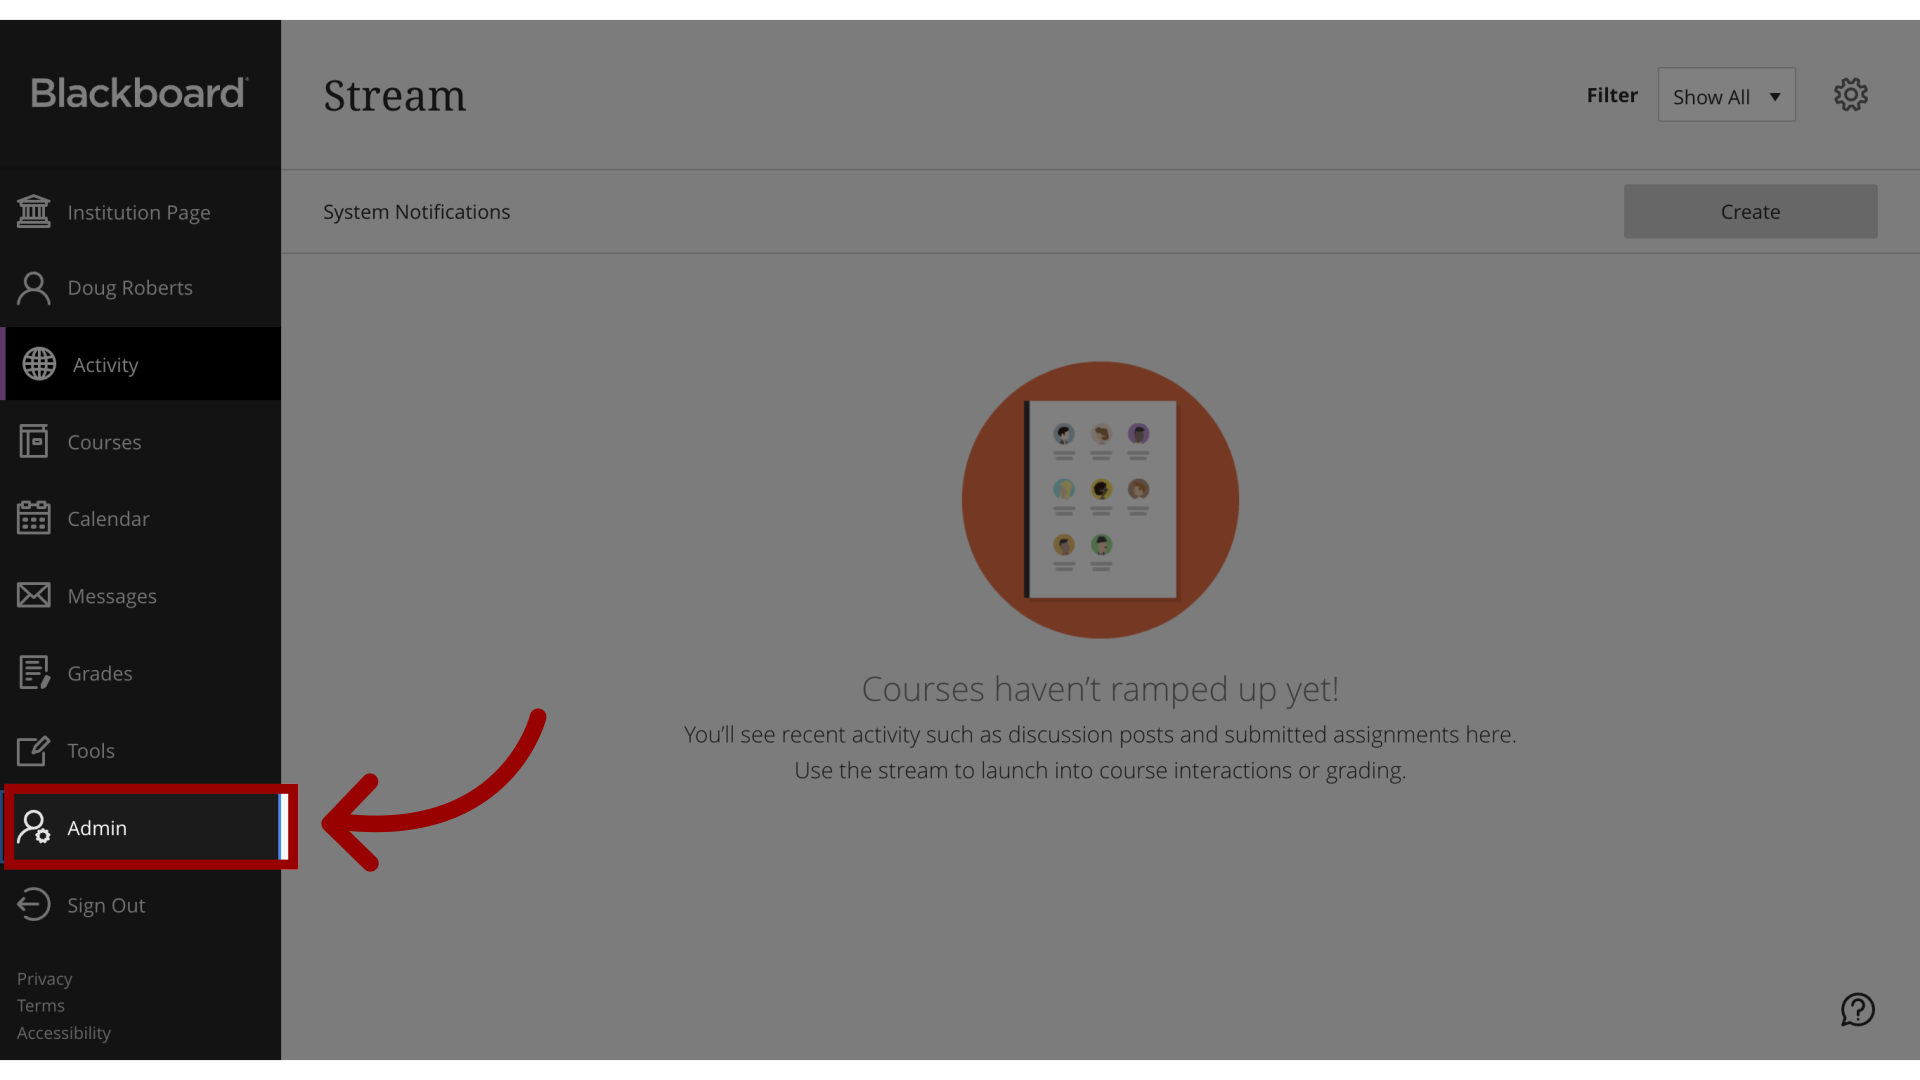
1. Open System Admin
In Blackboard Learn, click the System Admin link.
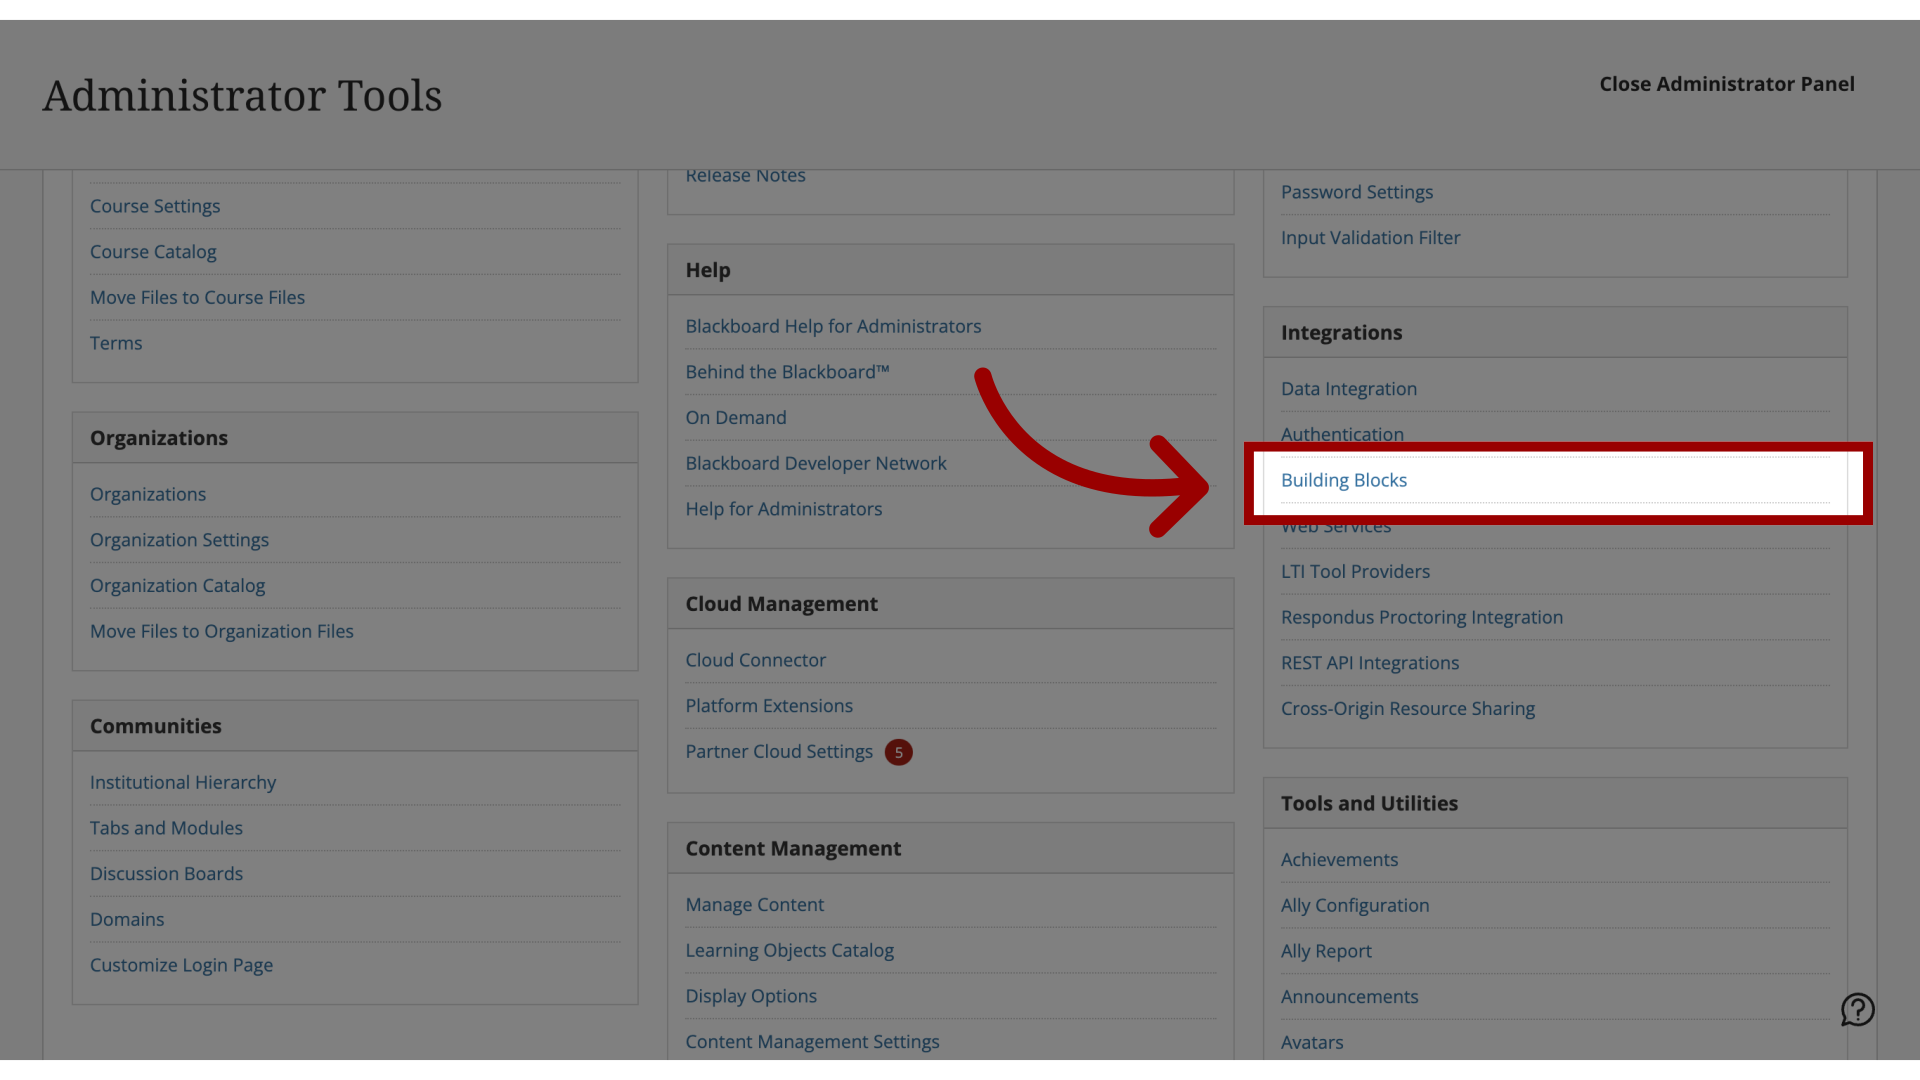
2. Open Building Blocks
In the Integrations section, click the Building Blocks link.
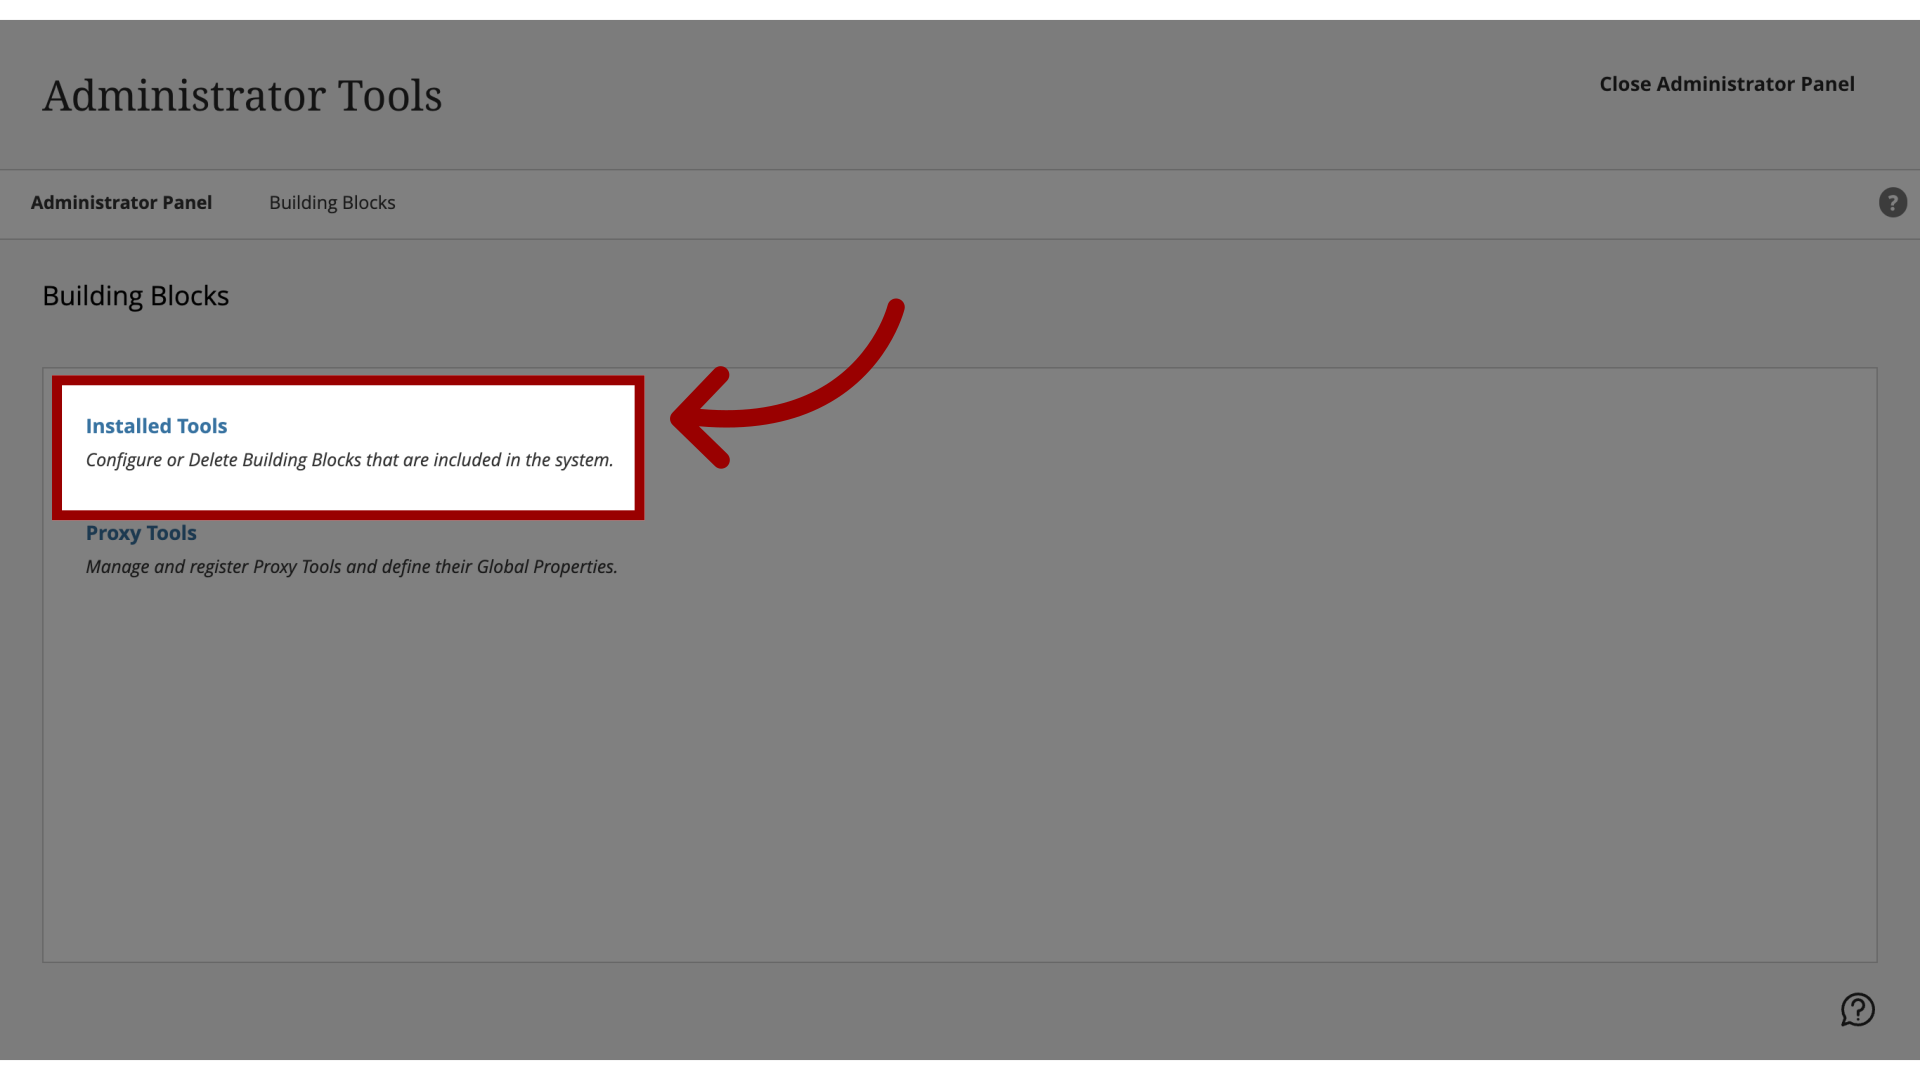
3. Open Installed Tools
Click the Installed Tools link.
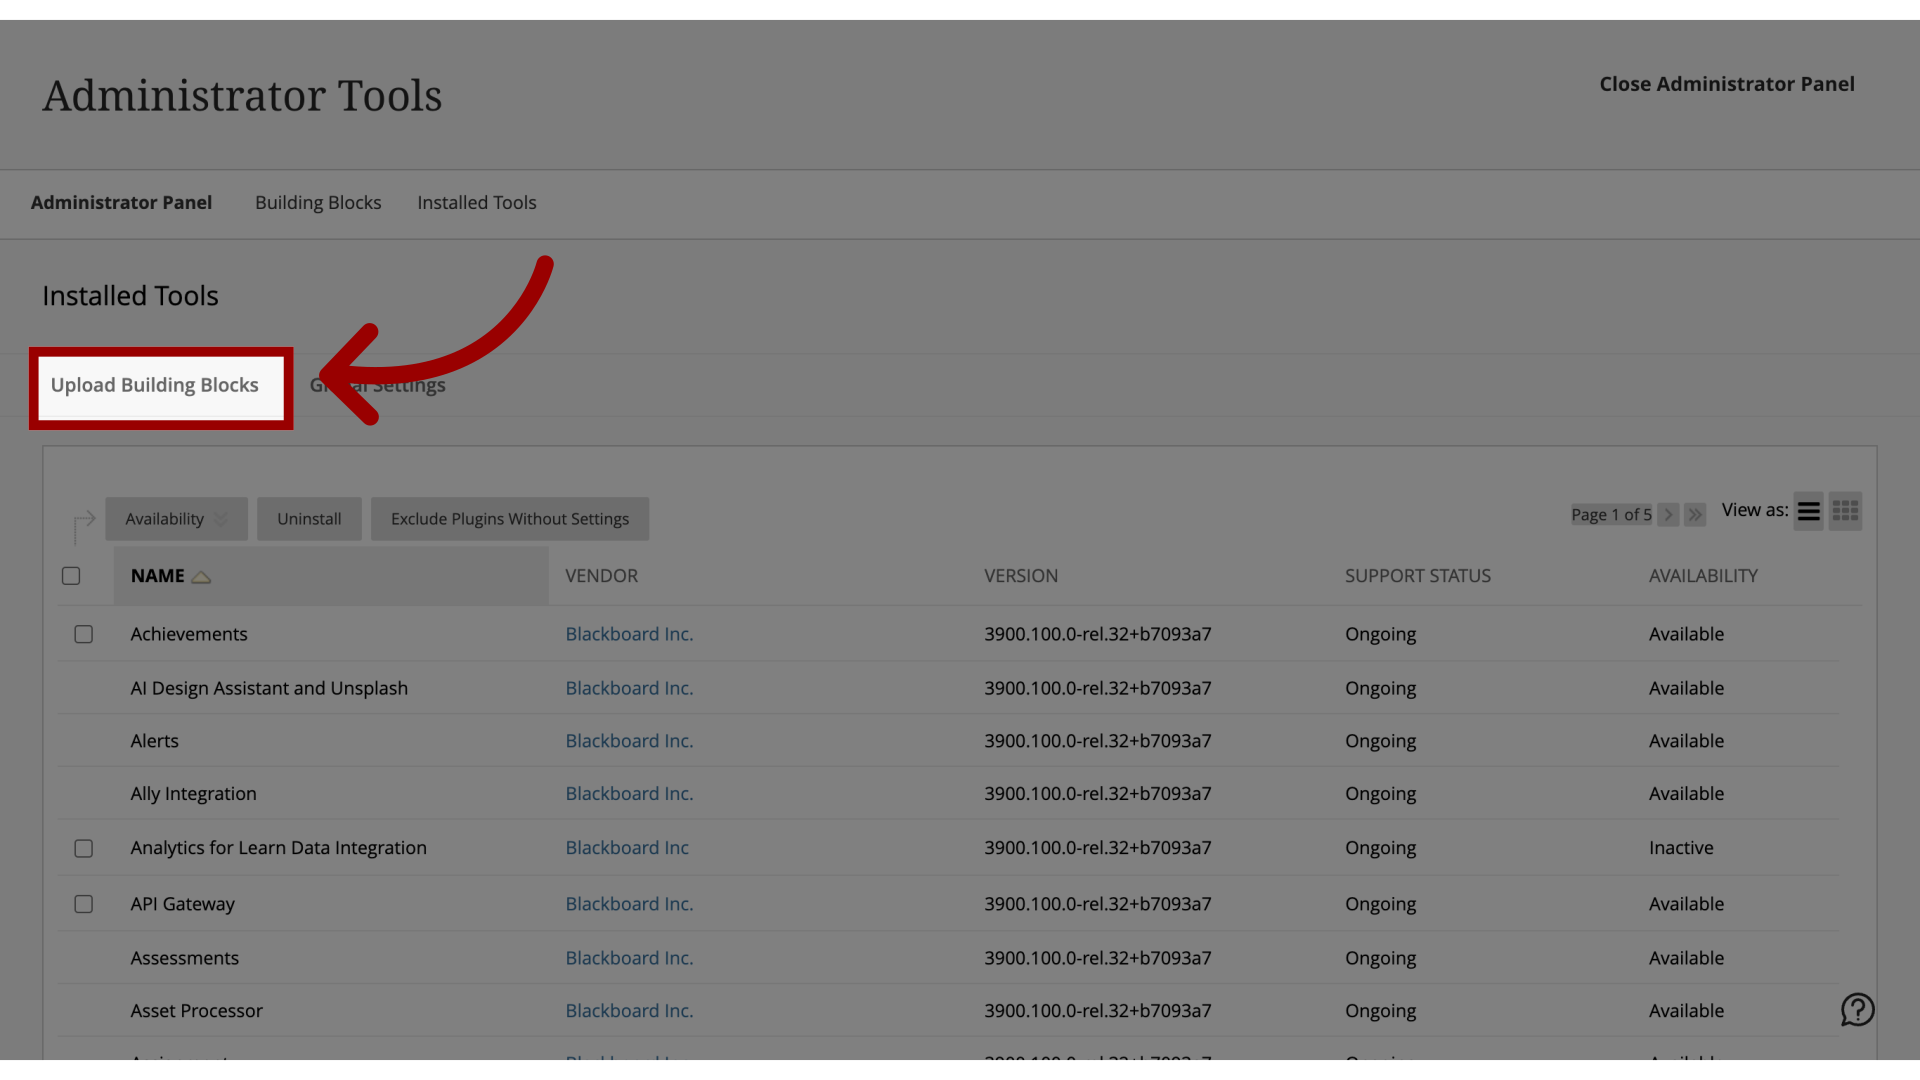
4. Upload Building Blocks
Click the Upload Building Blocks link.
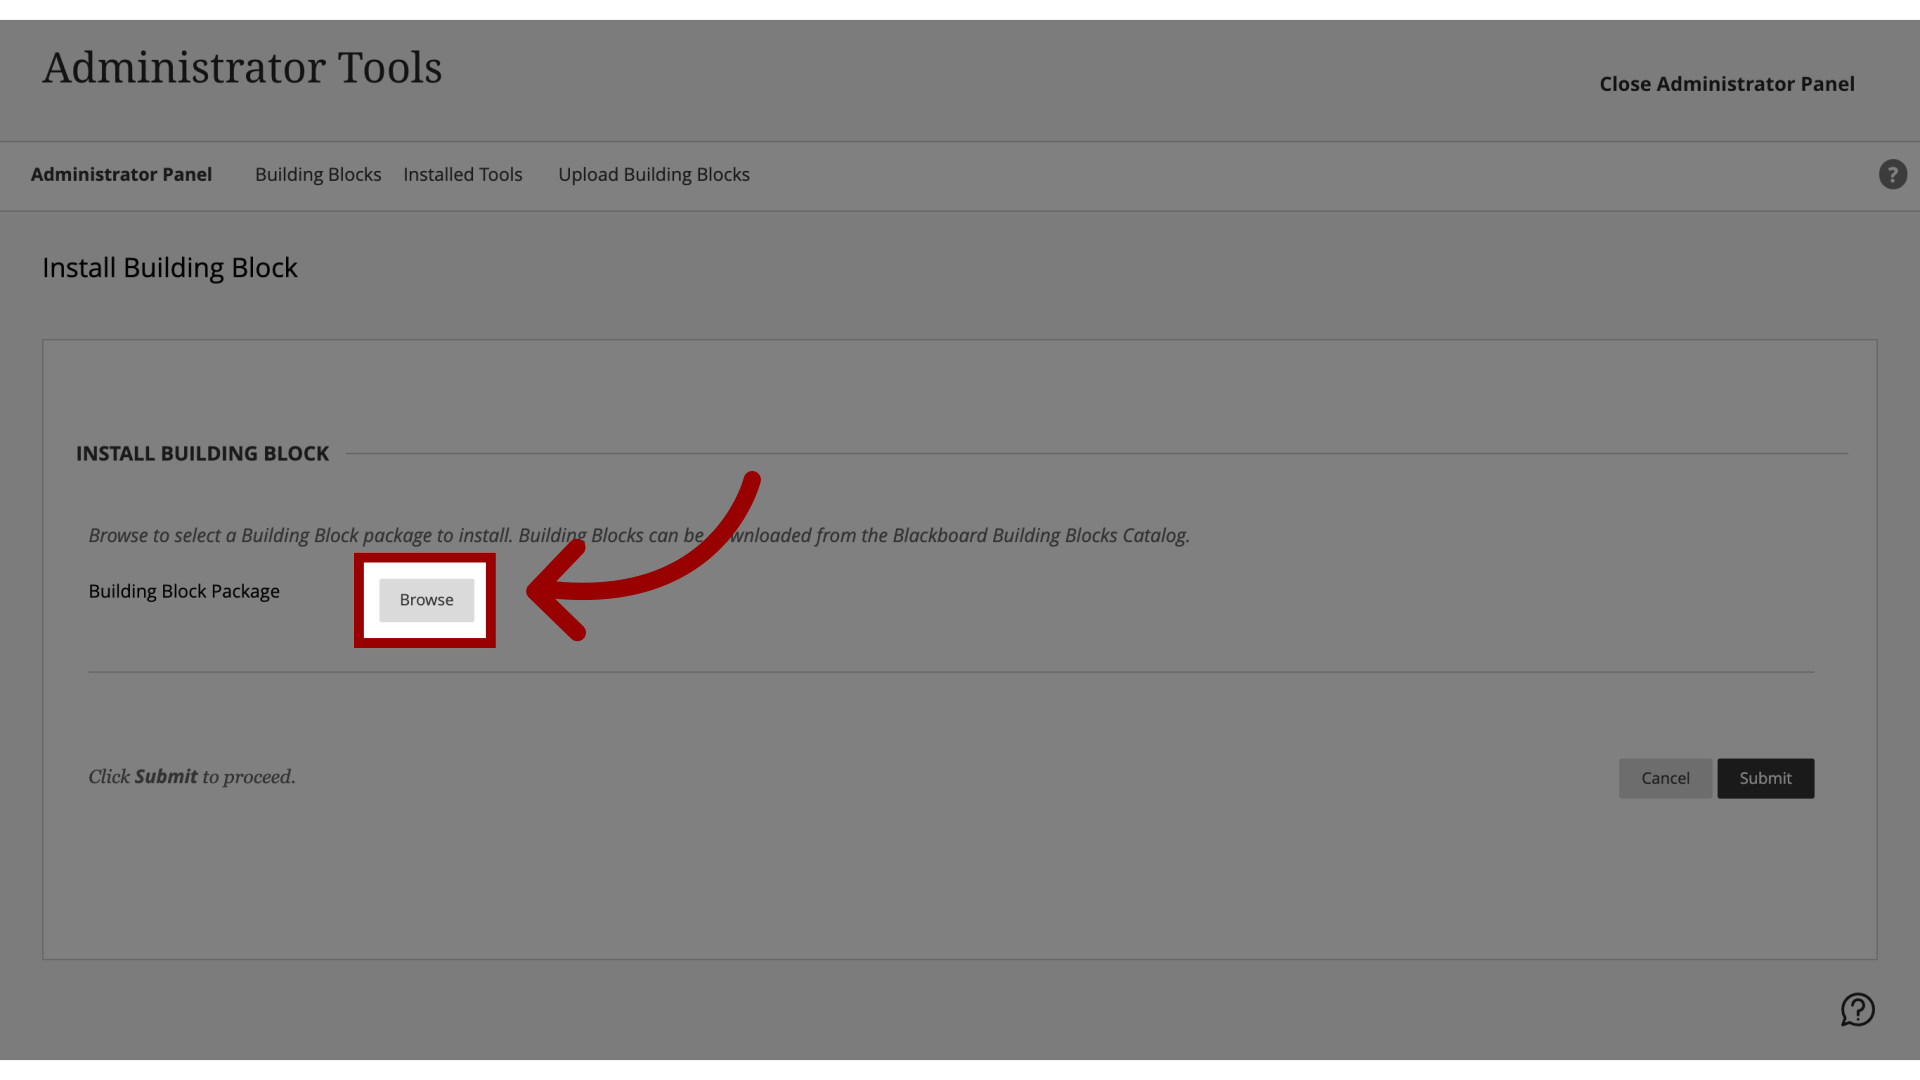
5. Upload Building Block
Click the Browse button and locate the Building Block .war file on your computer.
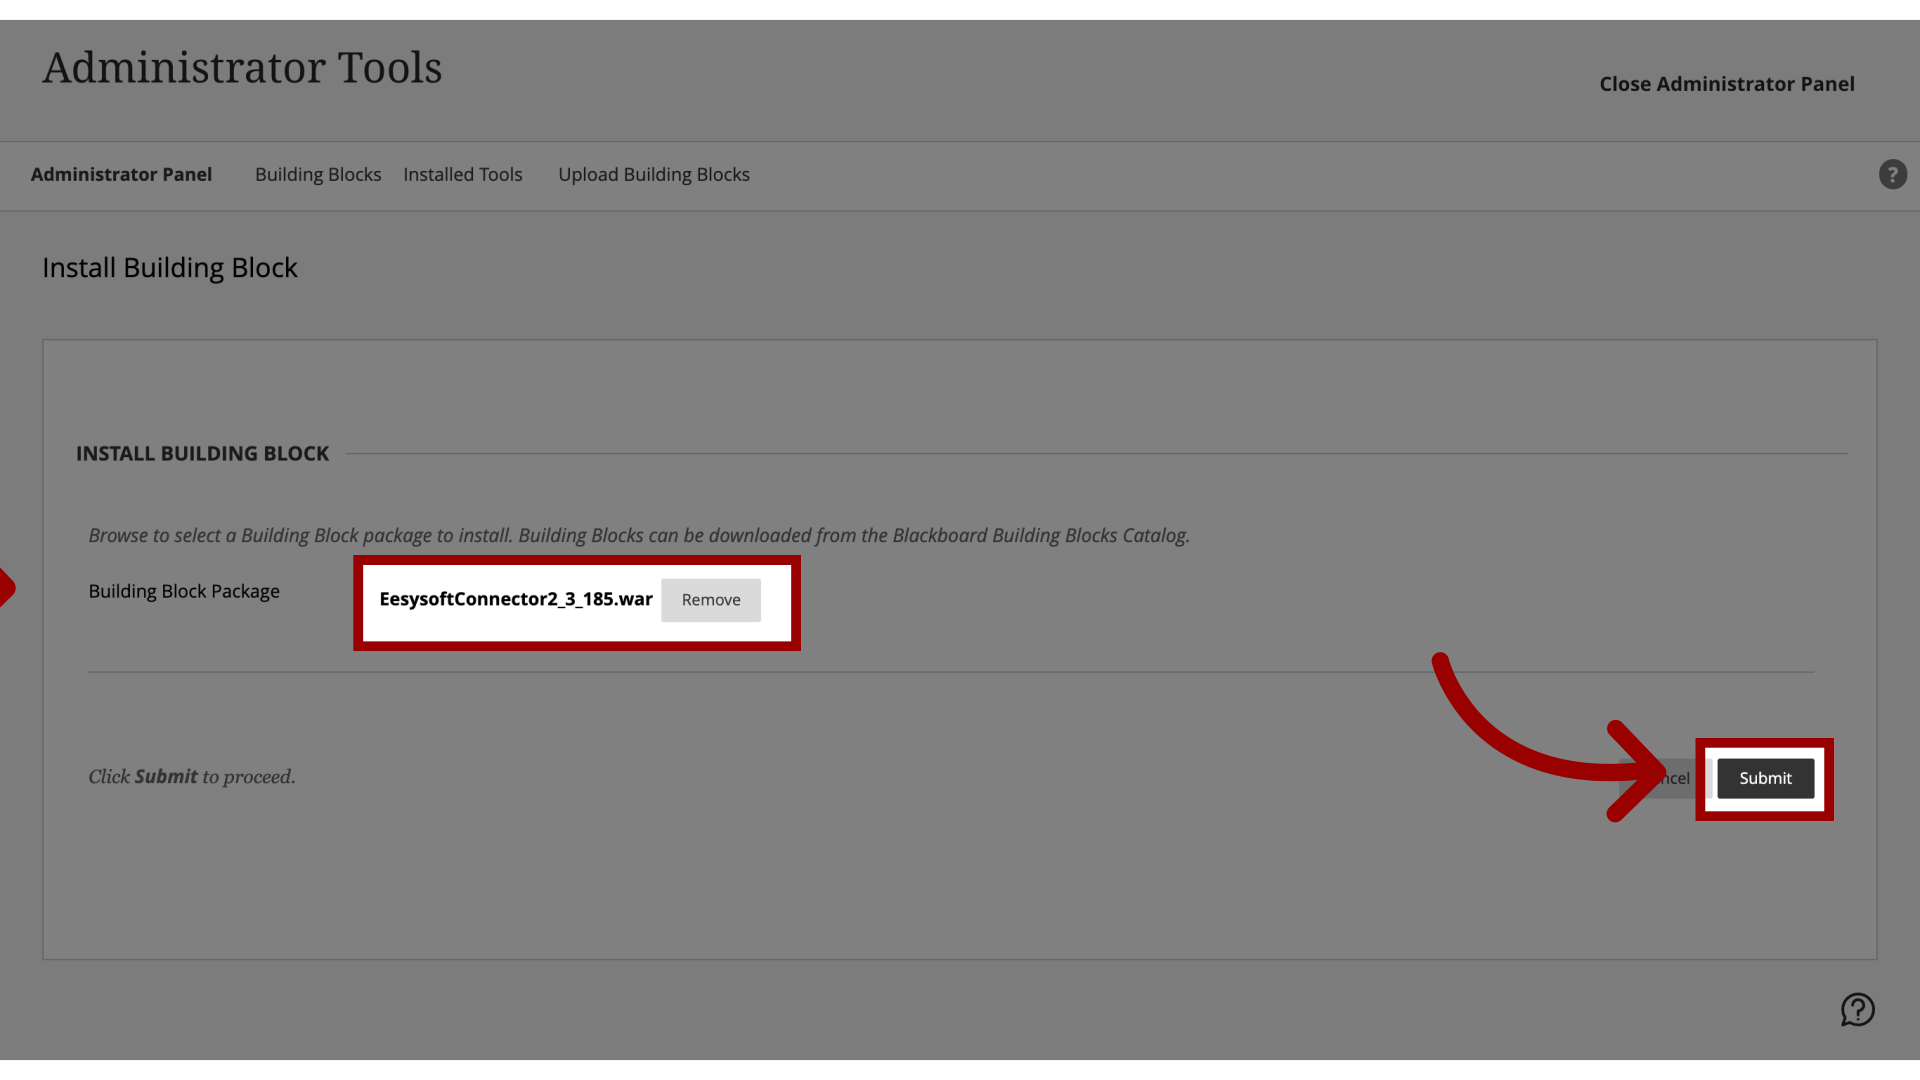
6. Install Building Block
Click the Submit button to upload the file to Blackboard Learn, and then select OK to go back to the Building Blocks page.
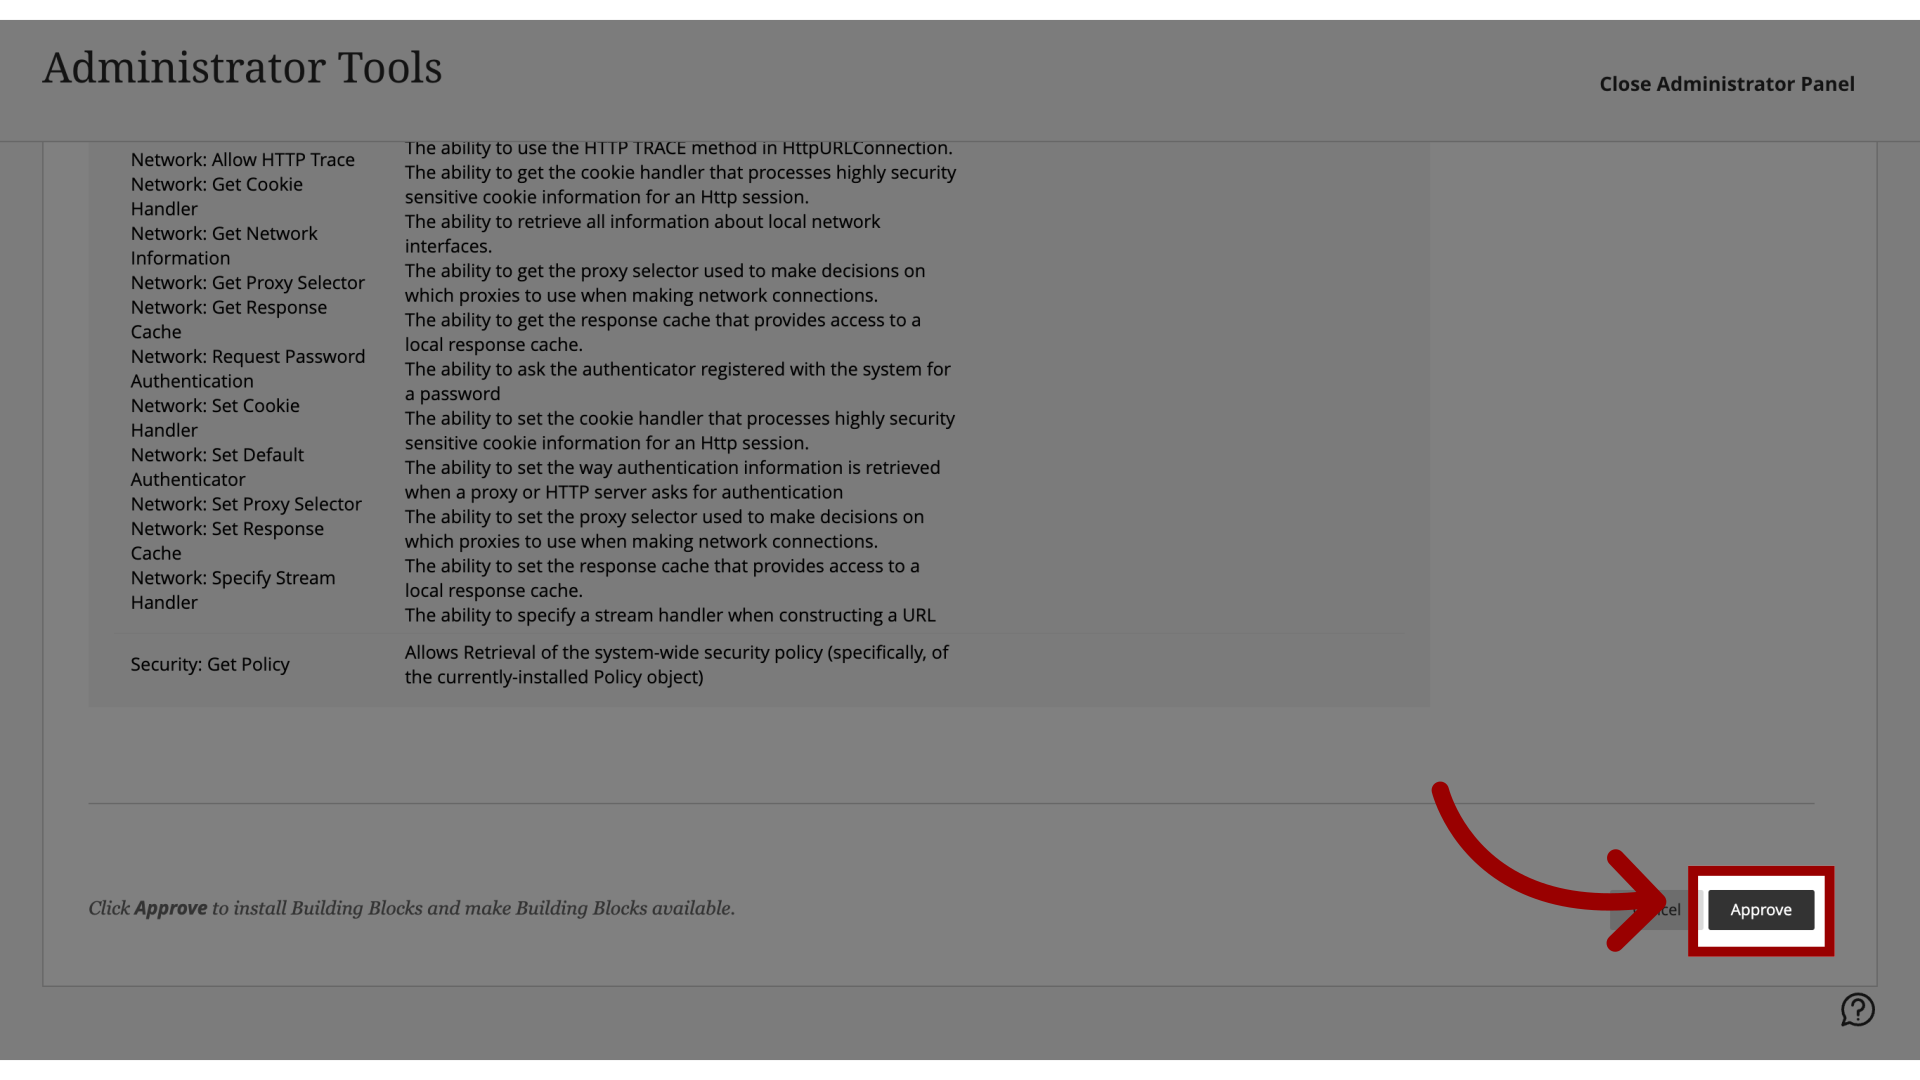
7. Approve Building Block
Click the Approve button.
To enable the building block, select Available in the Availability list for the building block. Blackboard Learn lists the permissions that the building block requires. This is a security feature to protect Blackboard Learn from dangerous content. If you are concerned about the permissions given to a building block, contact the vendor before approving the permissions.
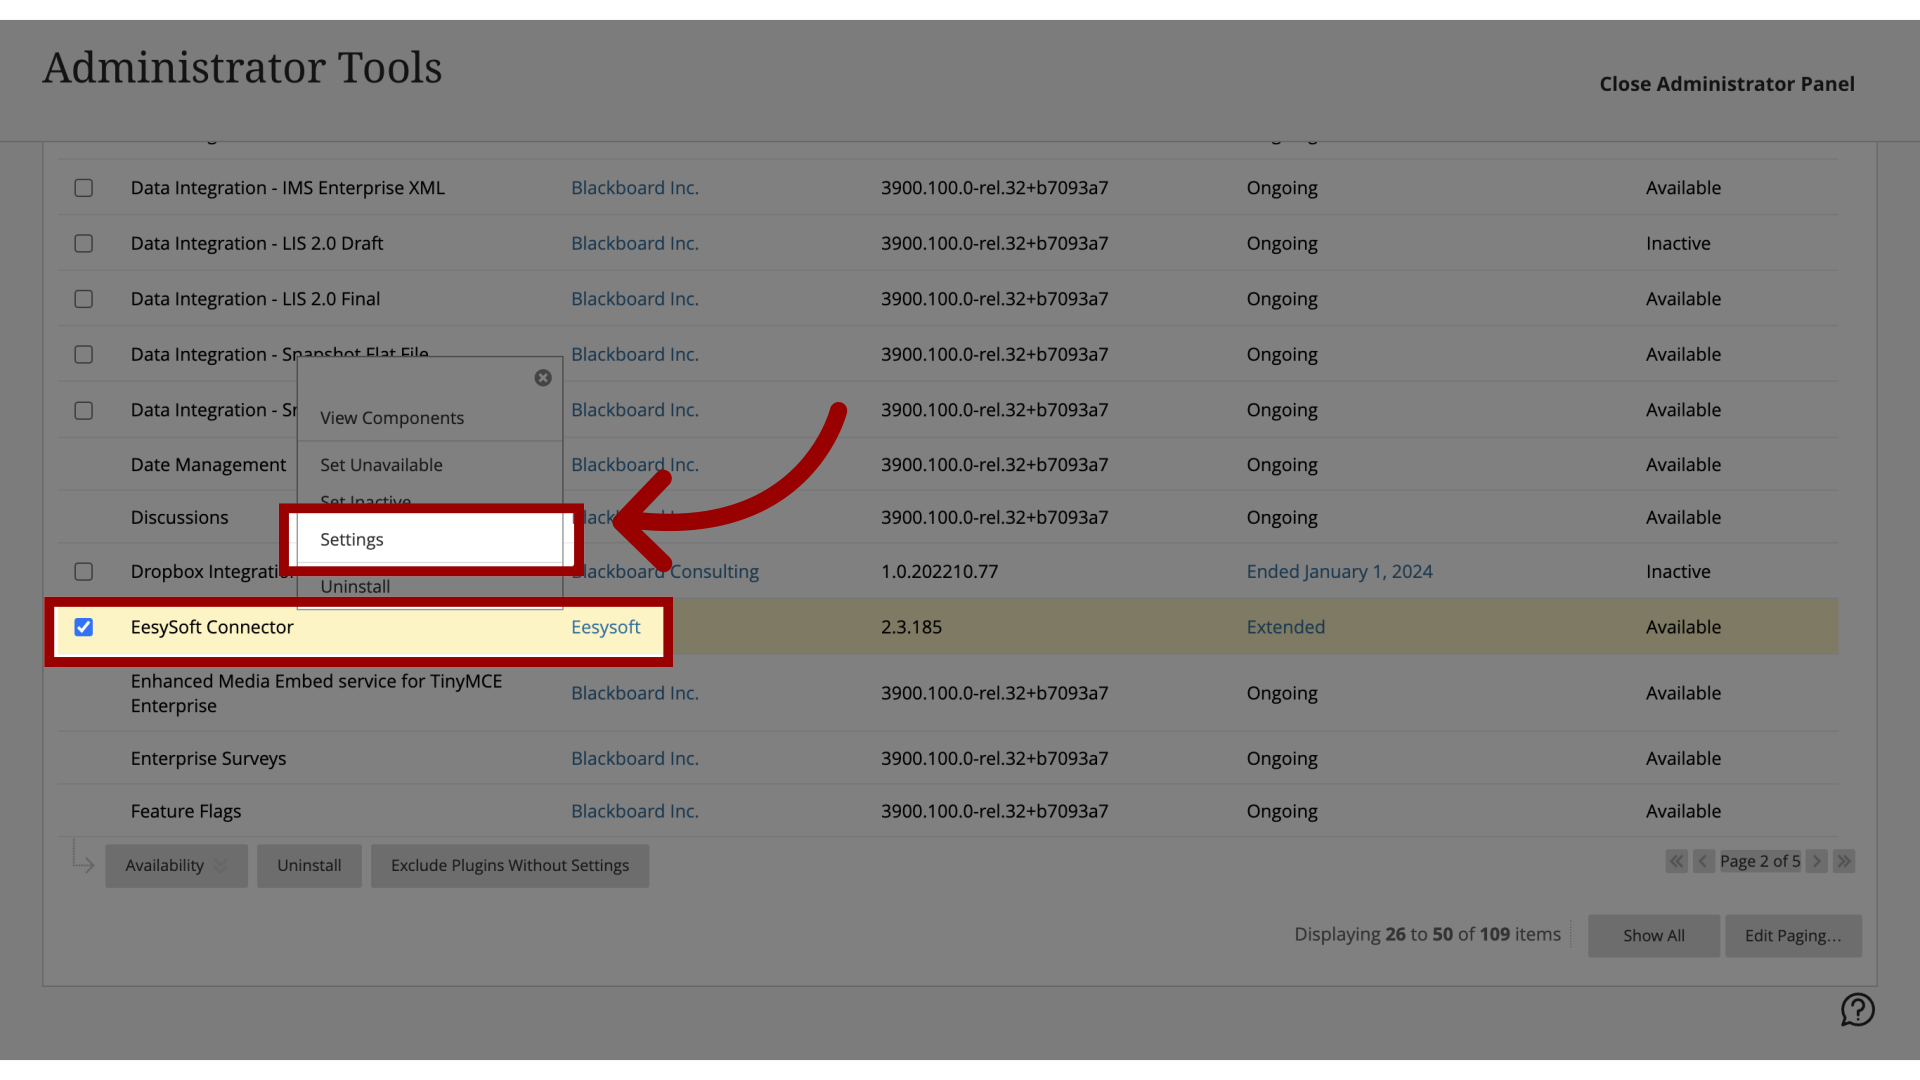
8. Open Settings
Locate the Eesysoft (Impact)Connector in the list of installed Building Blocks.
Click the Settings link.
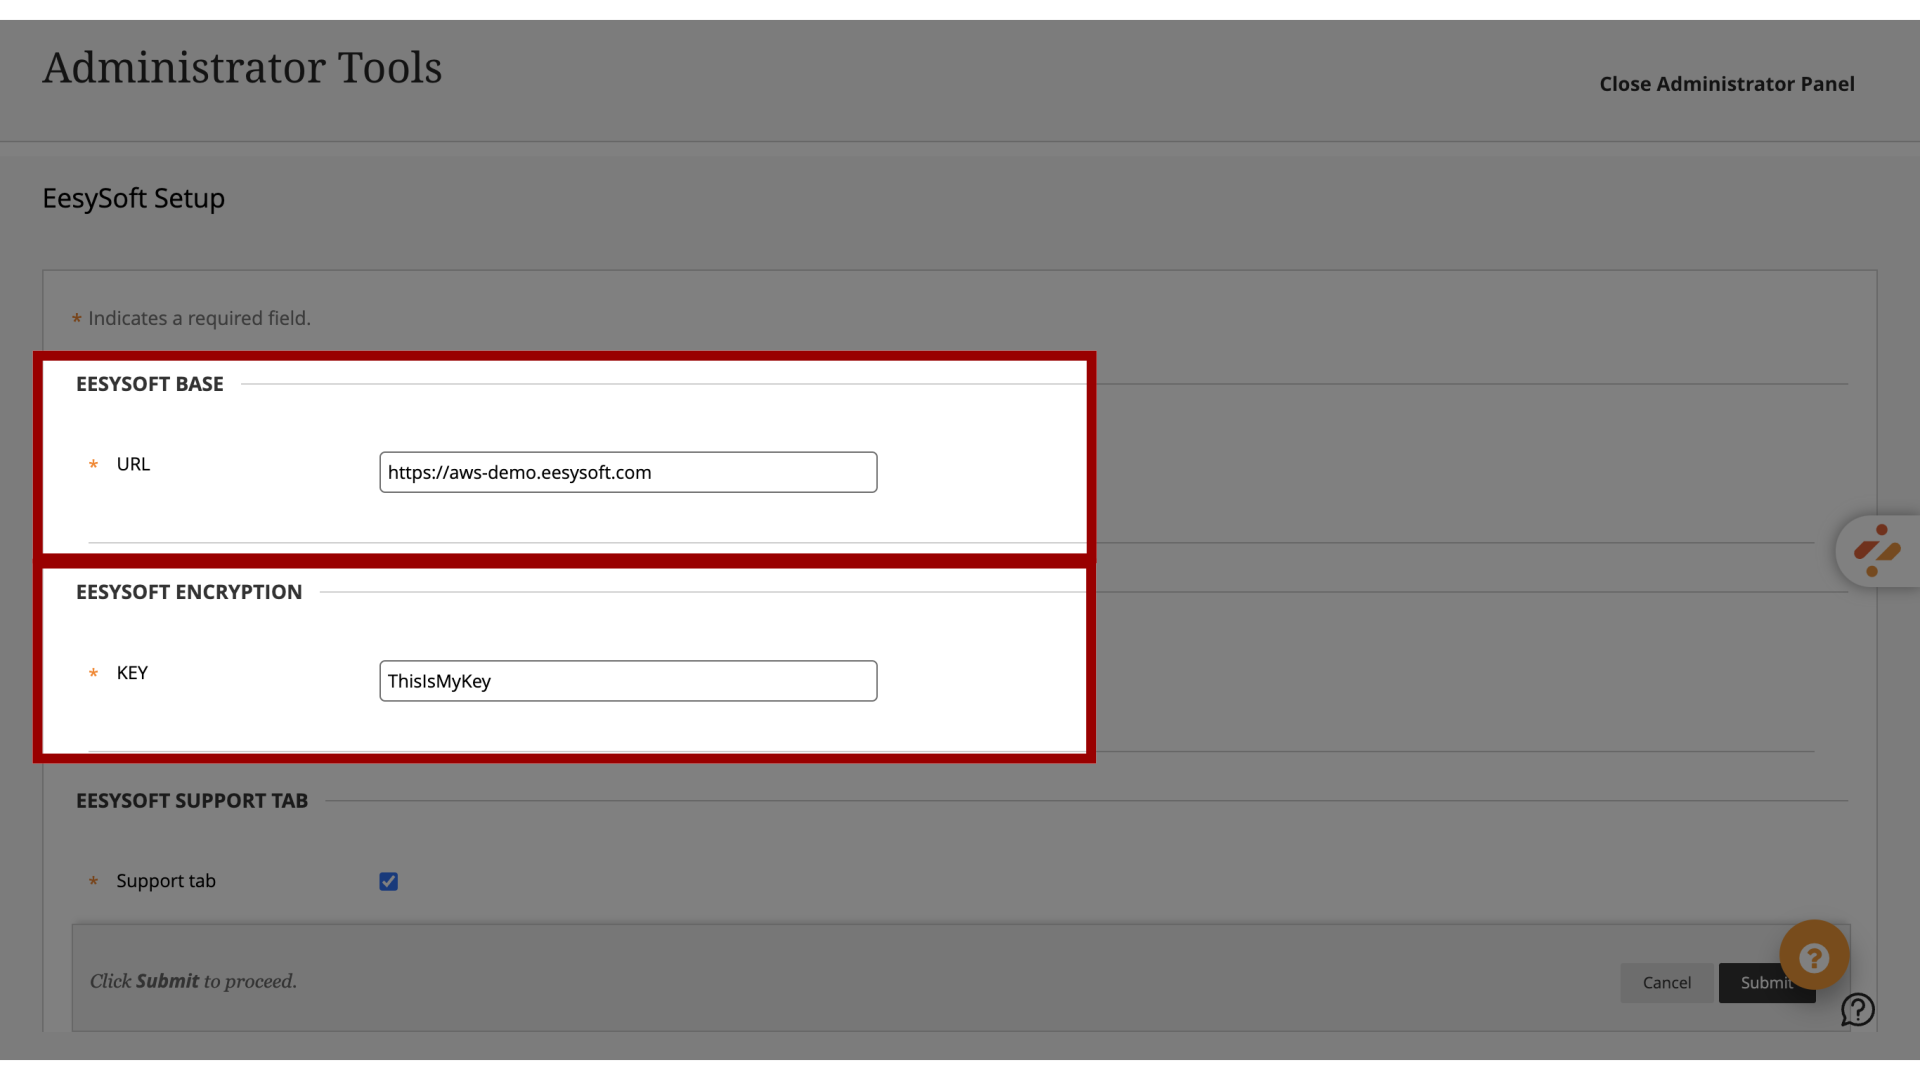
9. Enter Base URL and Key
Enter the Base URL and Key provided by Impact.
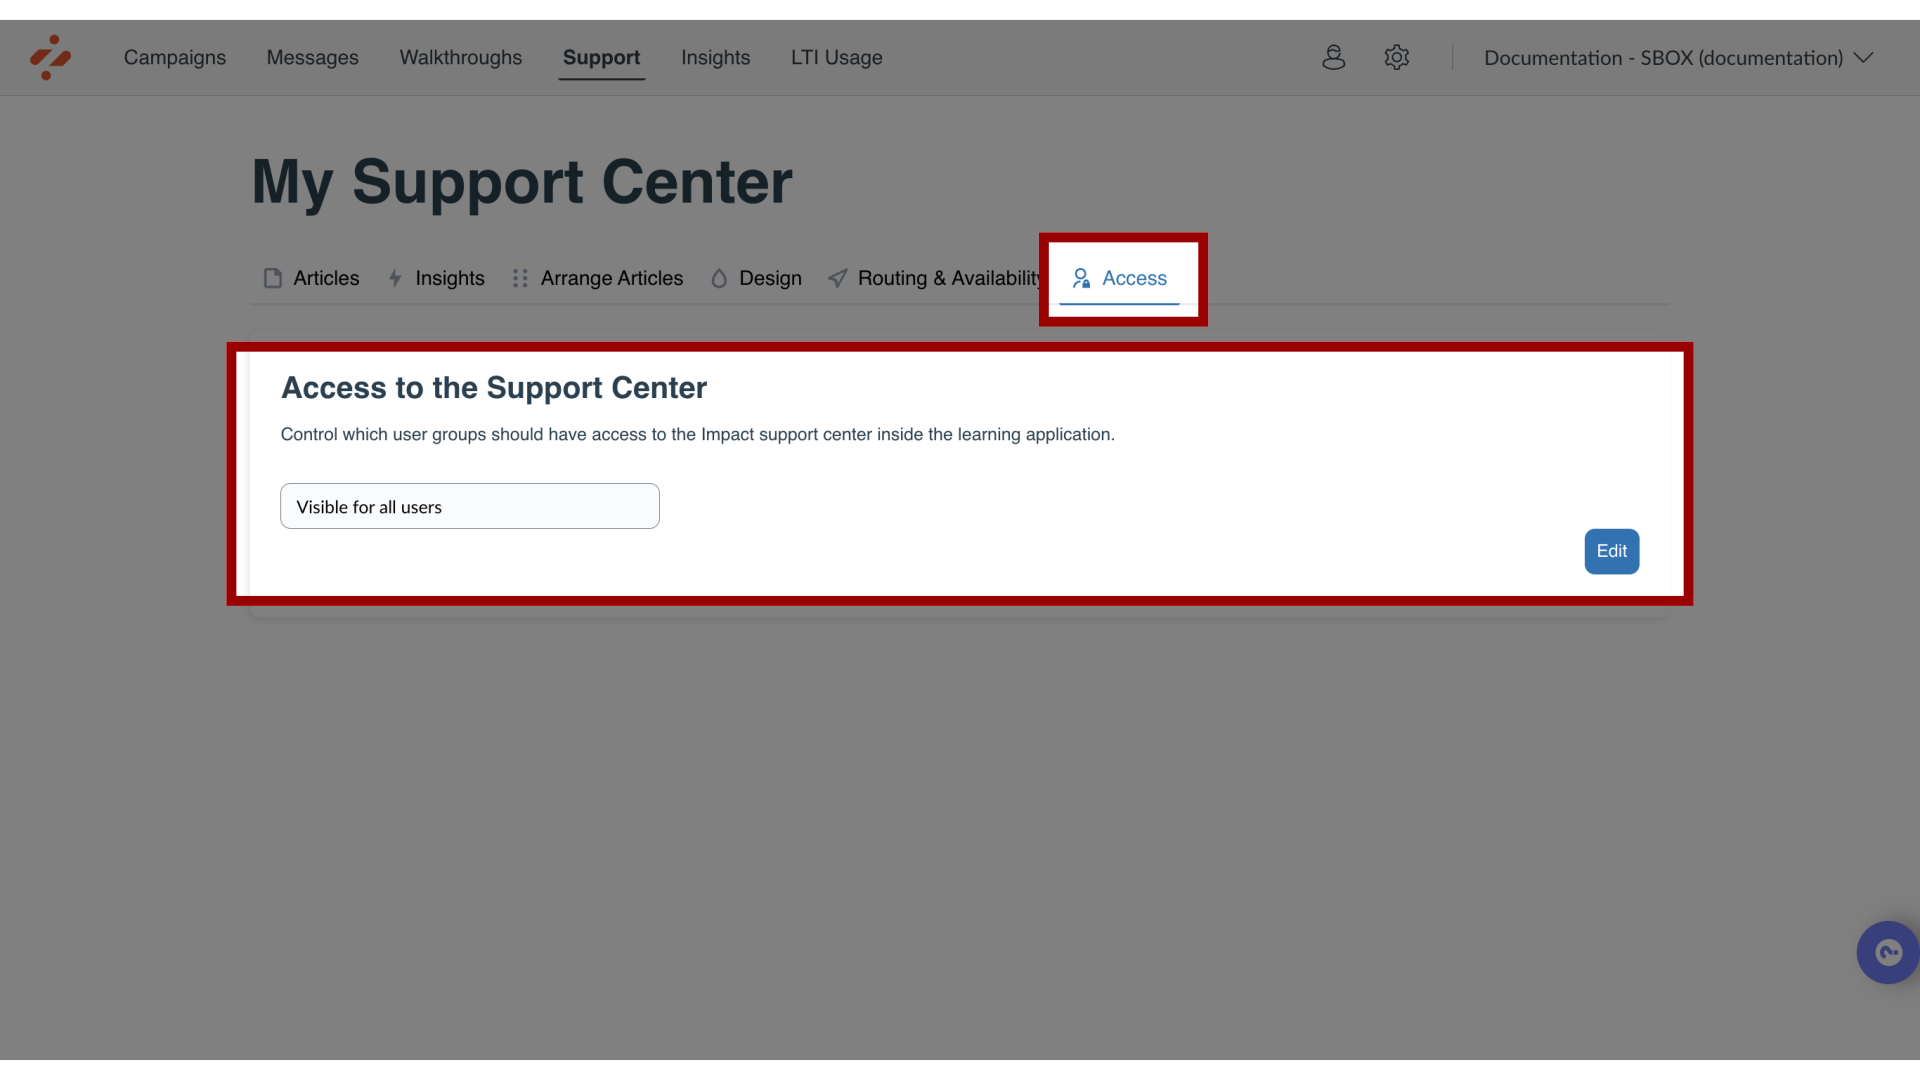
10. Add Support for Users
Access the Support Center settings.
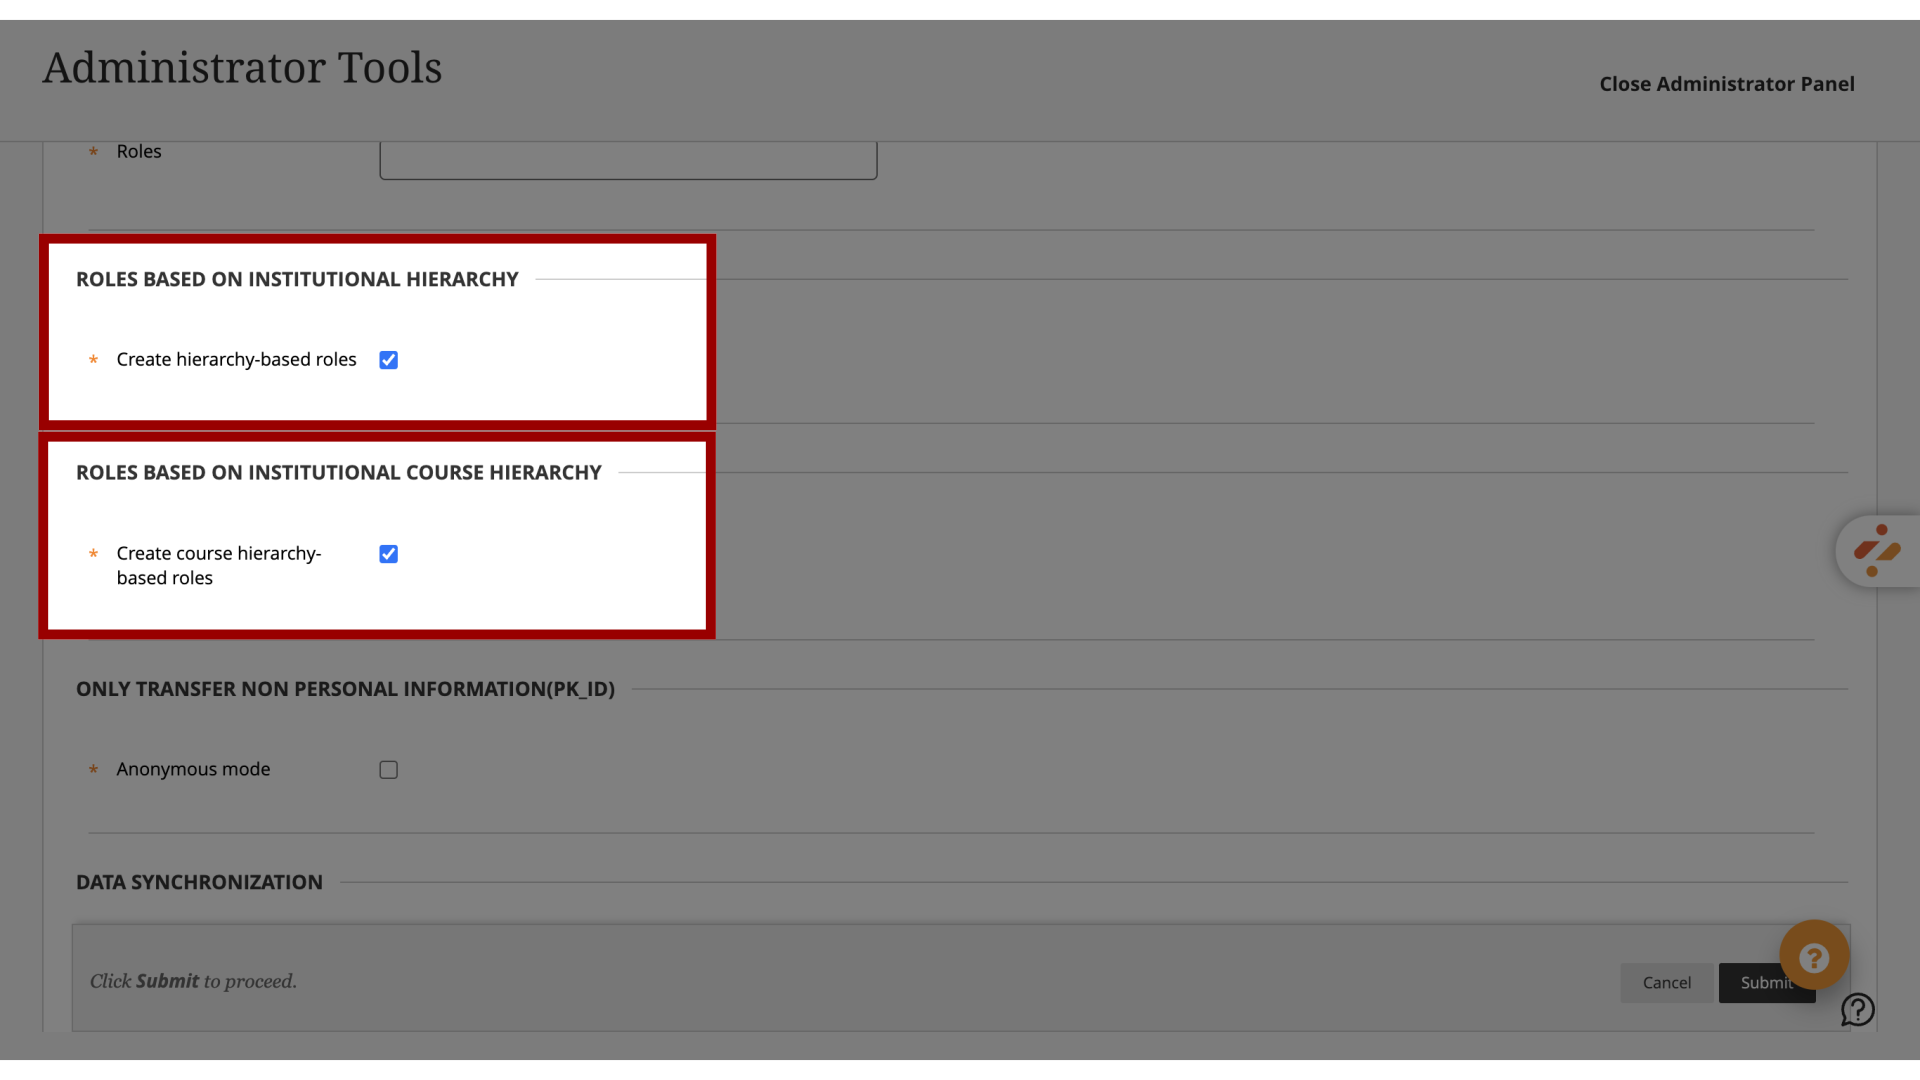
11. Create Hierarchy Roles
To use Institutional Hierarchy nodes to filter Impact reports or target messages, articles, and campaigns, enable Create hierarchy-based roles (if users are directly aligned with nodes) and/or Create course hierarchy-based roles (if courses are aligned with nodes).
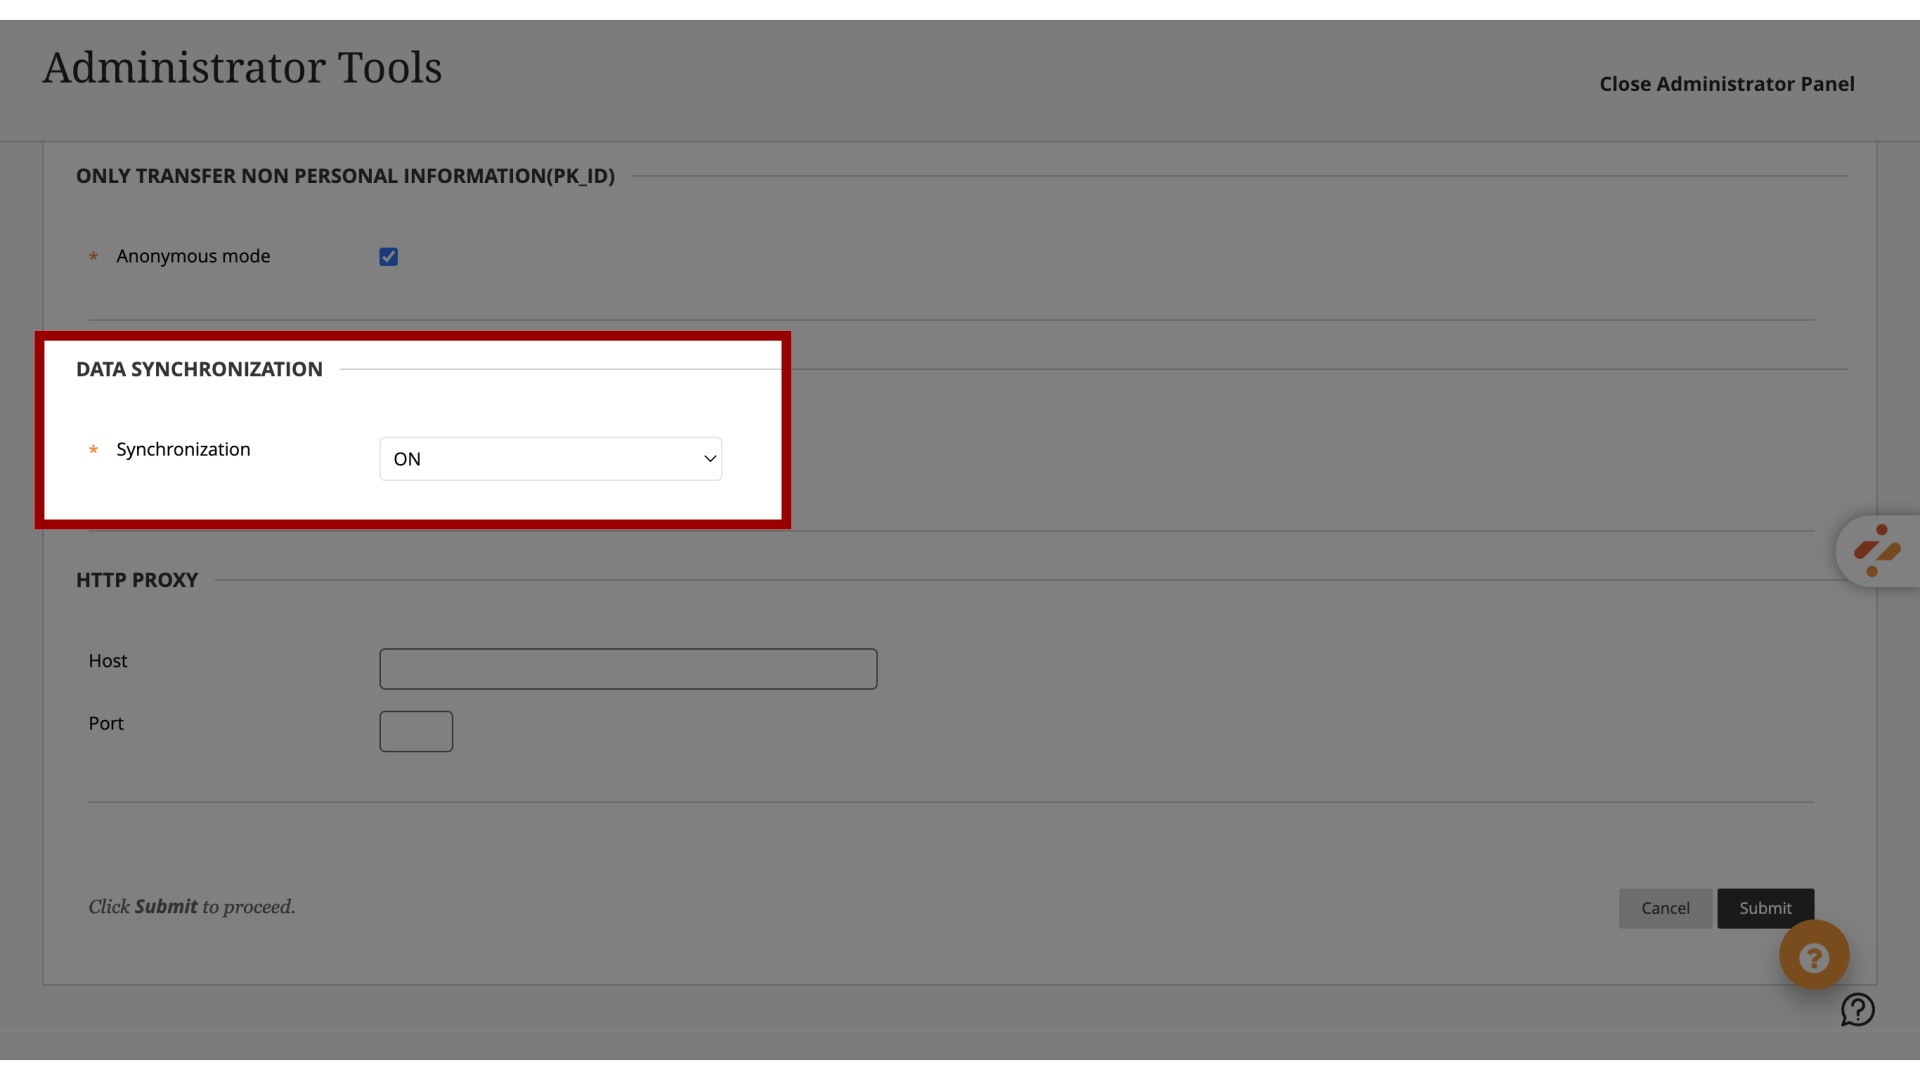
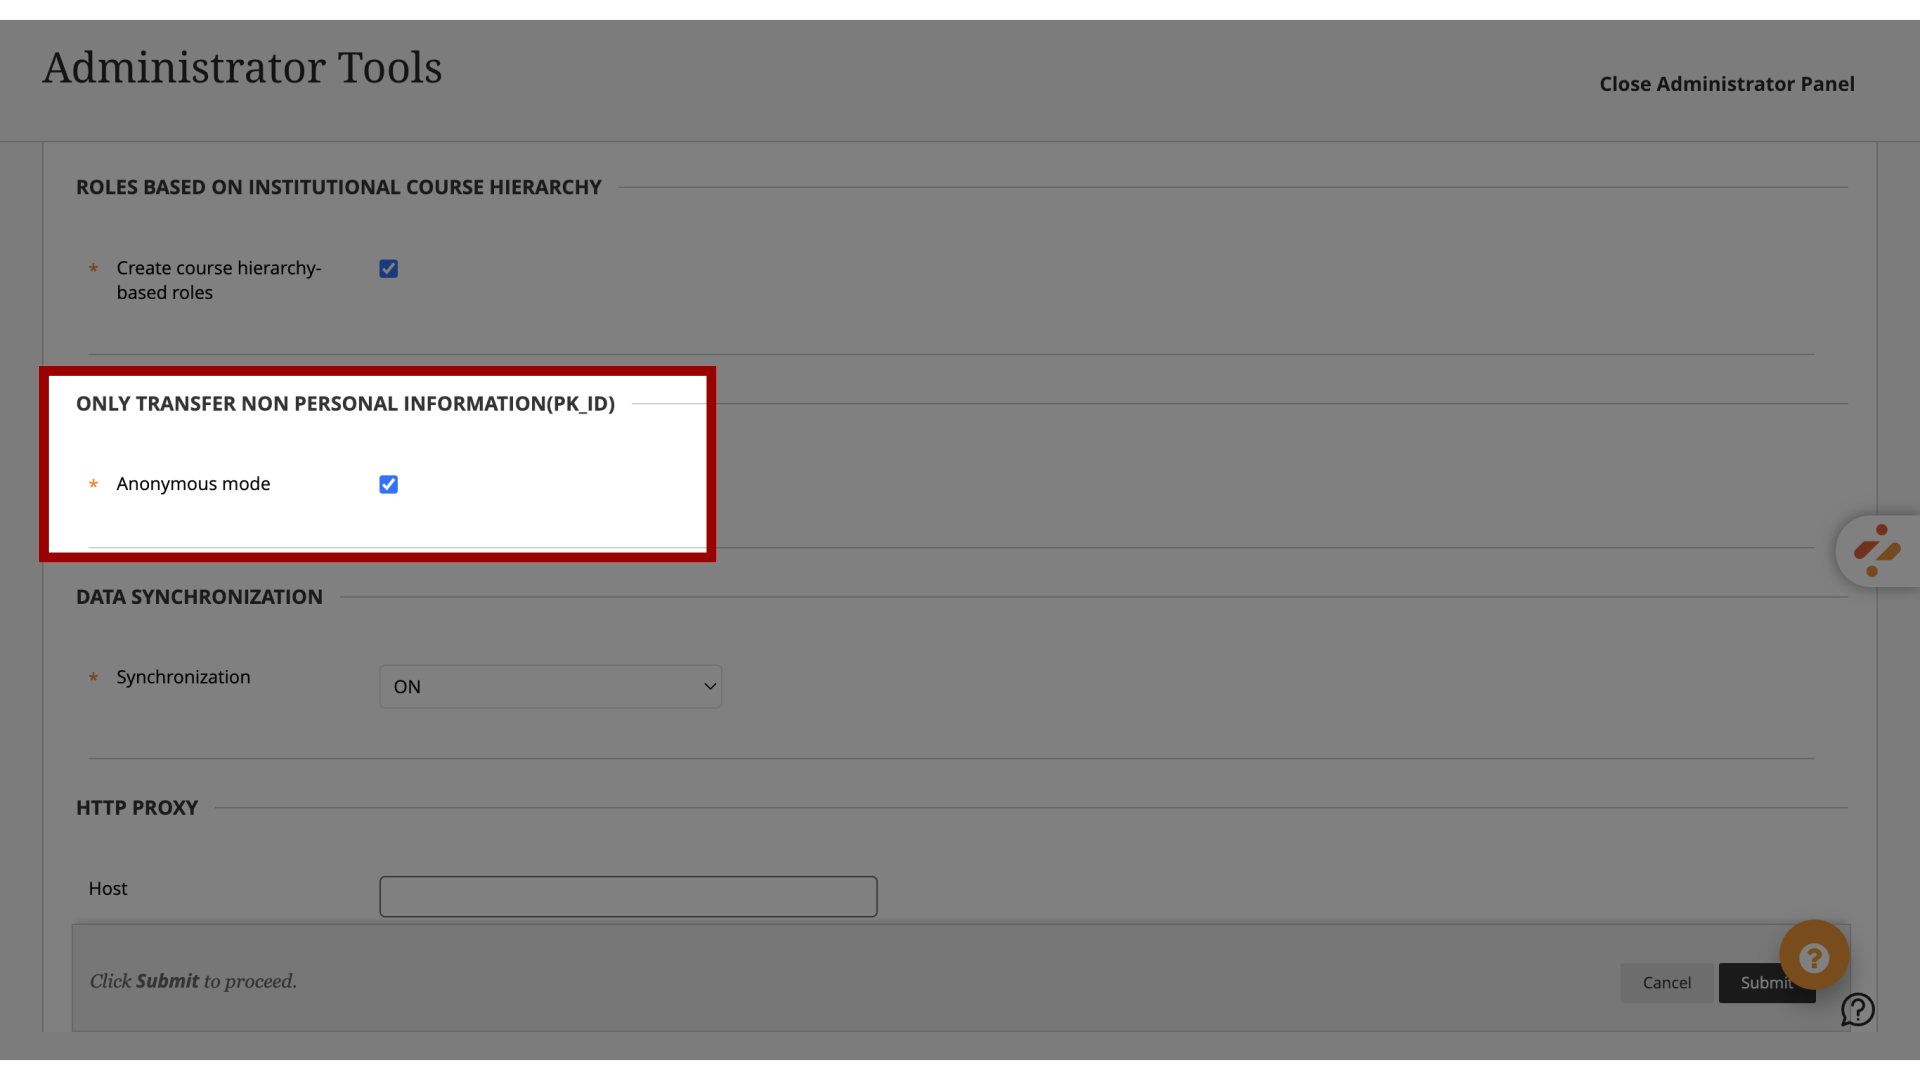
12. Enable Anonymous Mode
To collect user activity data anonymously, turn on Anonymous mode. This will ensure that only the user’s PK1_ID is transferred to the Impact server.
13. Enable Synchronization
Turn Synchronization ON if you wish to enable Course Activity Reports.