How do I install the Impact integration in the Blackboard Learn Ultra Experience?
You can configure the Impact integration in the Blackboard Learn Ultra Experience. Please submit a ticket to [email protected] or through the Impact Support button on your Impact dashboard to obtain a unique application/client ID to configure the application
Note: Currently there is a two-part integration that requires the installation and configuration of the Impact Building Block.
How do I install the Impact integration in the Blackboard Learn Ultra Experience?
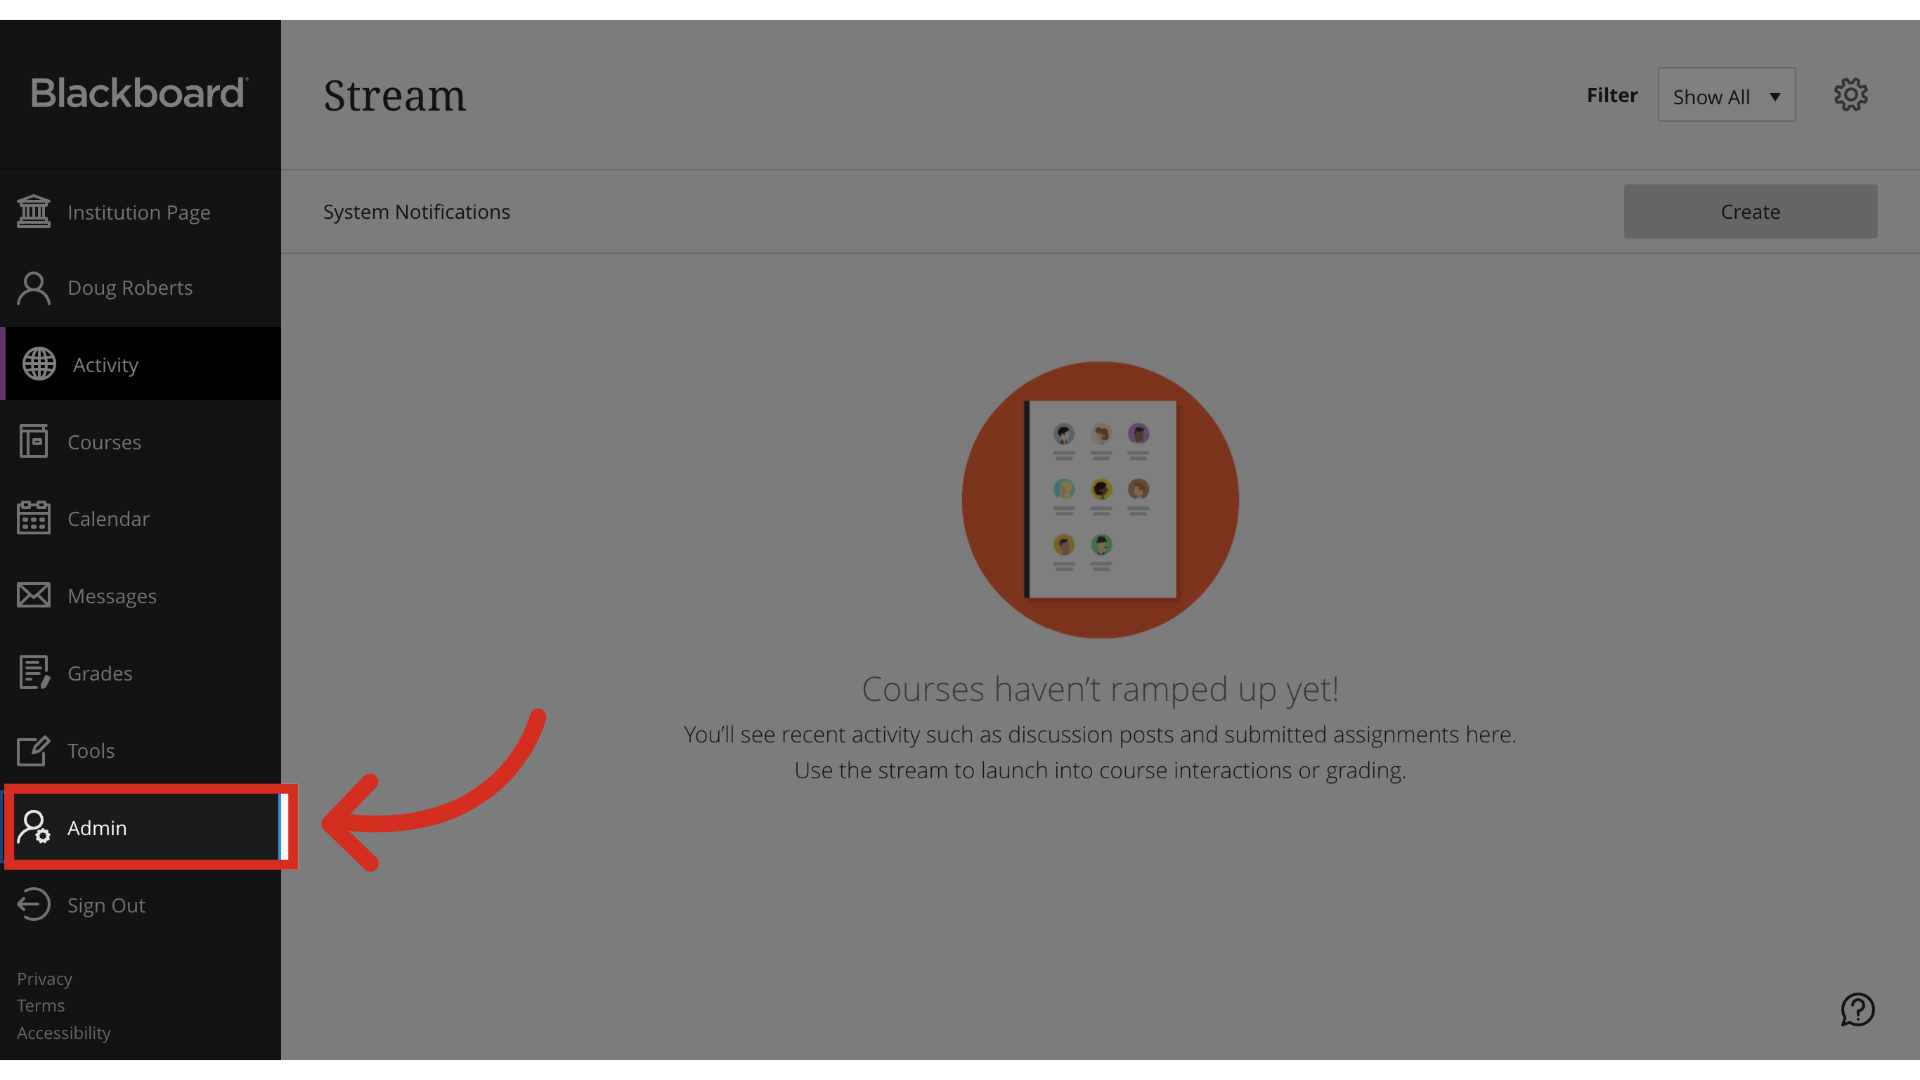
1. Open System Admin
In Blackboard Learn, click the System Admin link.
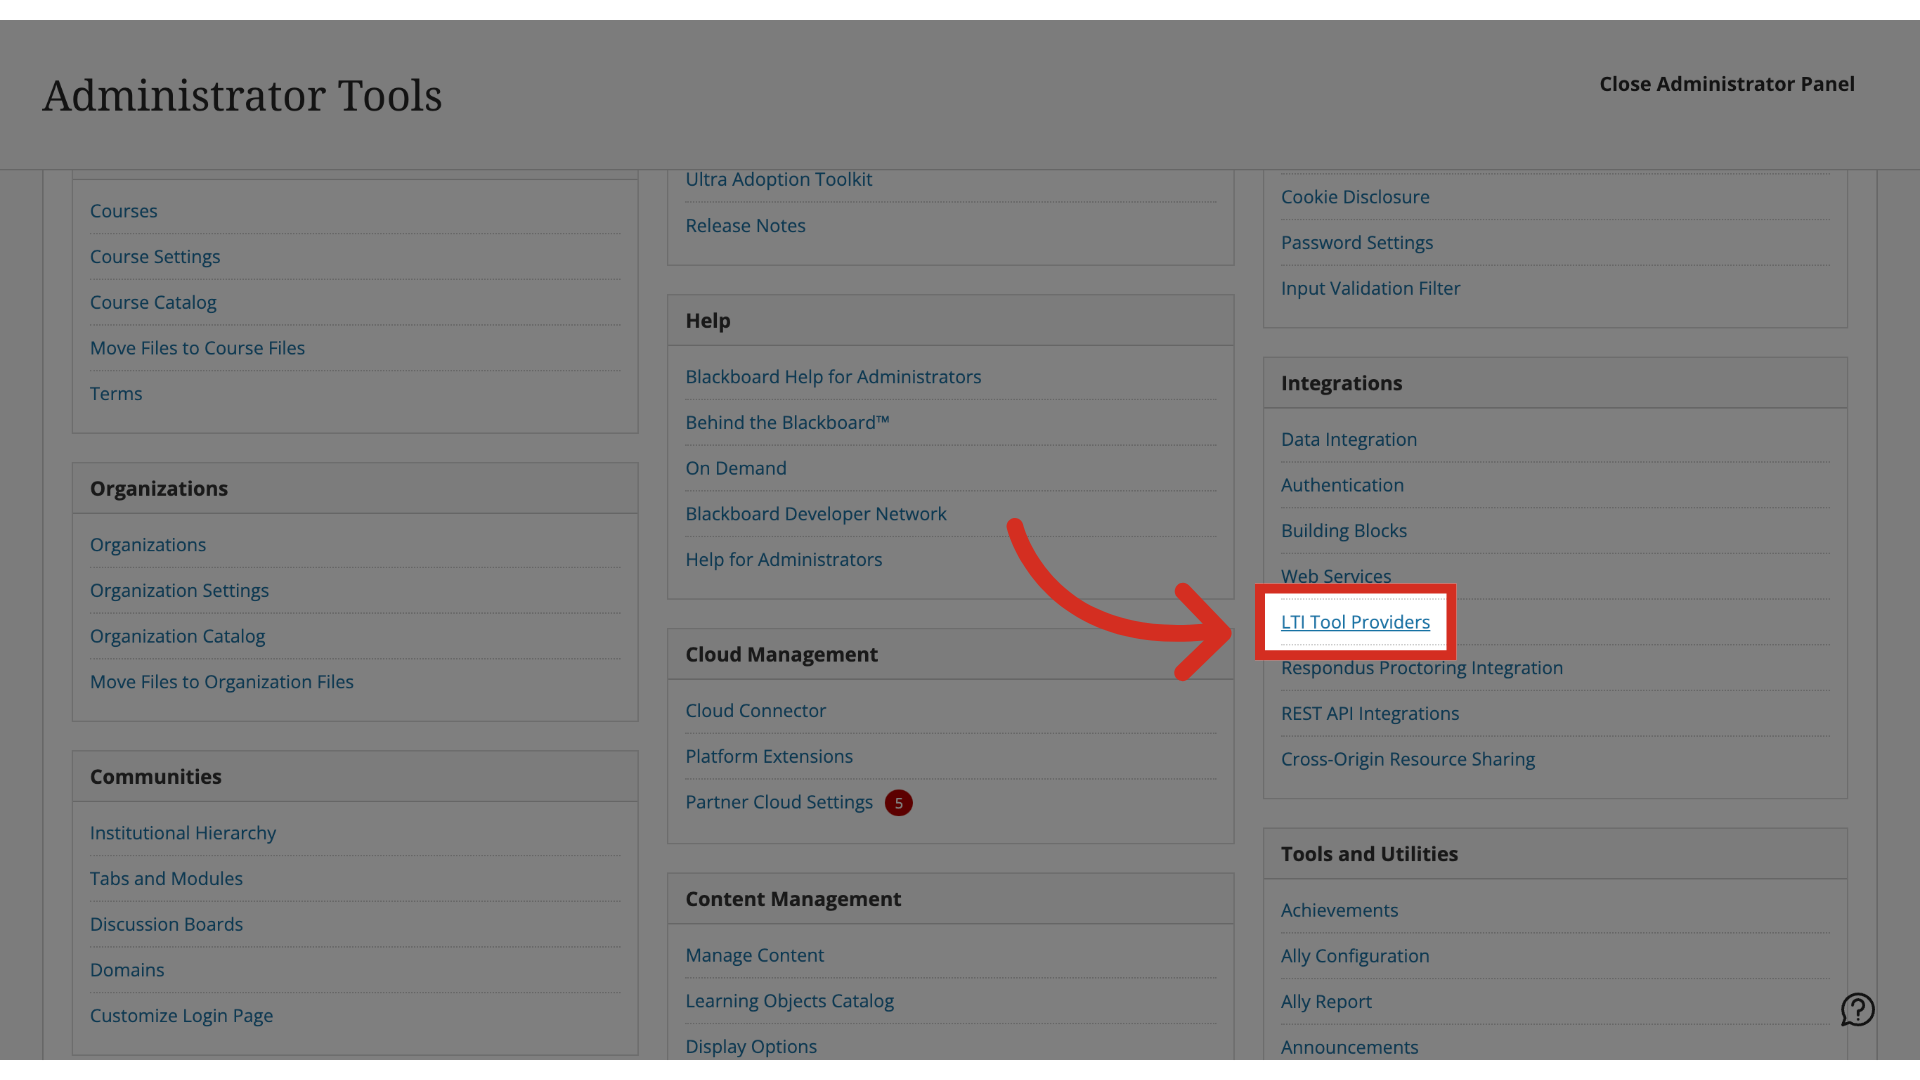
2. Open LTI Tool Providers
In the Integrations section, click the LTI Tool Providers link.
3. Open Register LTI 1.3/Advantage Tool
Click the Register LTI 1.3/Advantage Tool link.

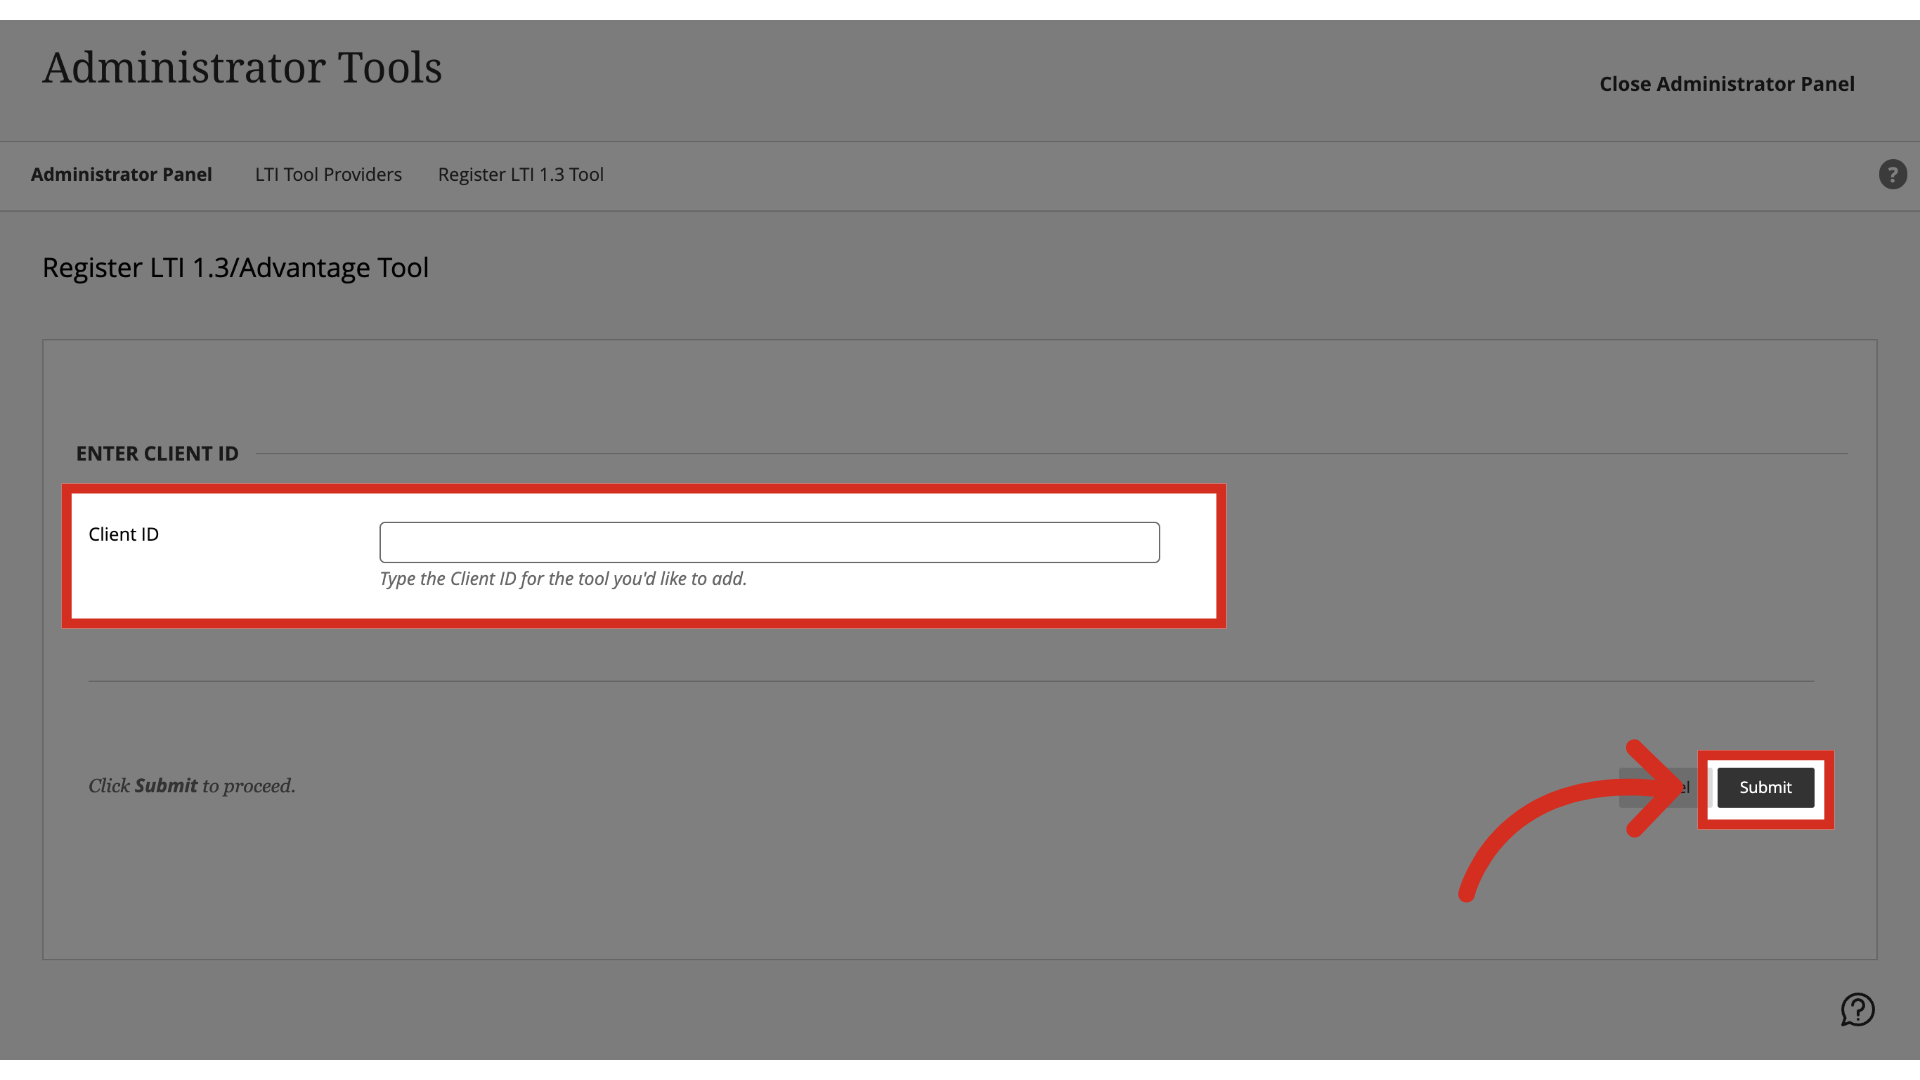
4. Register LTI 1.3/Advantage Tool
In the Client ID field, enter your Application/Client ID. Click the Submit button.
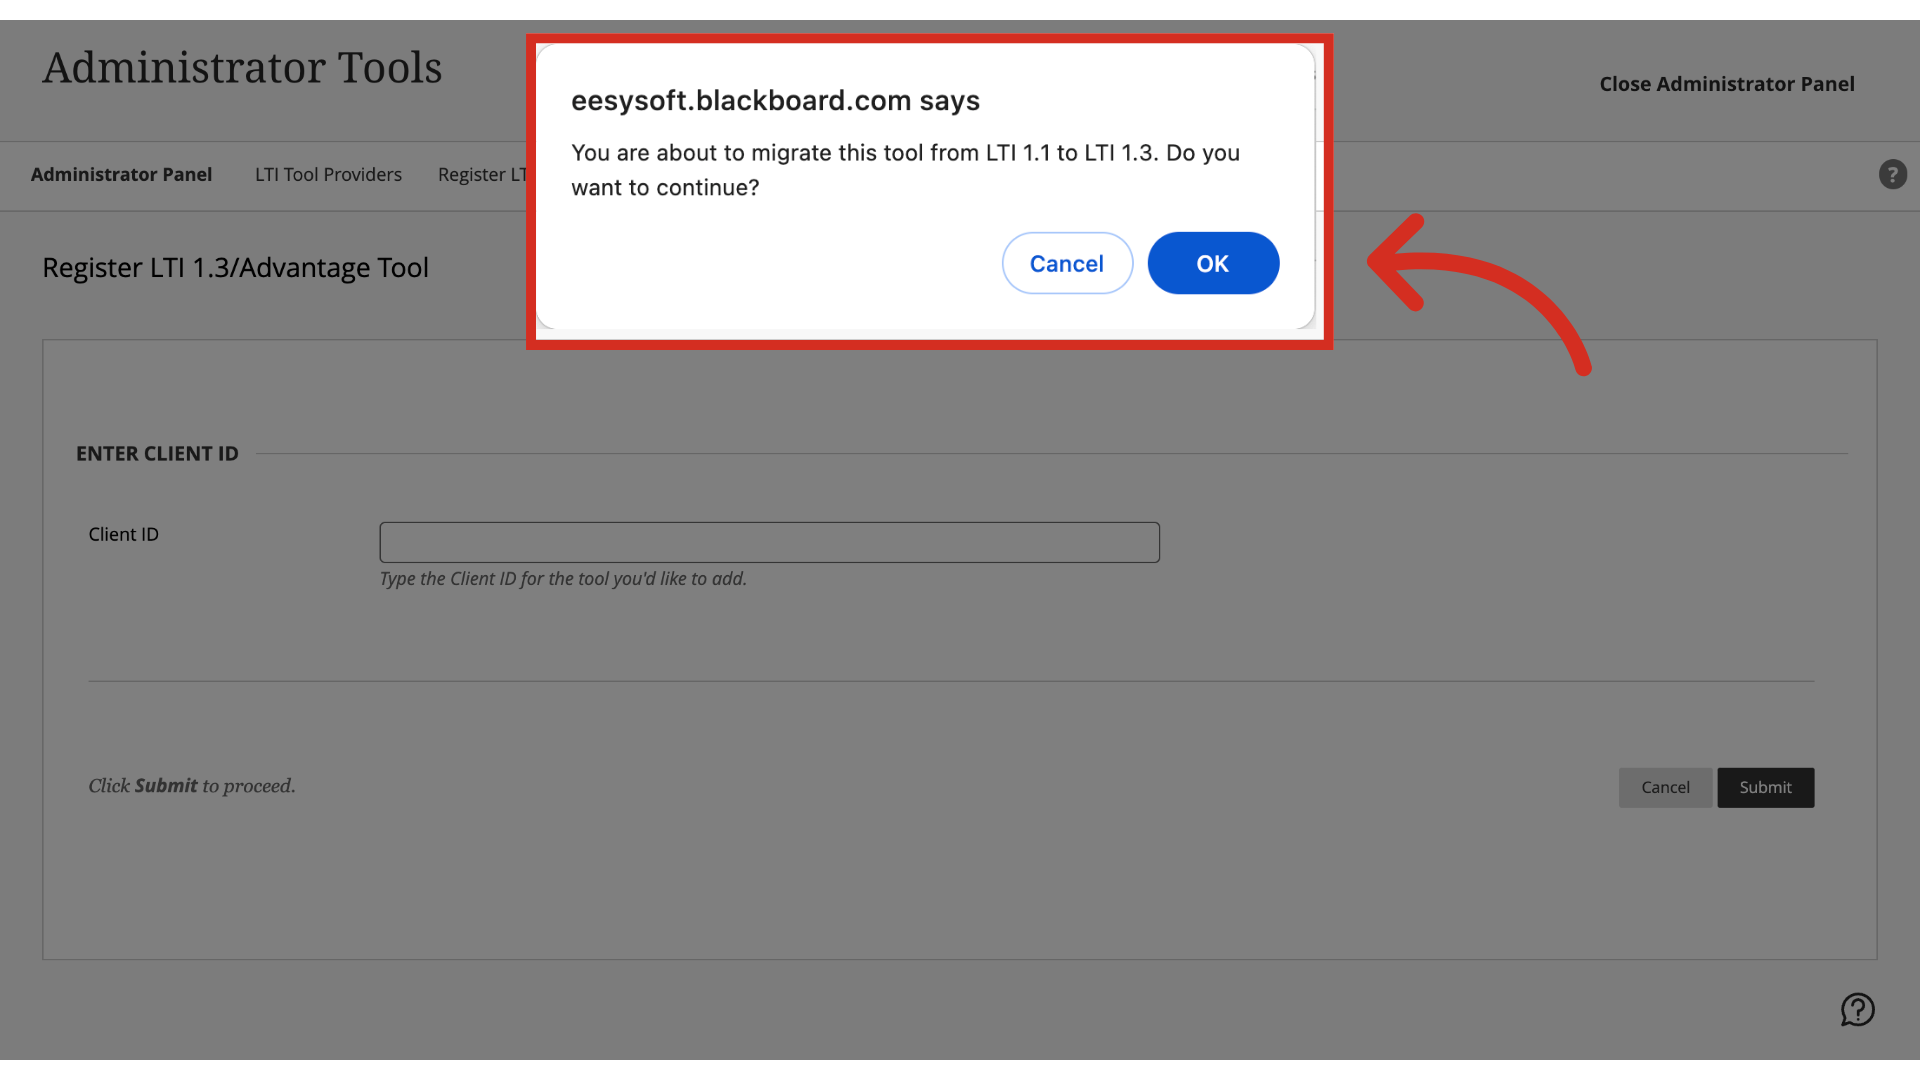
5. Confirm Migration
An alert will display if the 1.1 LTI is already installed. Click OK to continue.
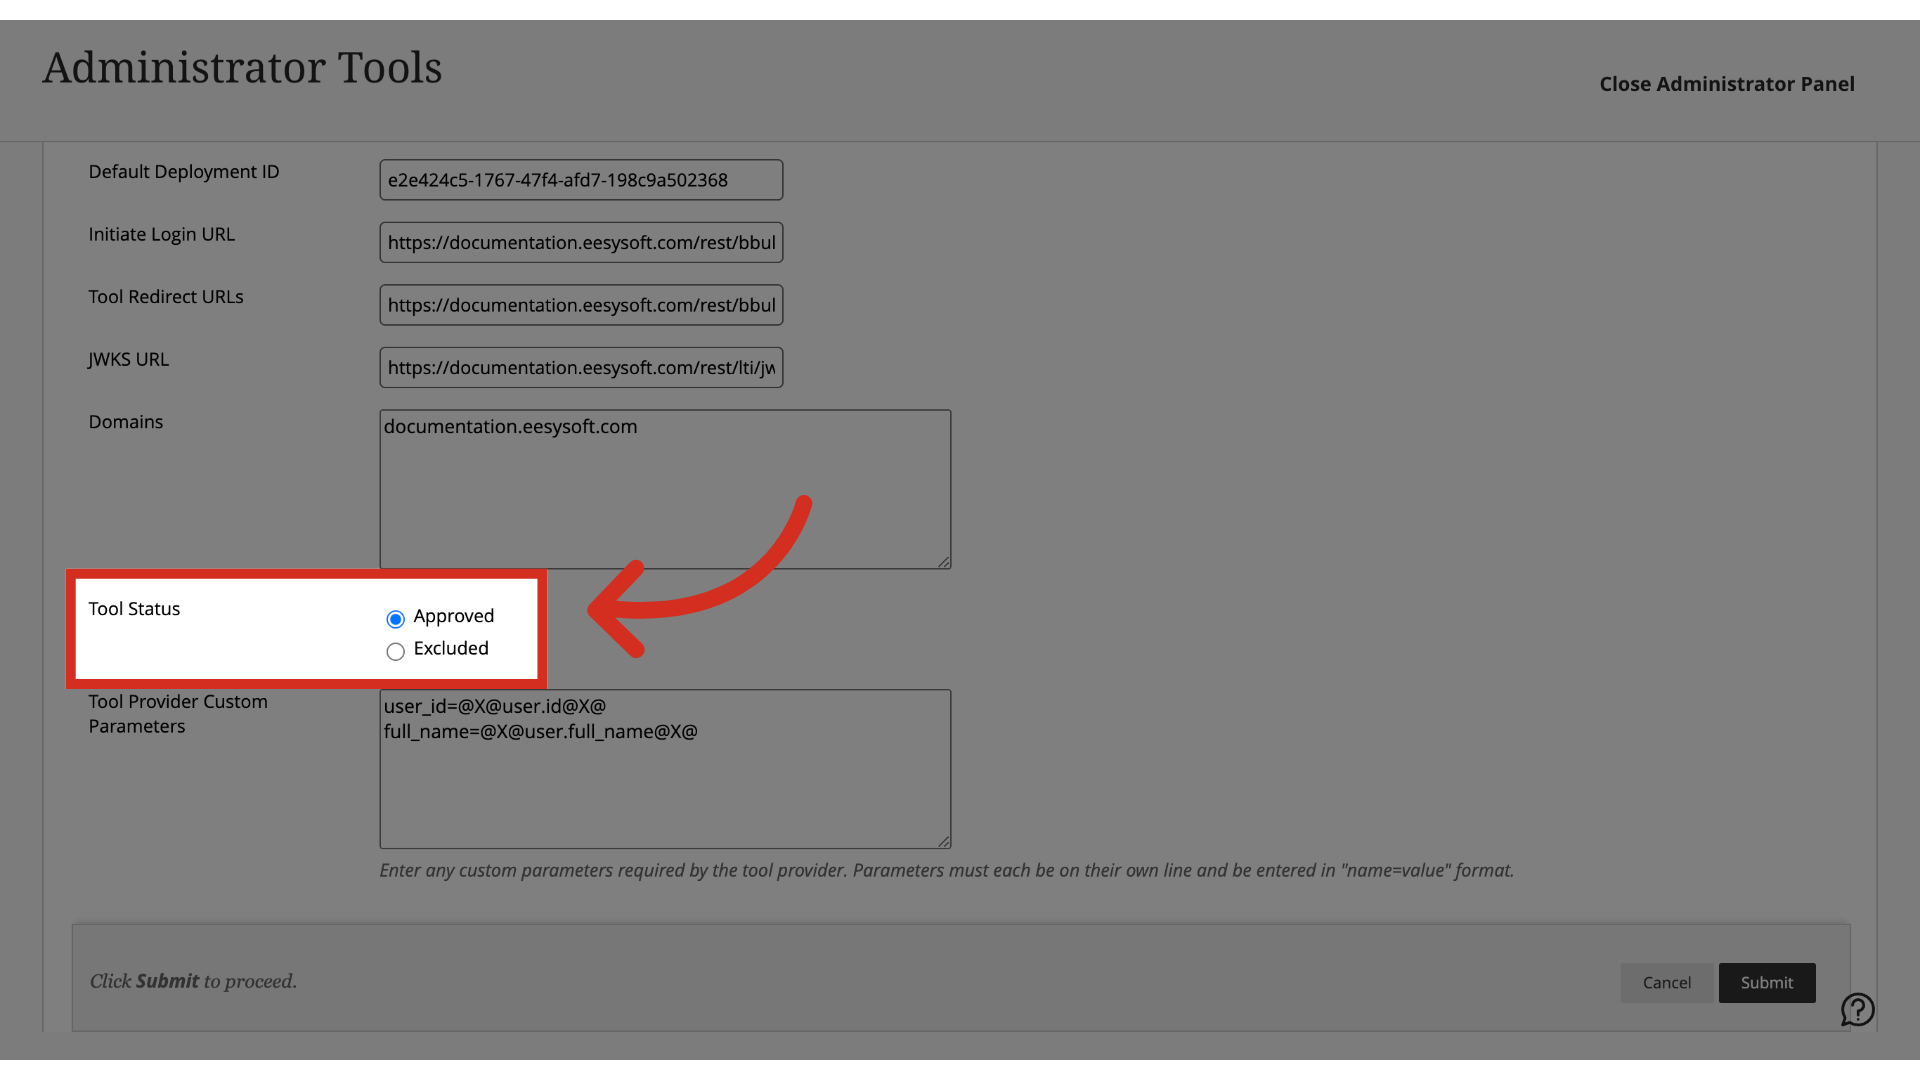
6. Set Tool Status
Fields will auto-populate. Set Tool Status to Approved.
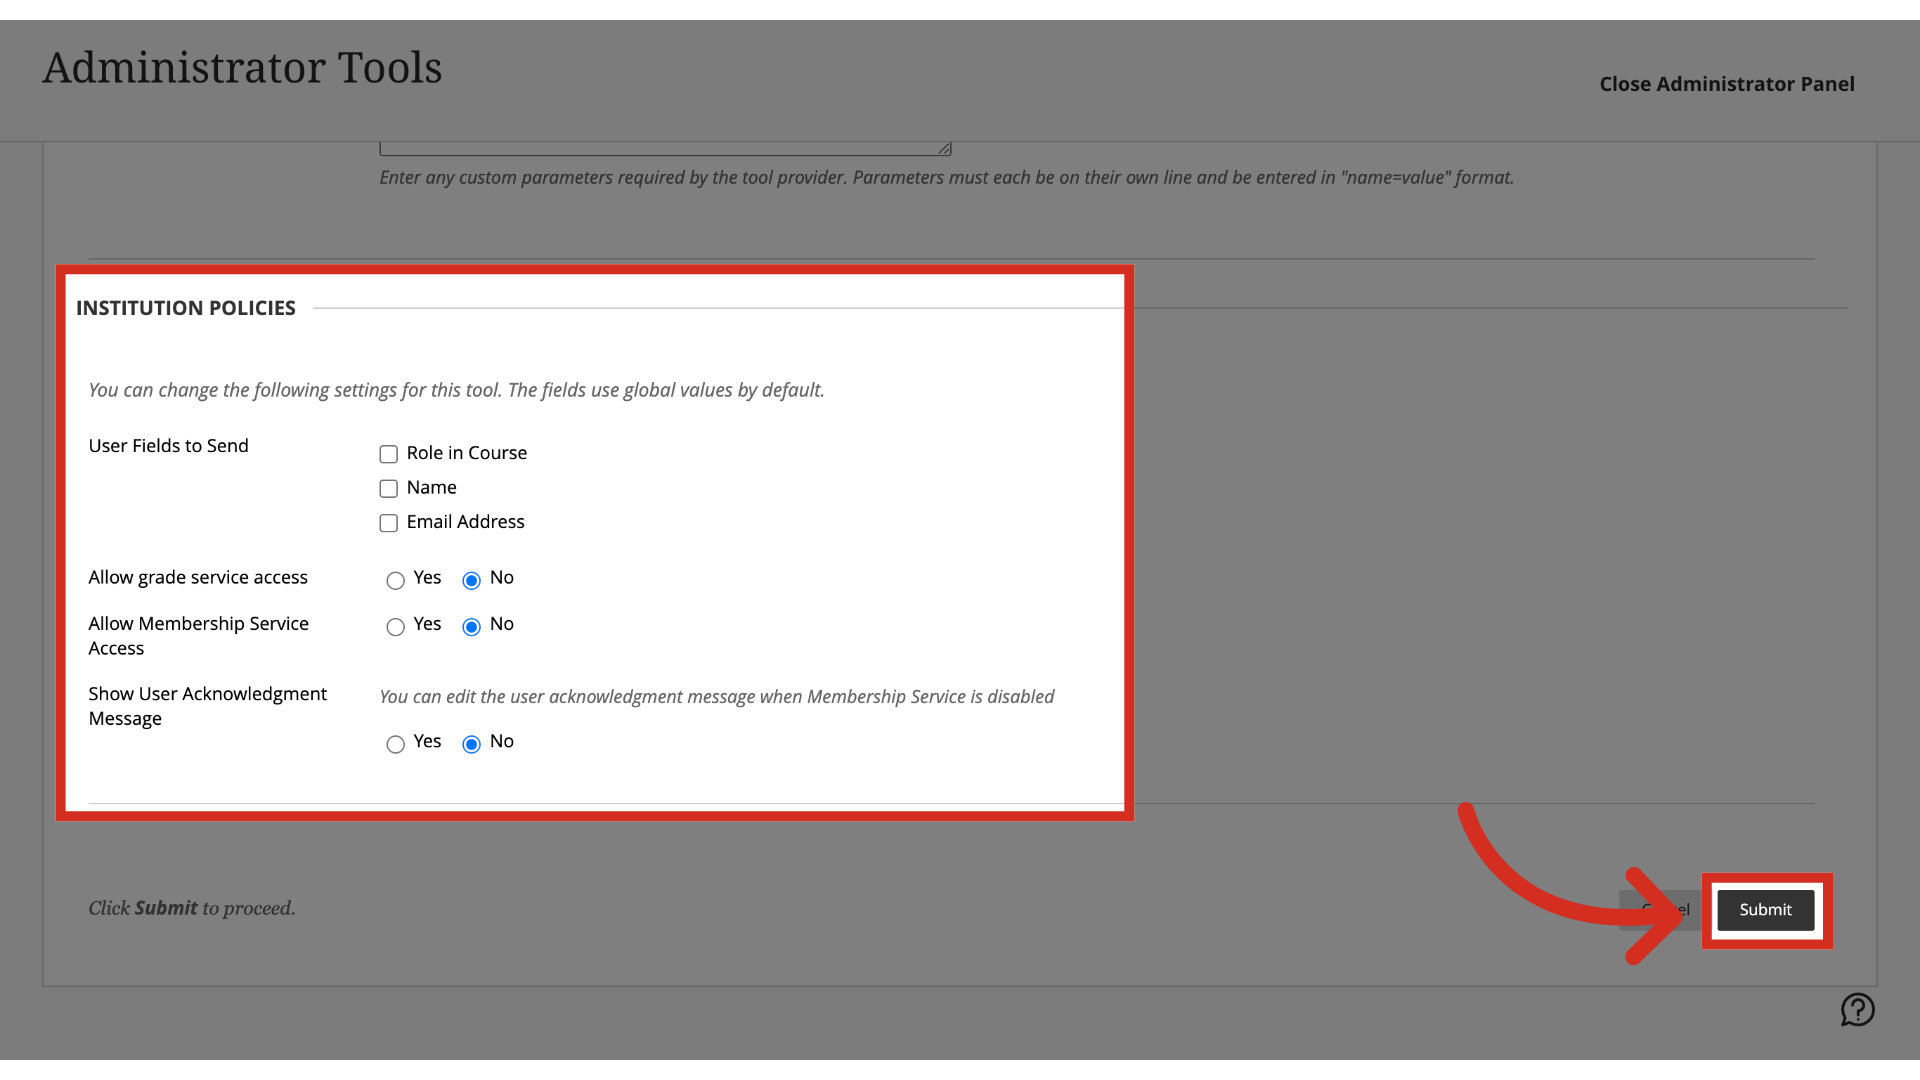
7. Set Institution Policies
Set your Institution Policies and then click the Submit button.
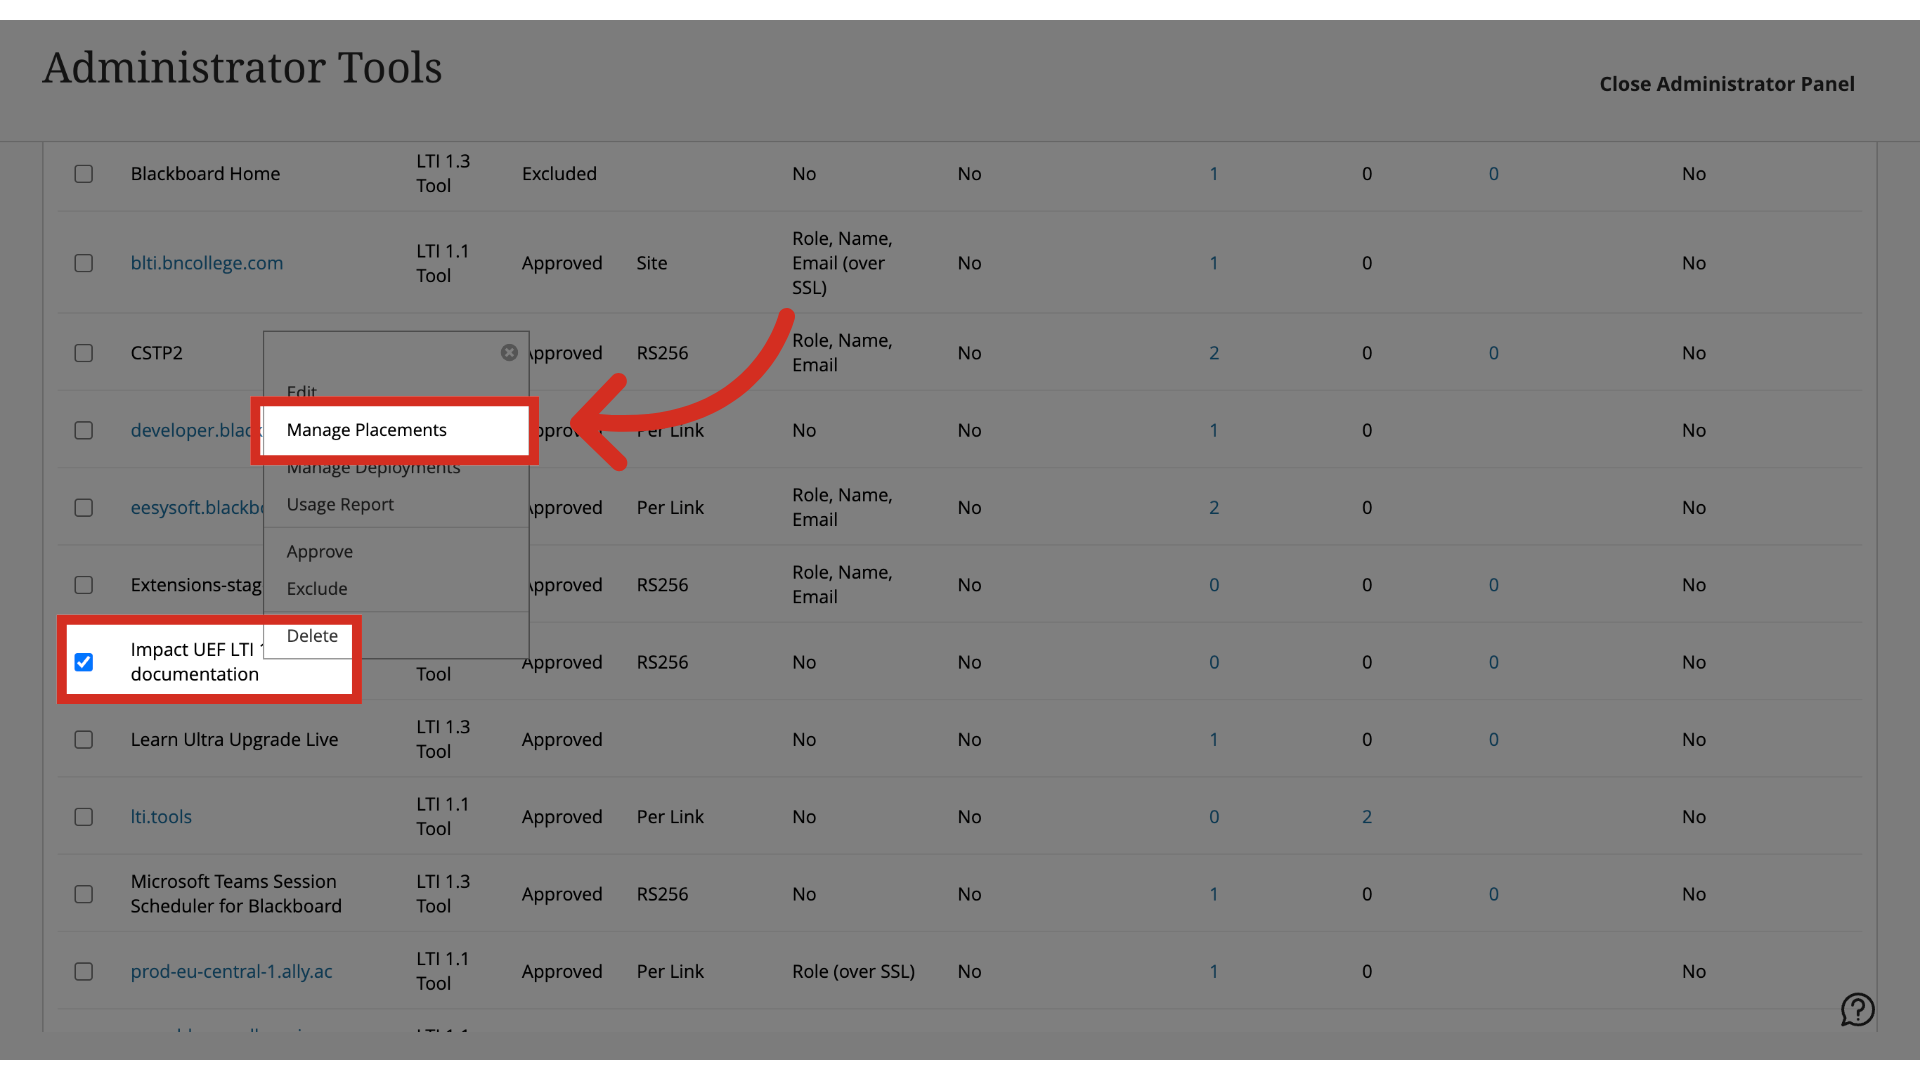
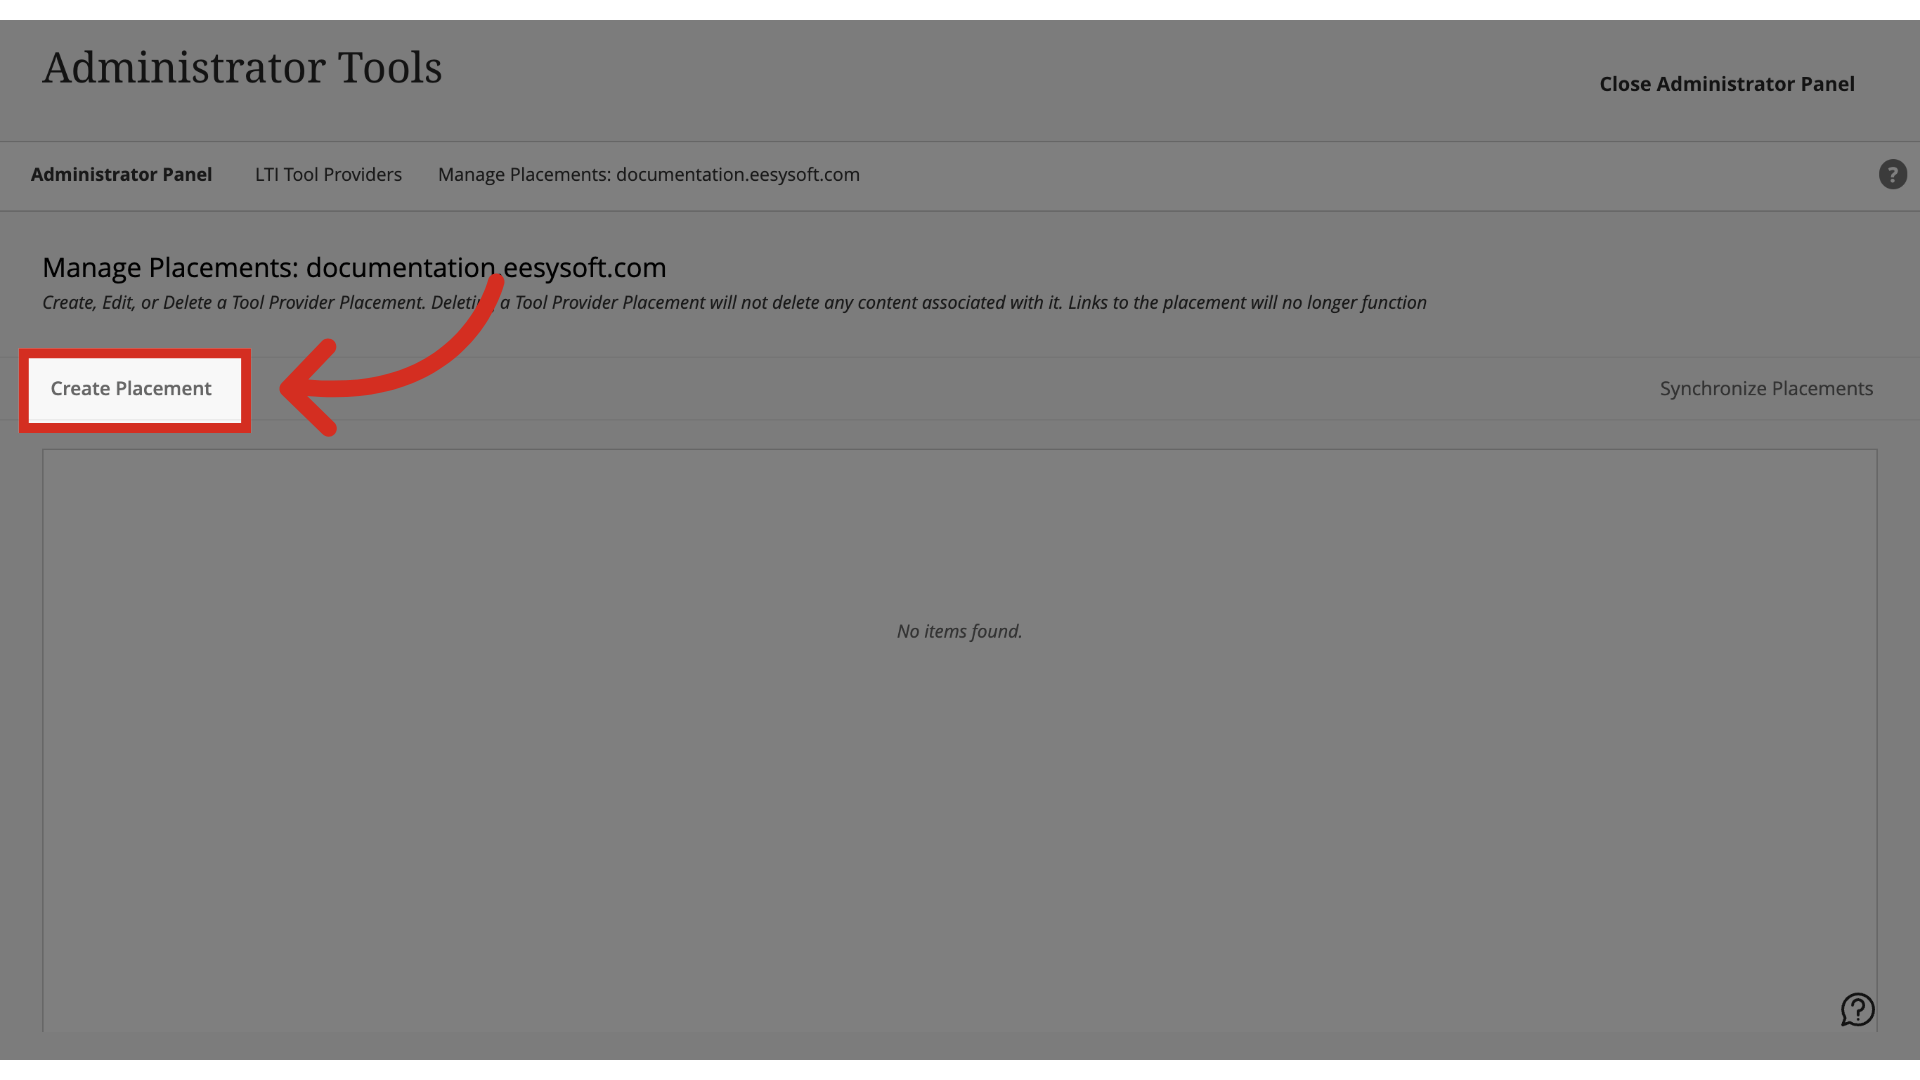
8. Manage Placements
Locate the existing LTI Provider added for Impact UEF version 1.3 and click the Manage Placements link.
9. Create Placement
Click the Create Placement link.
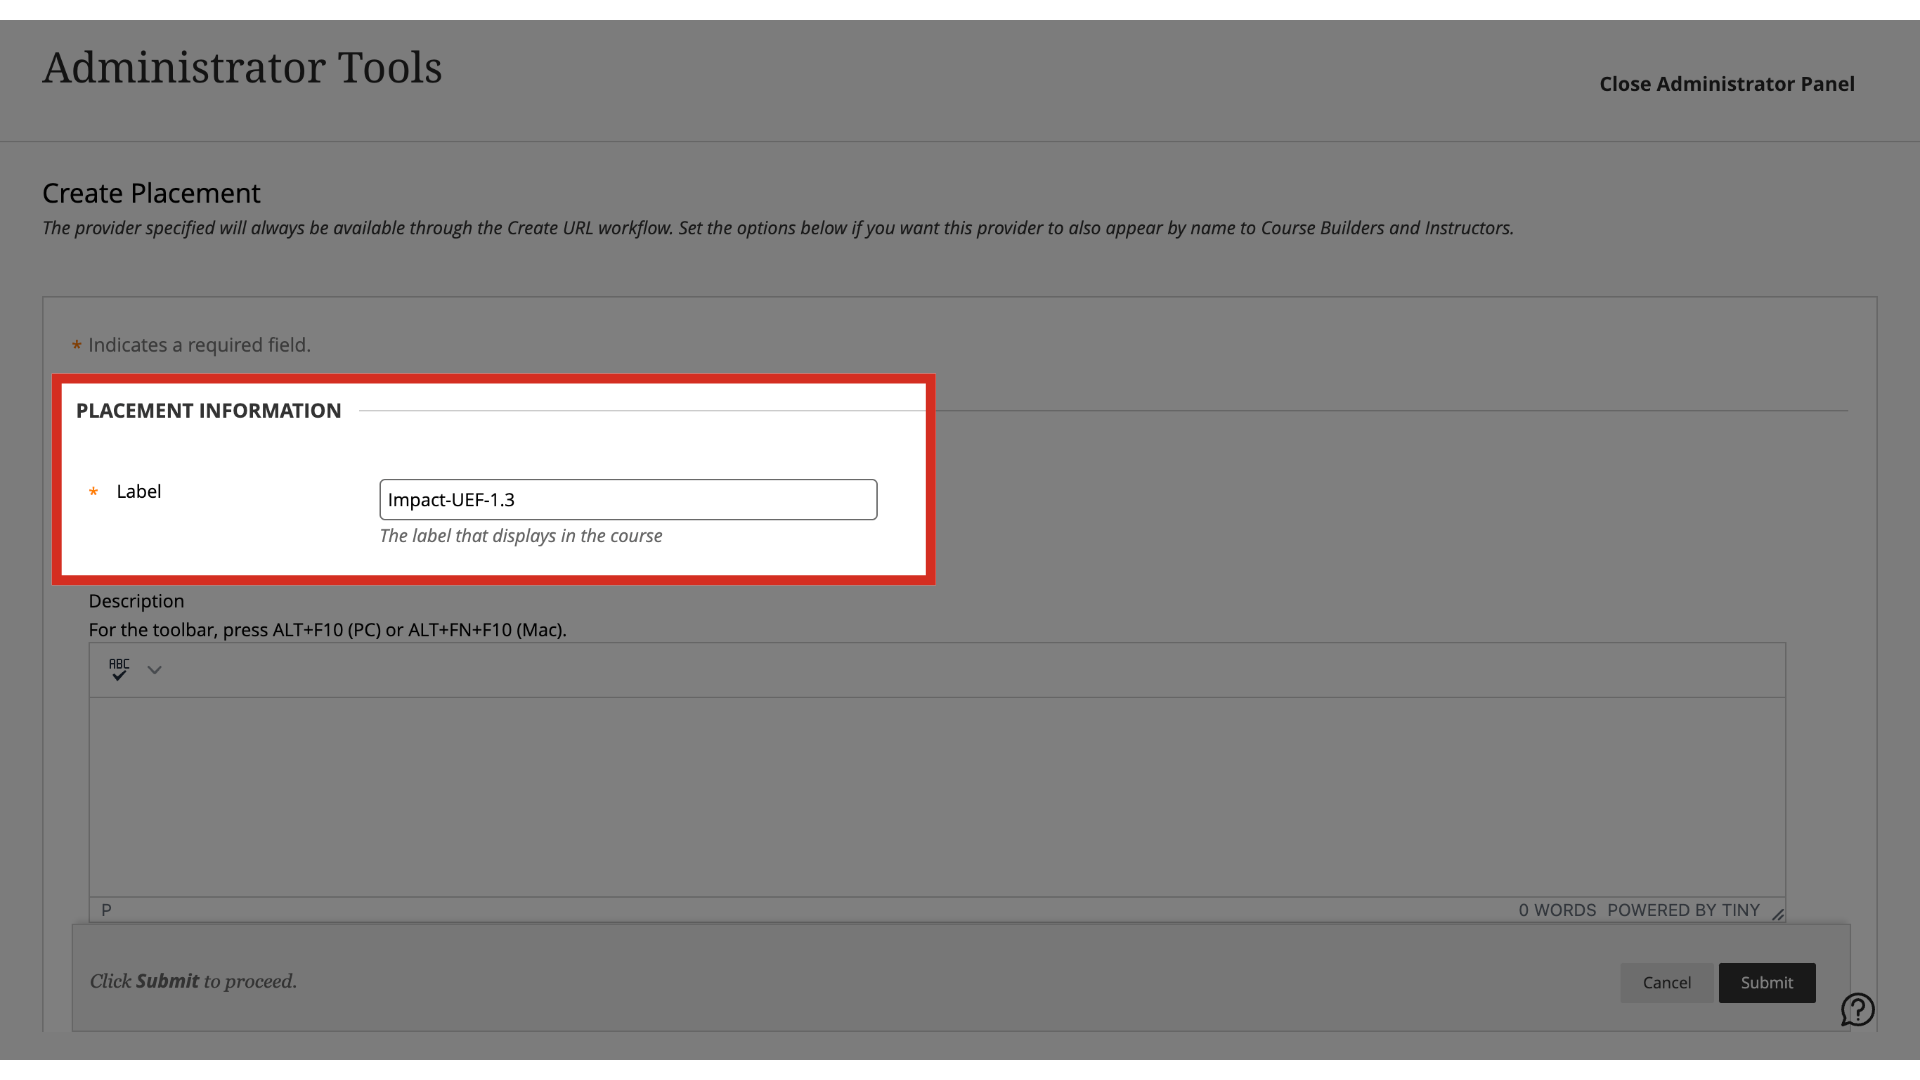
10. Enter Placement Label
For the placement you'll need the following information: Label as Impact-UEF-1.3.
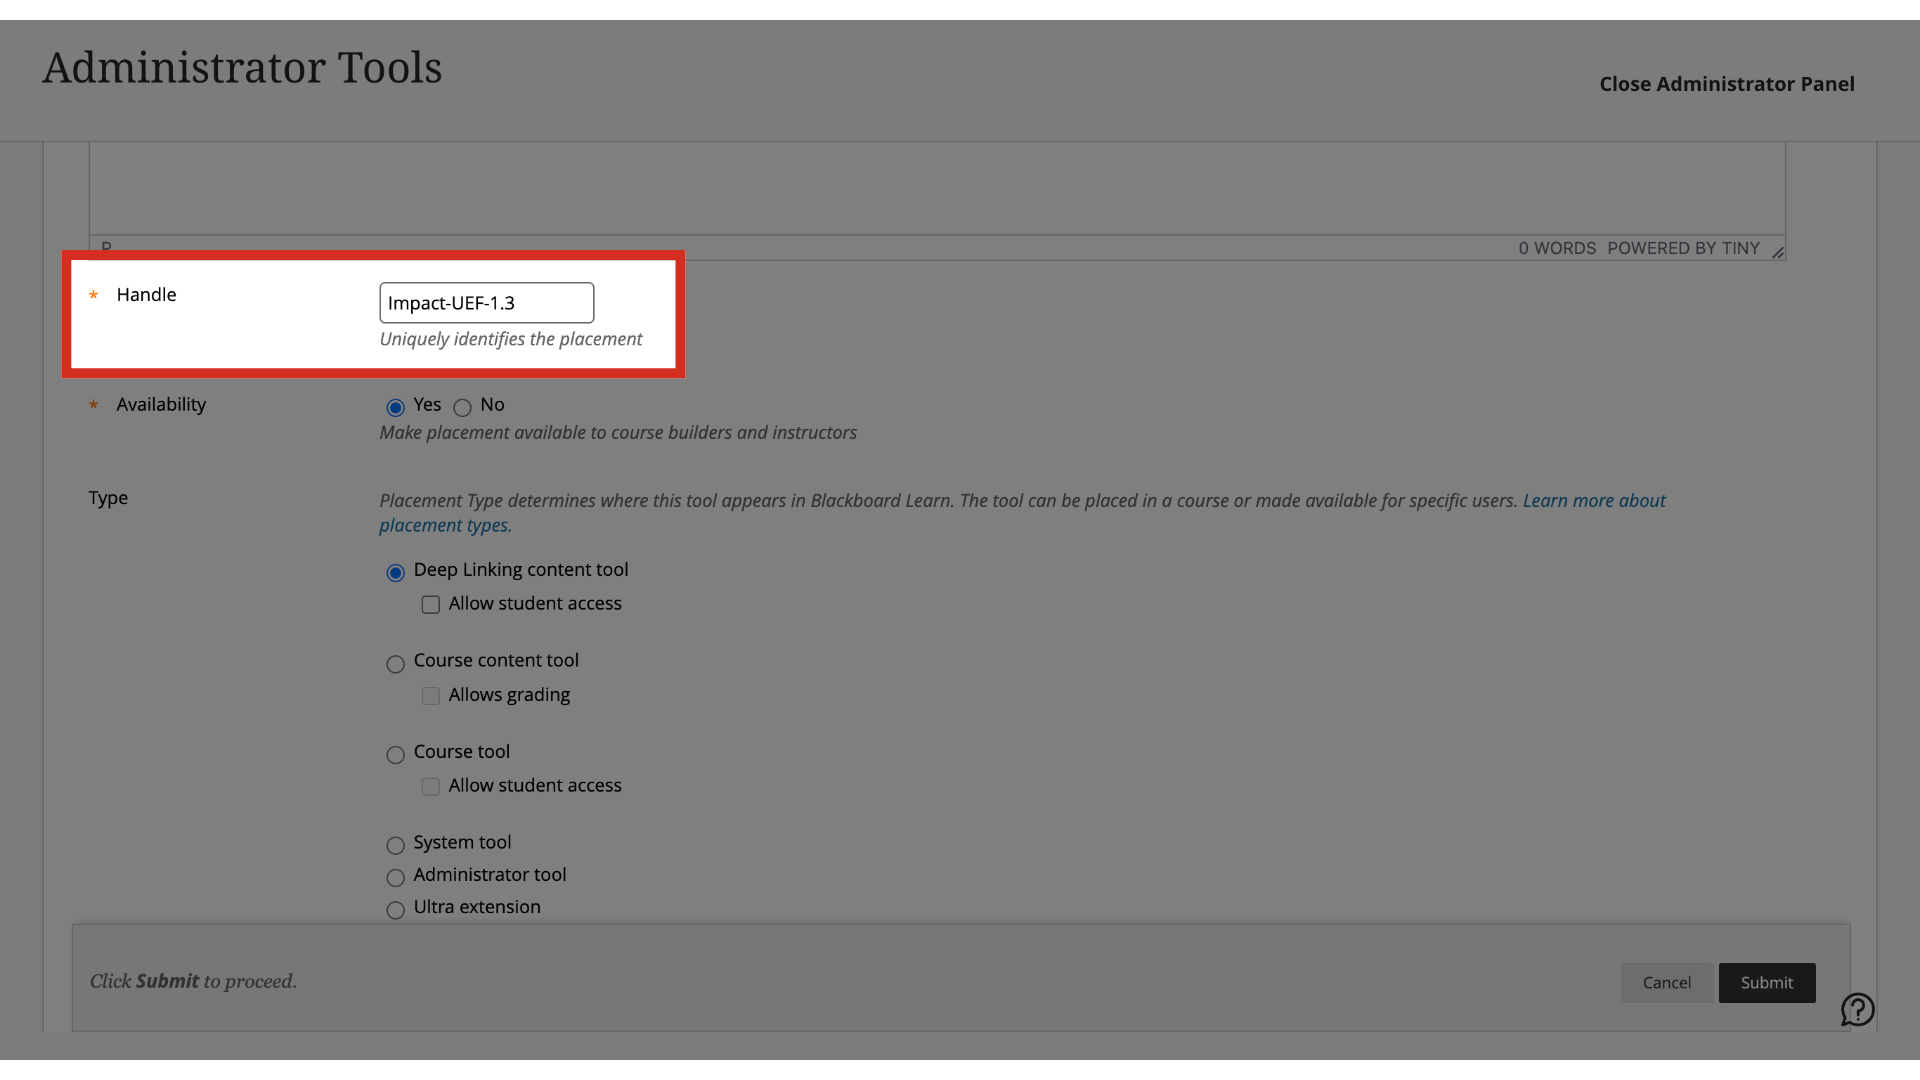
11. Enter Placement Handle
Label the Handle as Impact-UEF-1.3.
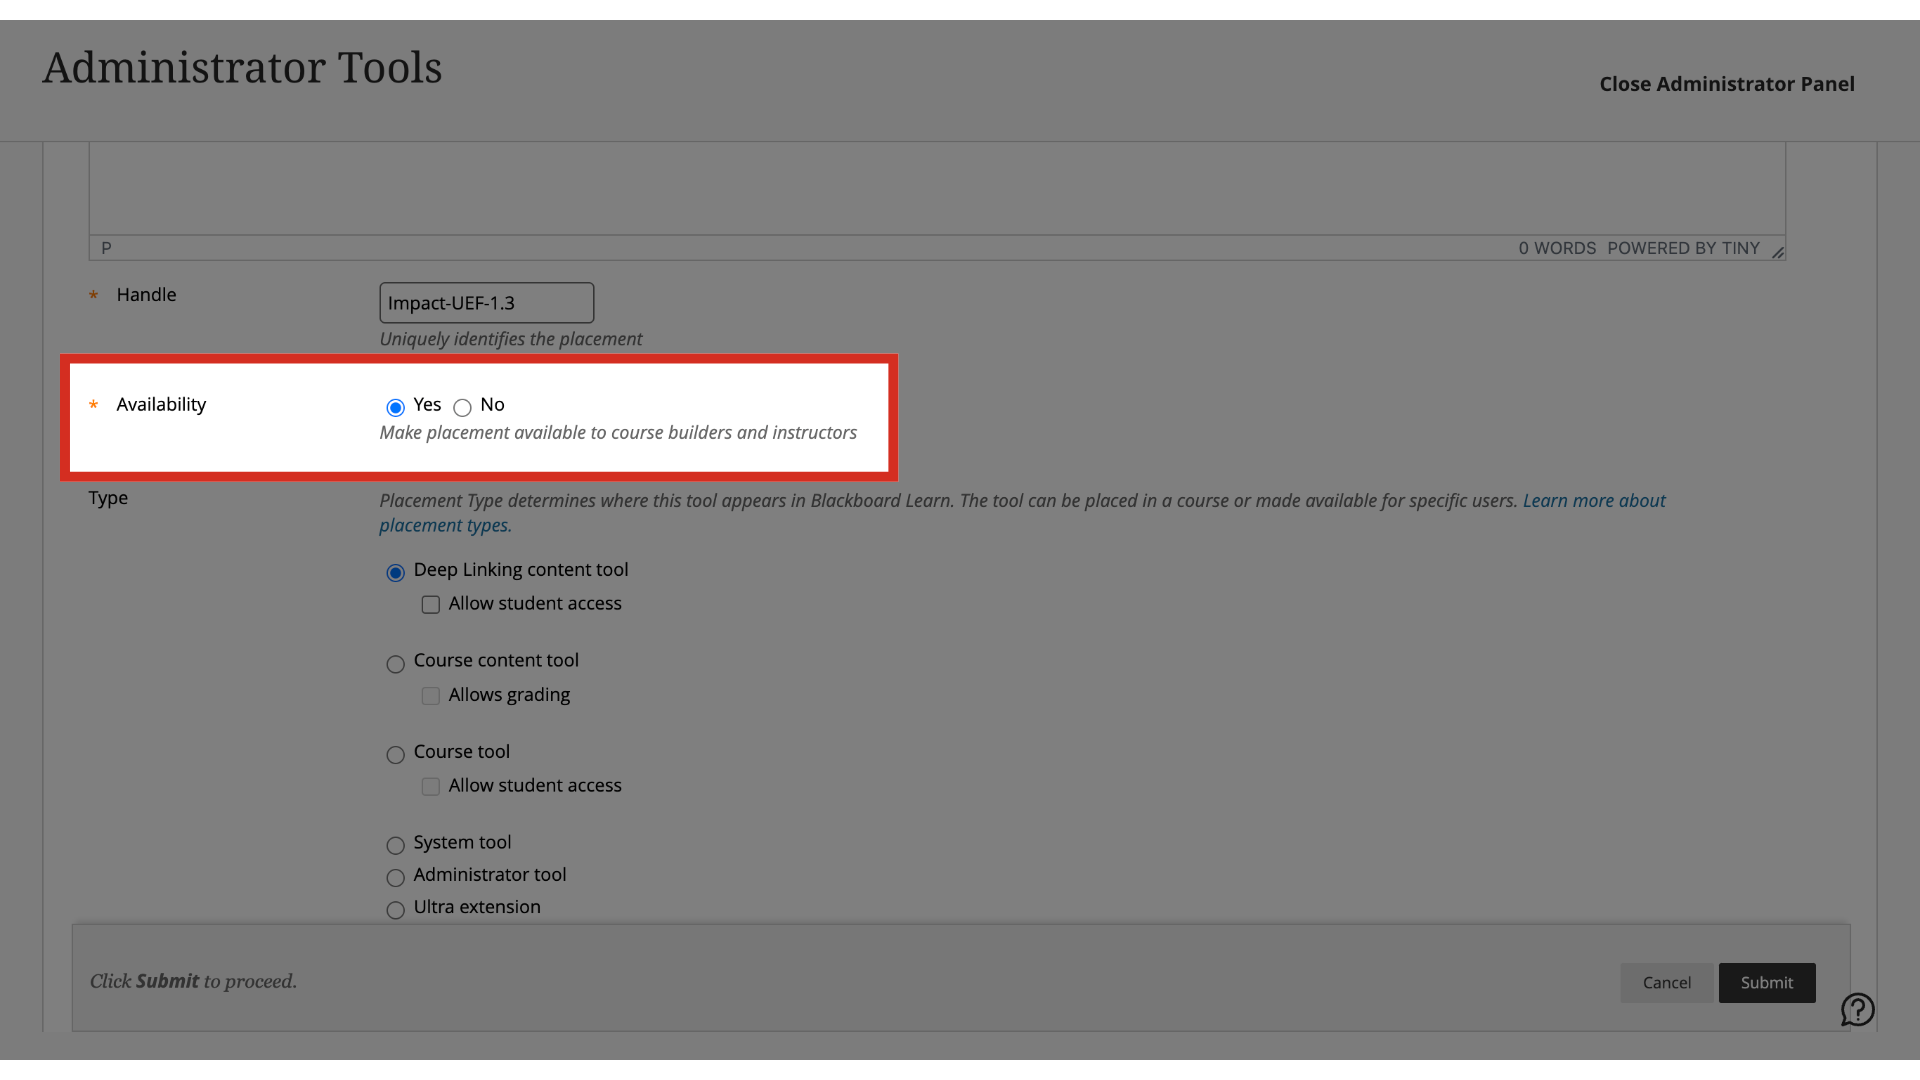
12. Enter Placement Availability
Set the Availability as Yes.
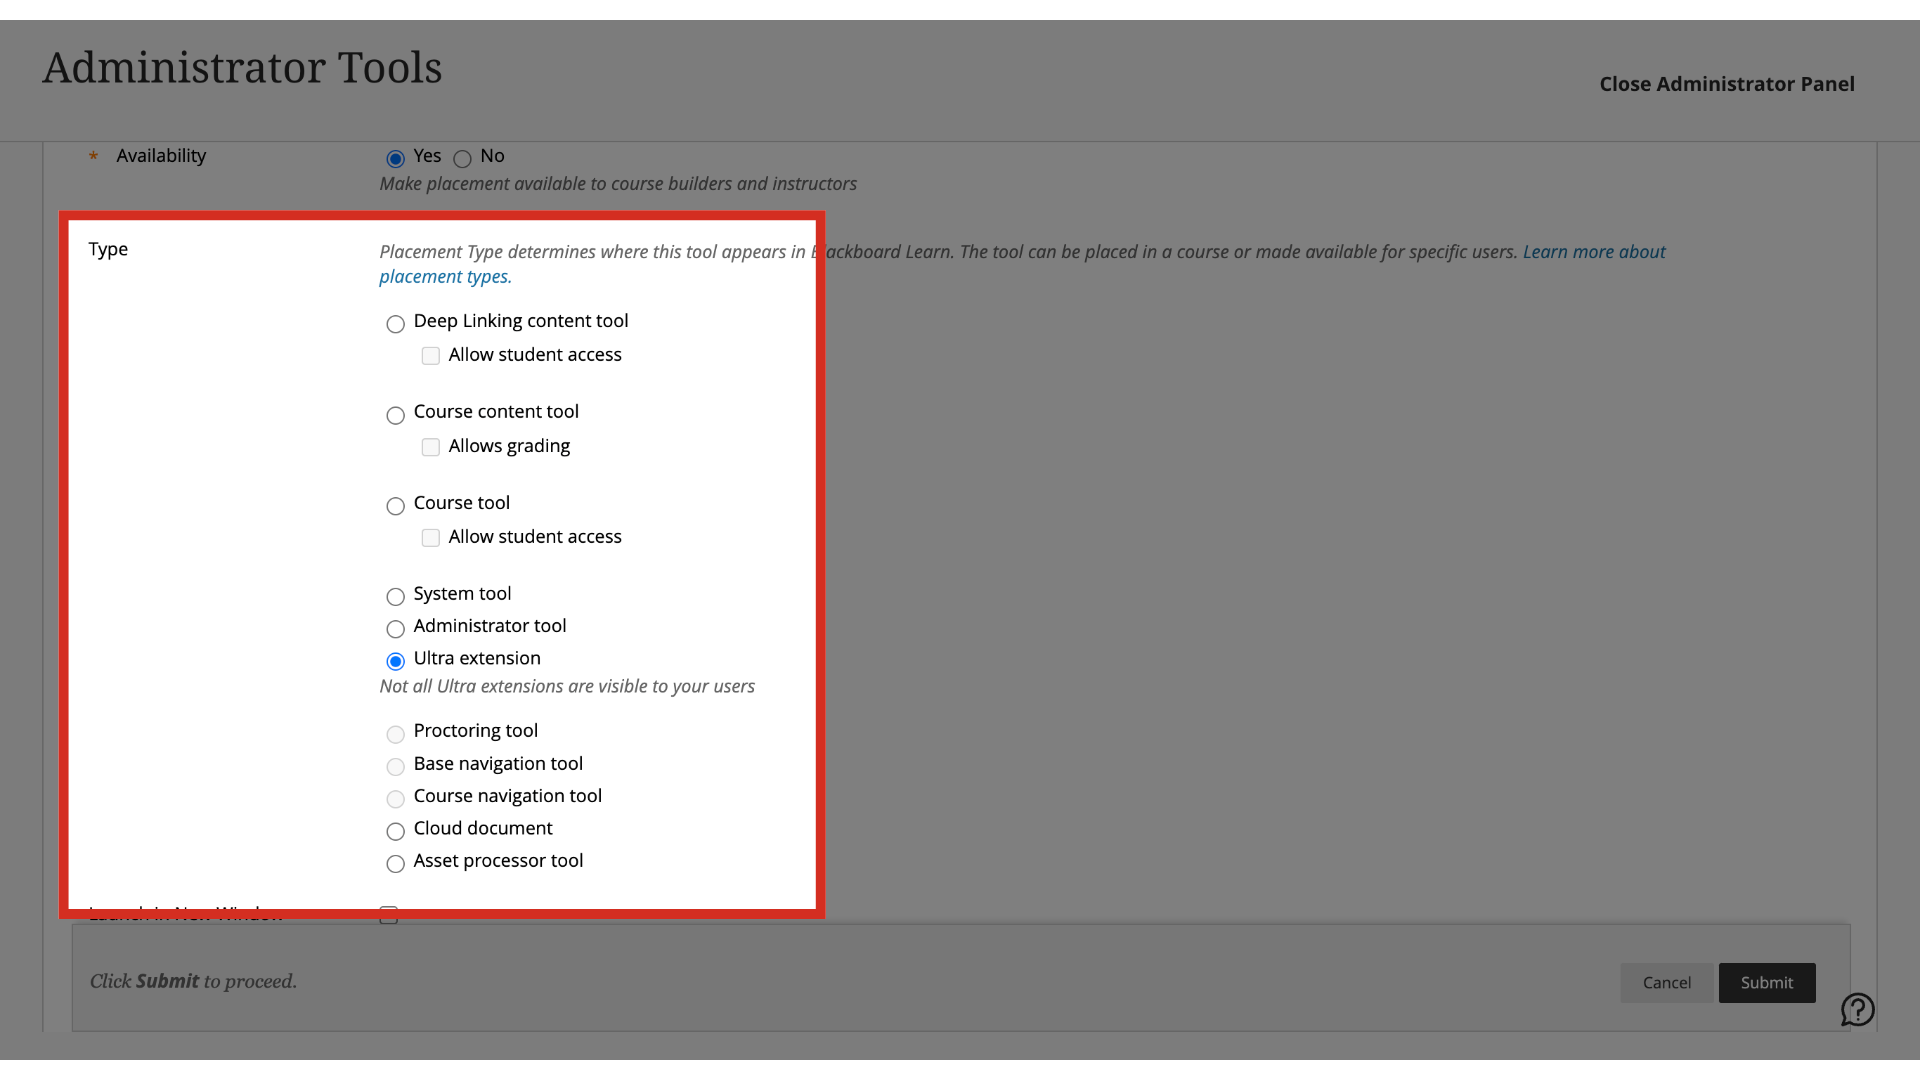
13. Enter Placement Type
Set the Type as Ultra Extension.
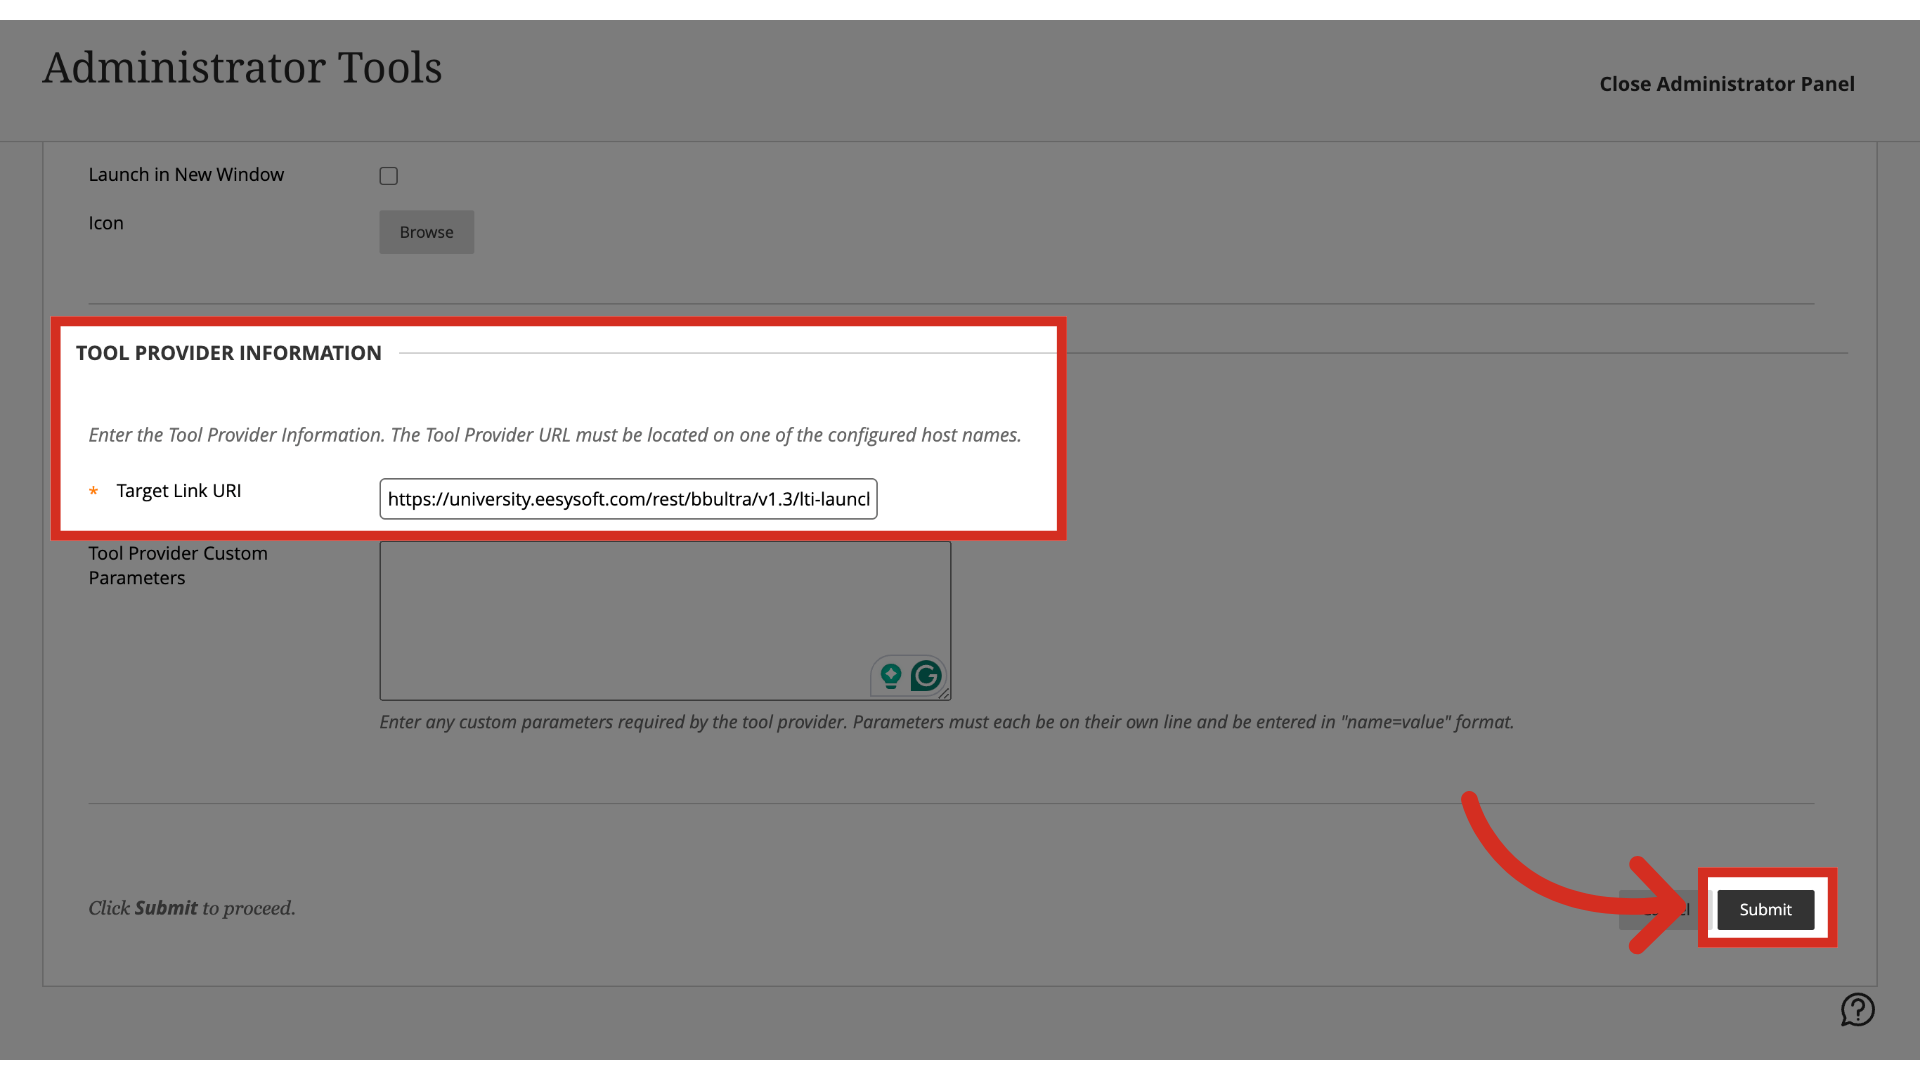
14. Enter Tool Provider Information
Set the Target Link URI as your specific provider's URL. Then click the Submit button.
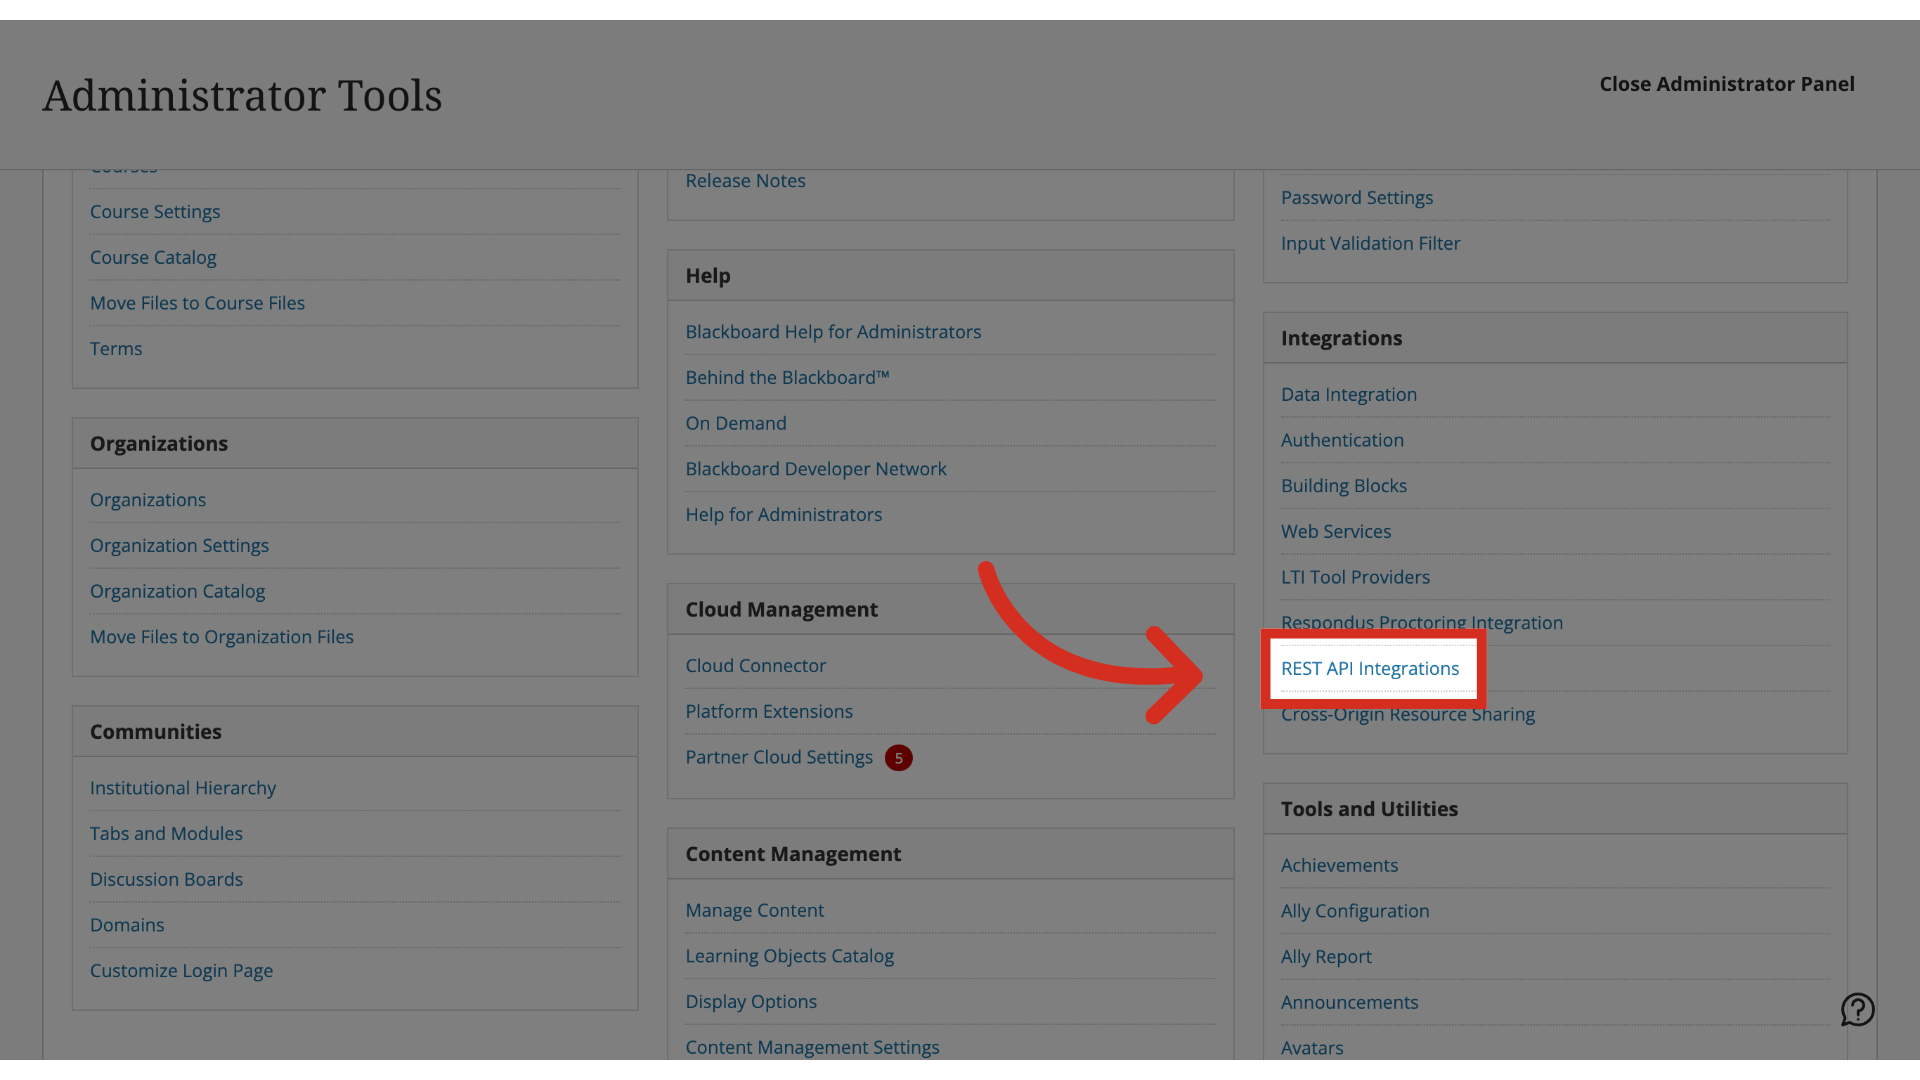
15. Open Rest API Integrations
In the Admin Panel, in the Integrations section, click the REST API Integrations link.
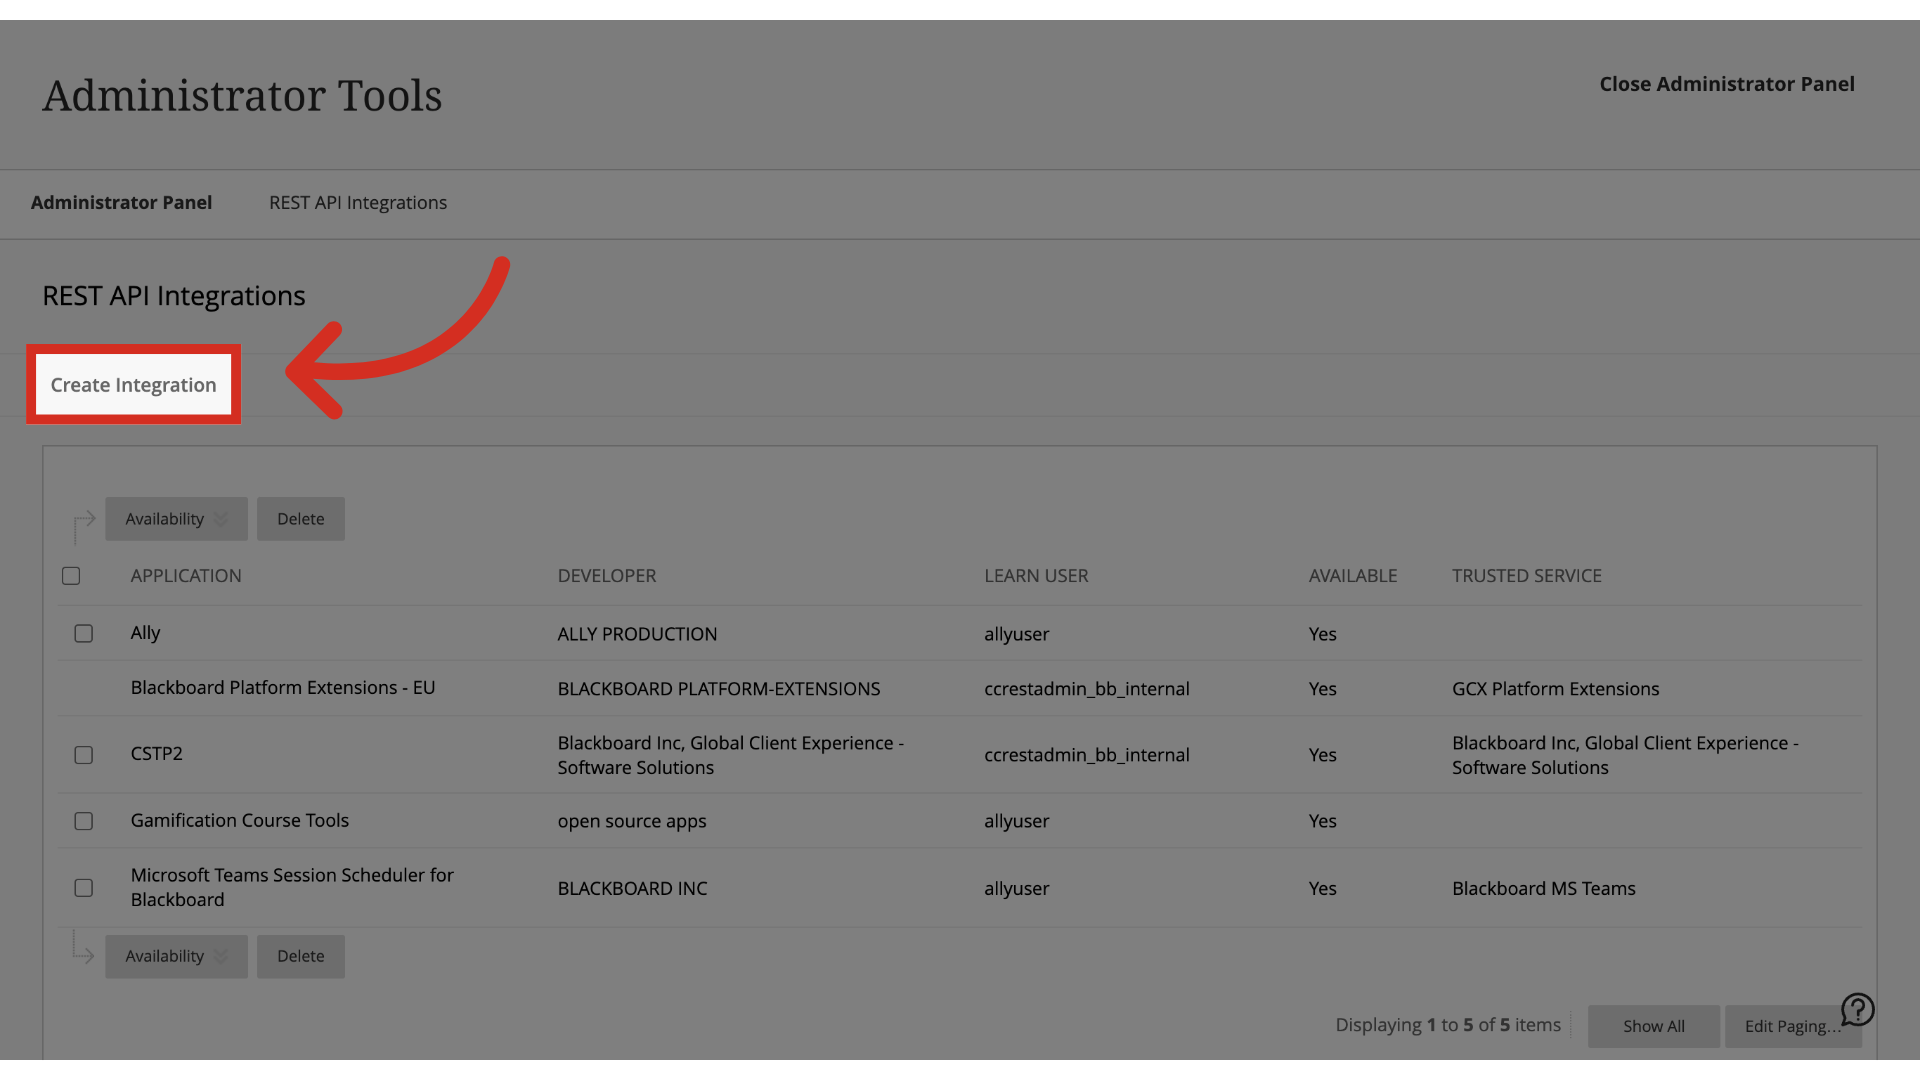
16. Create Integration
Click the Create Integration link. If upgrading, locate the existing Impact UEF 1.1 placement, and click Make Unavailable.
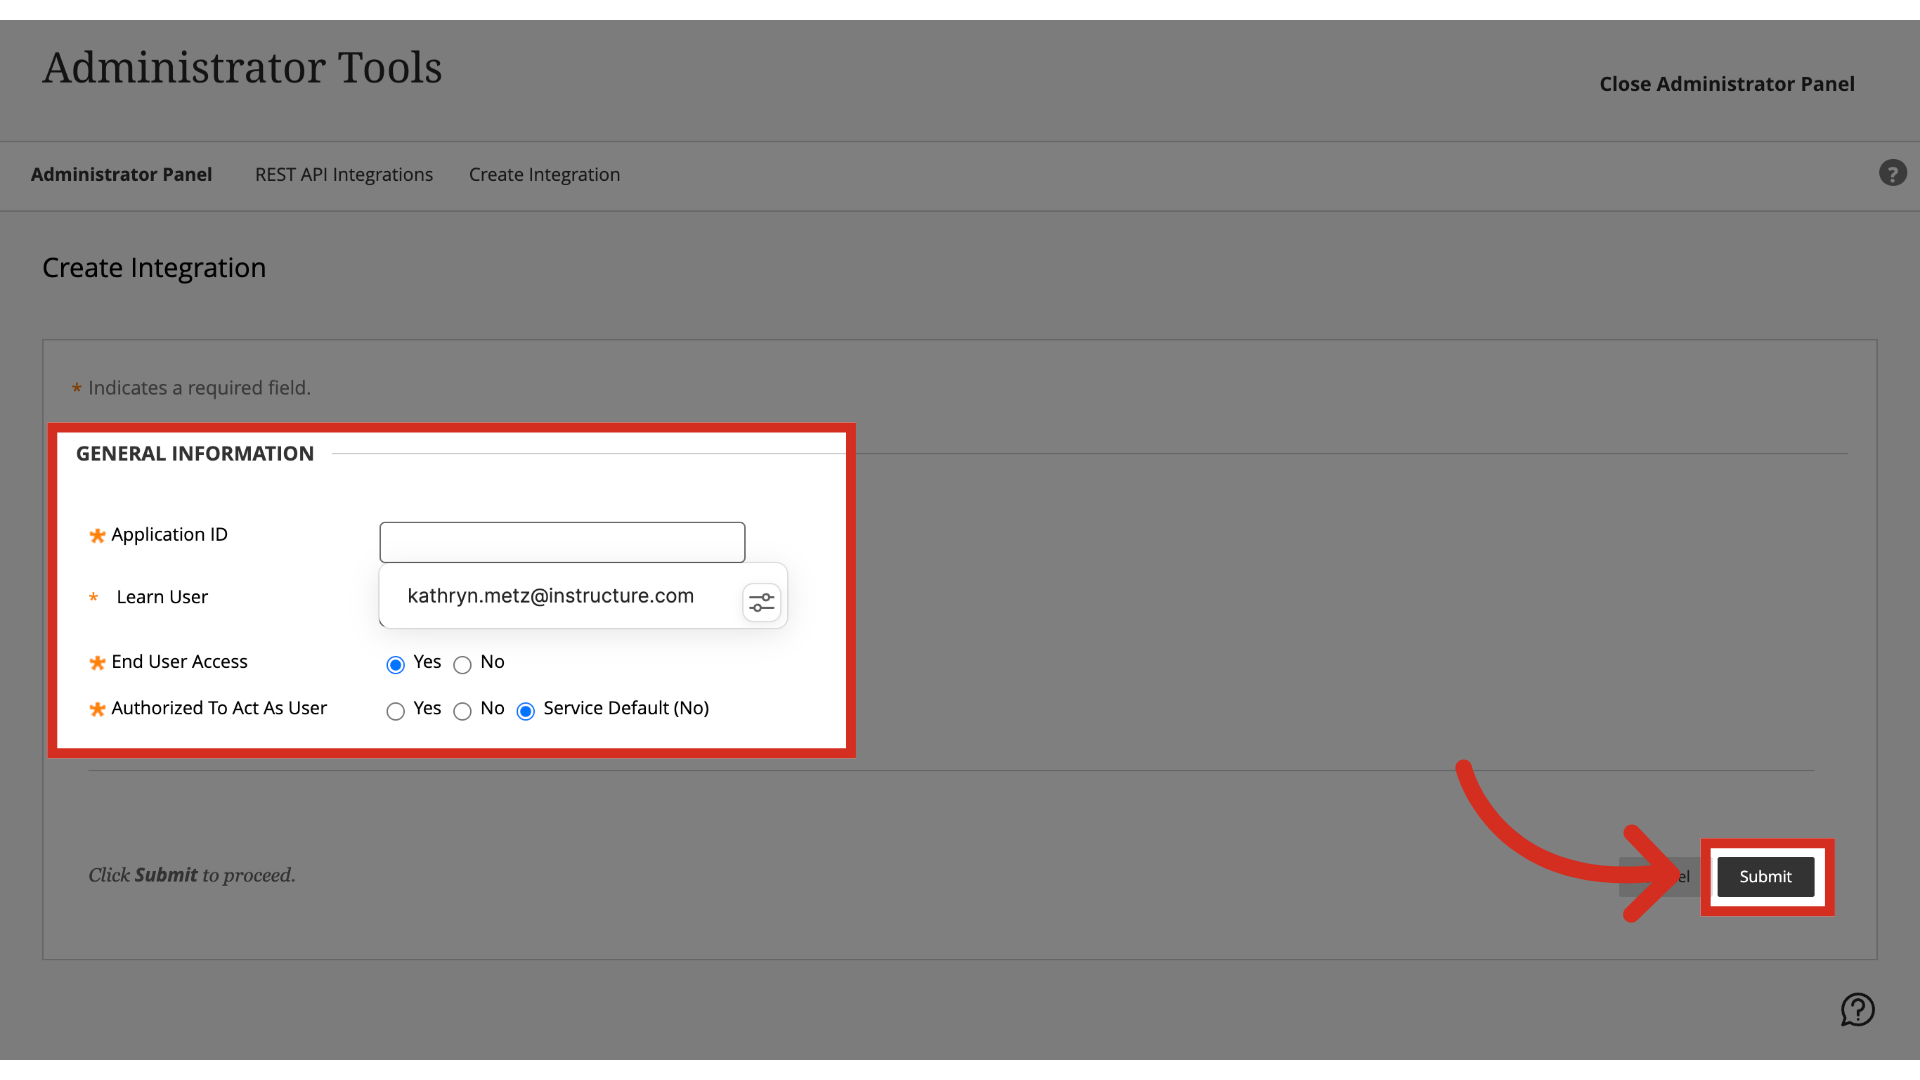
17. Enter Integration Information
Enter the following information:
Application ID: Enter your Application/Client ID
Learn User: this should be a user with a minimum set of privileges
End User Access: Yes
Authorized To Act As User: Yes
Then, click the Submit button.
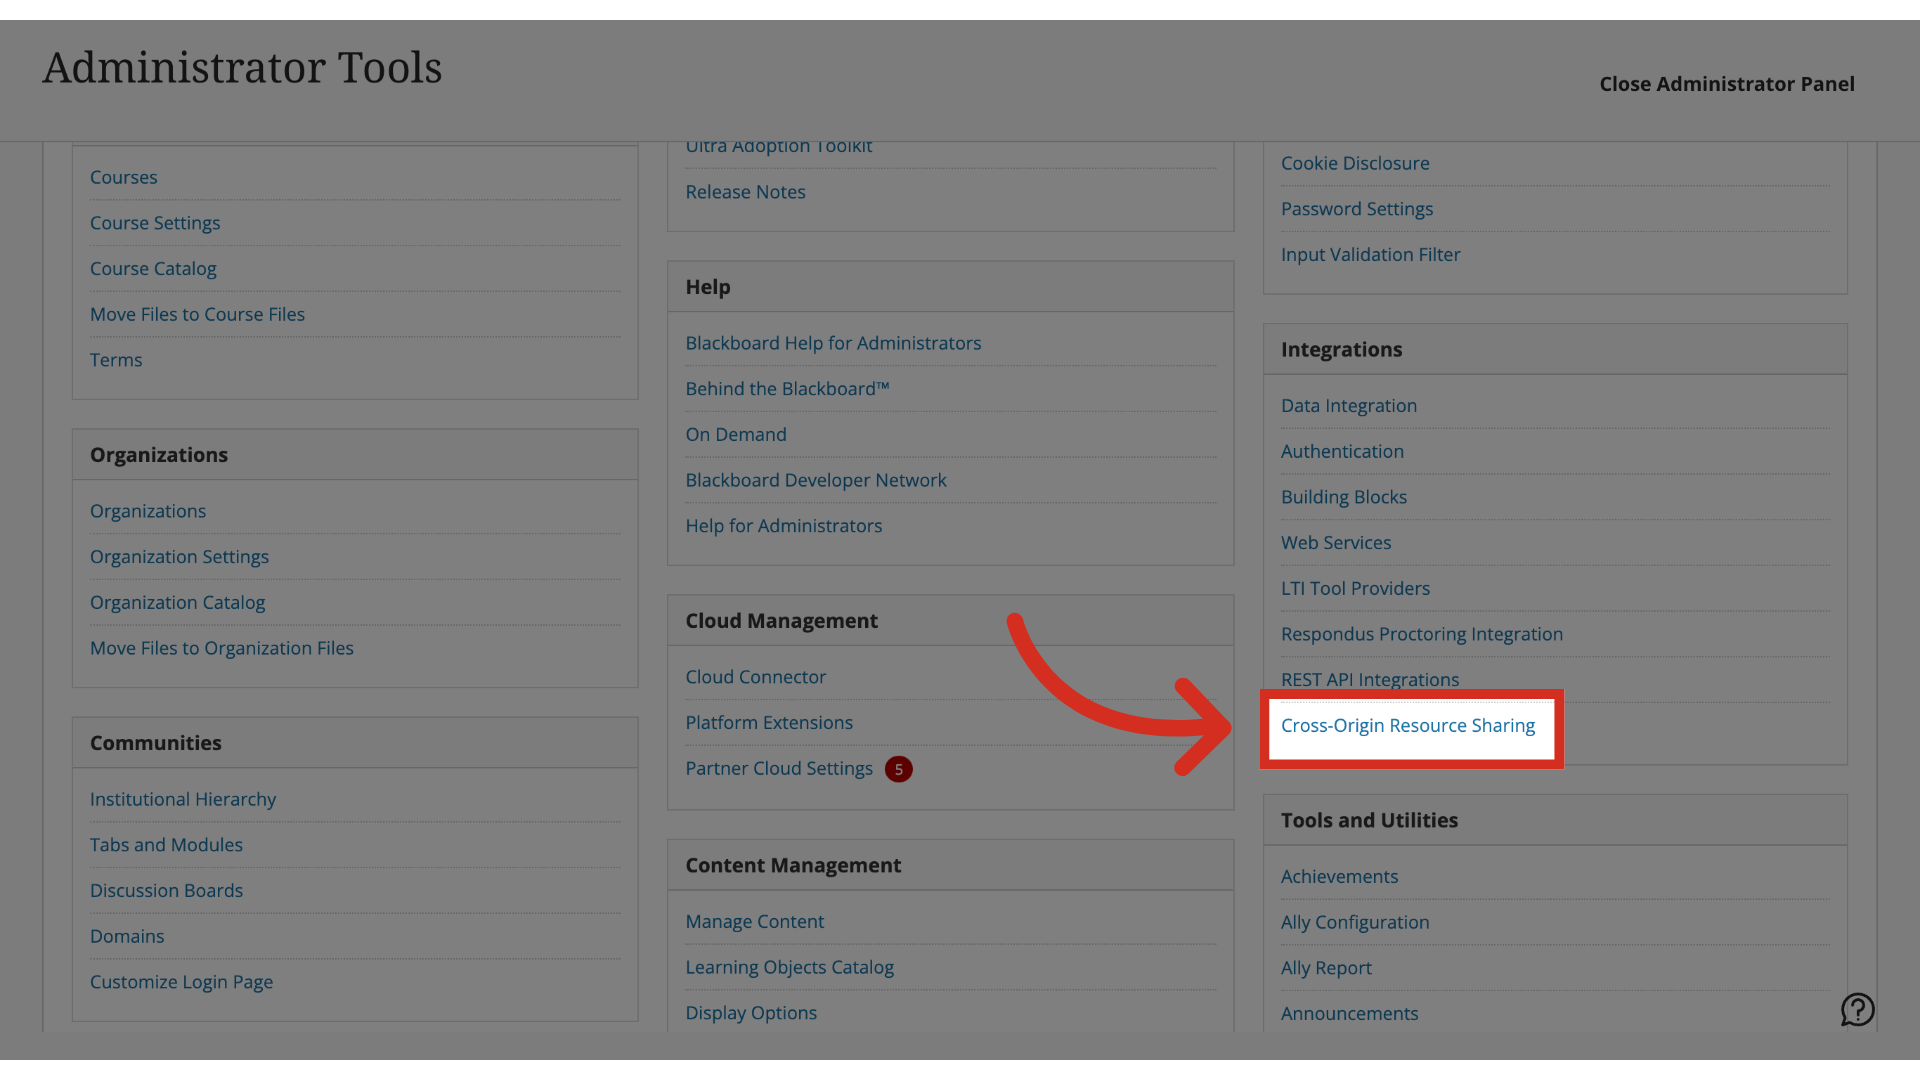
18. Create Configuration
In the Integrations section, click the Cross-Origin Resource Sharing link.
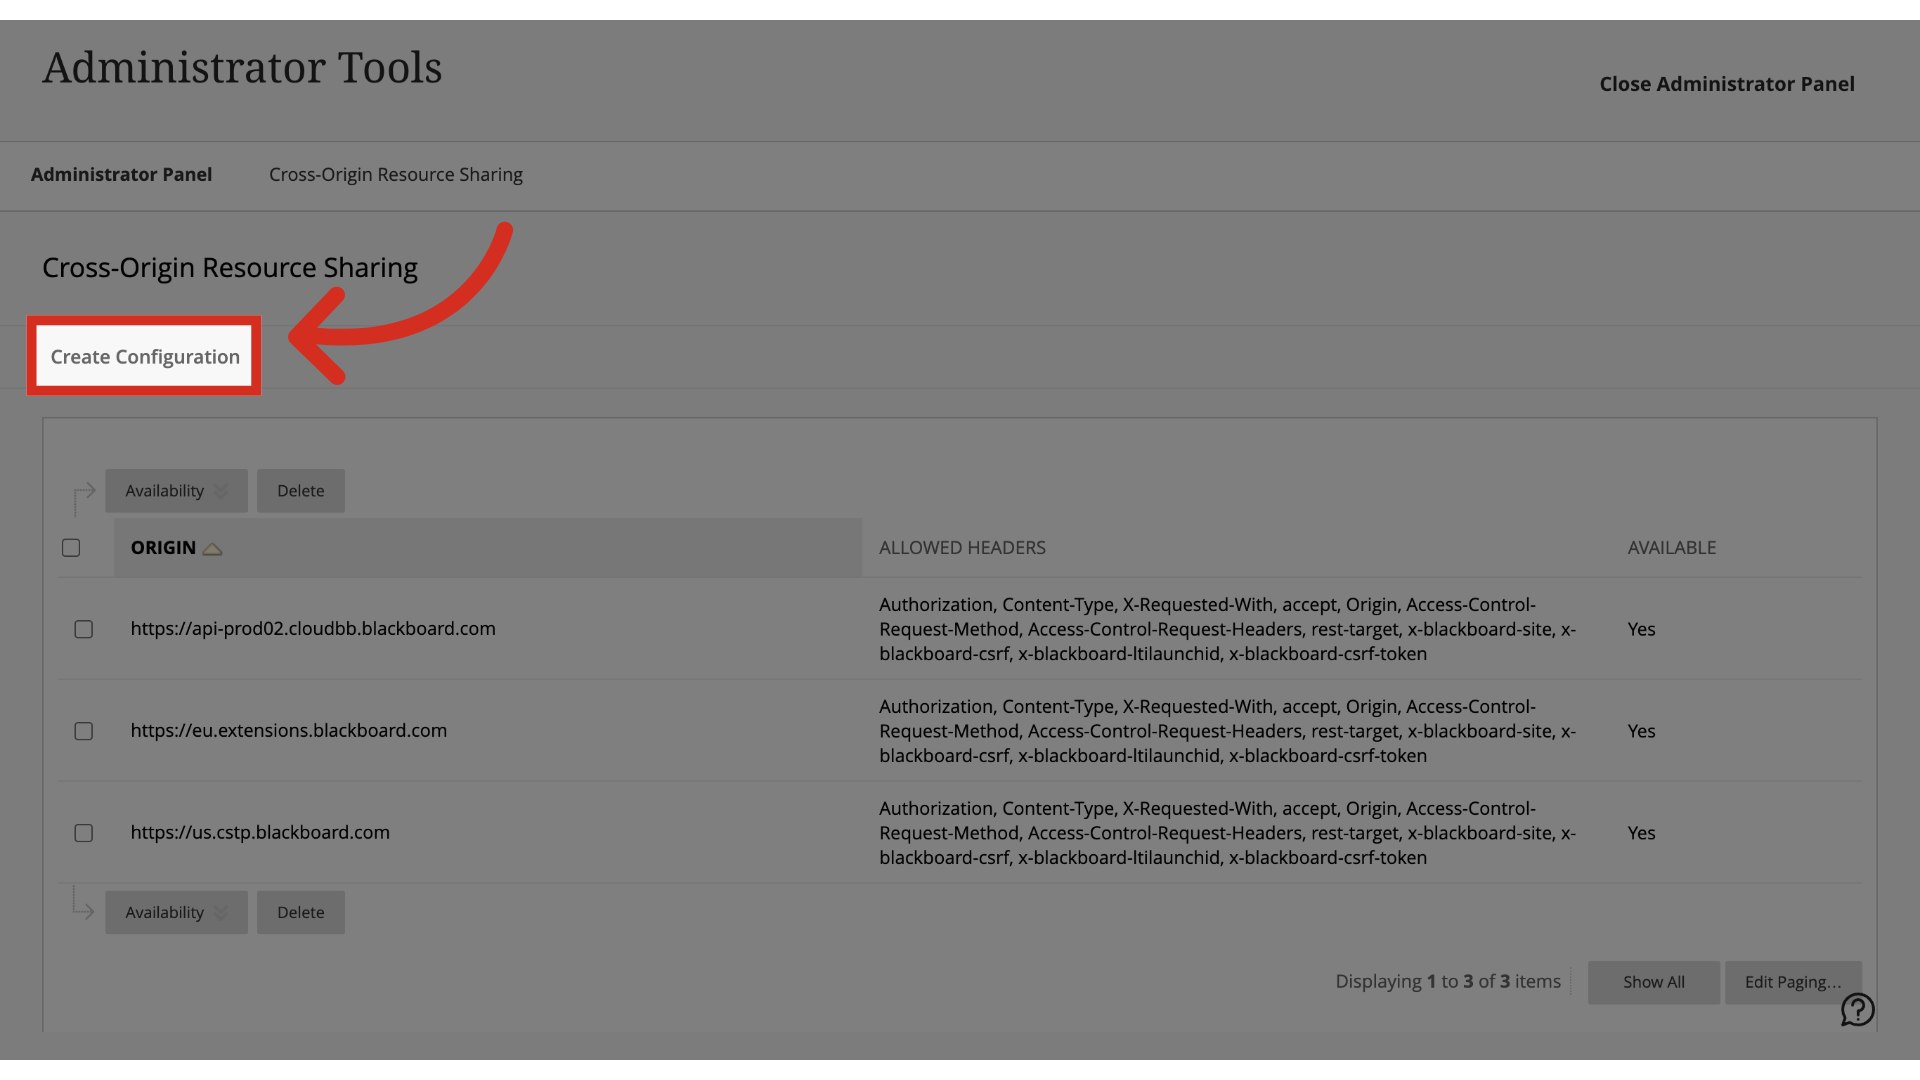
19. Create Configuration
Click the Create Configuration link.
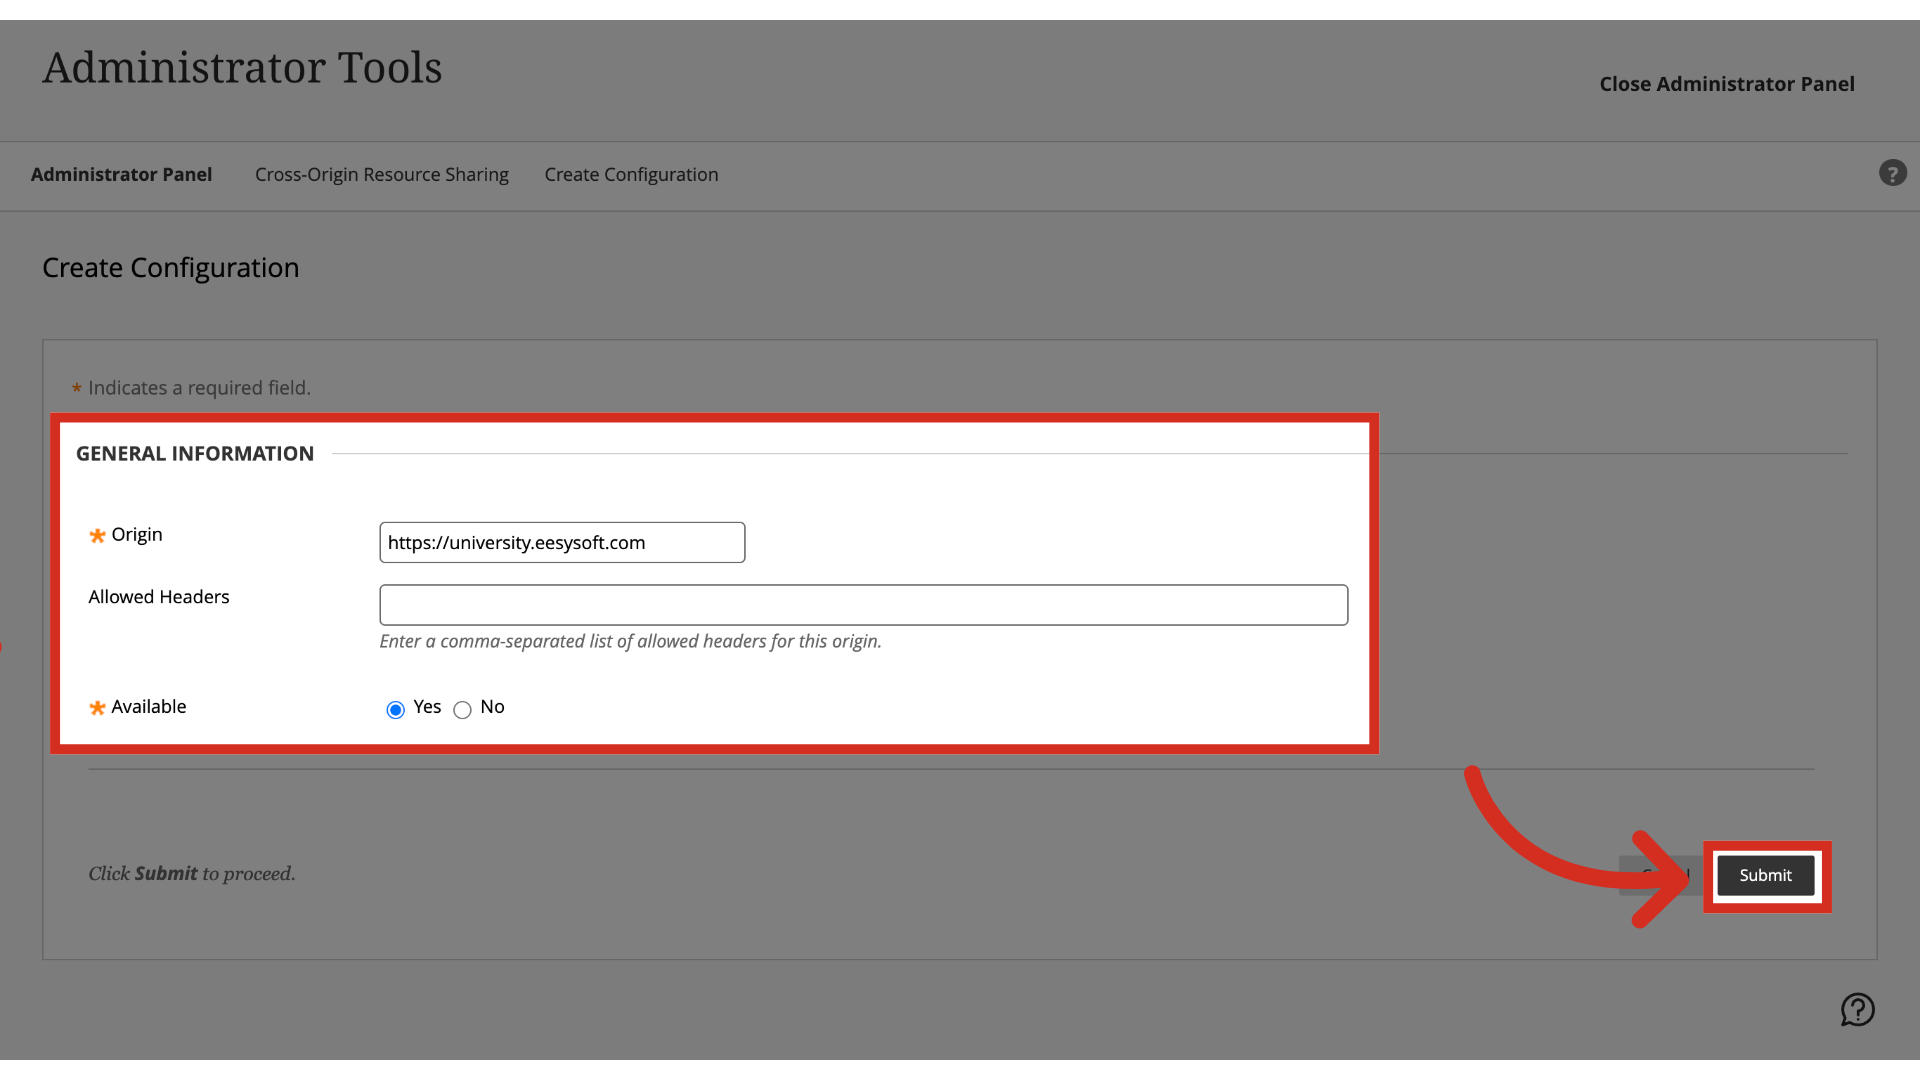
20. Enter General Information
For the General Information you'll need the following information:
Origin: e.g. https://university.eesysoft.com
Availability: Yes
Then, click the Submit button.