How do I create Custom User Groups for Messages and Support Articles in the Impact Dashboard?
You can create custom user groups based on a combination of criteria.
How do I create Custom User Groups for Messages and Support Articles in the Impact Dashboard?
1. Open Target User Groups
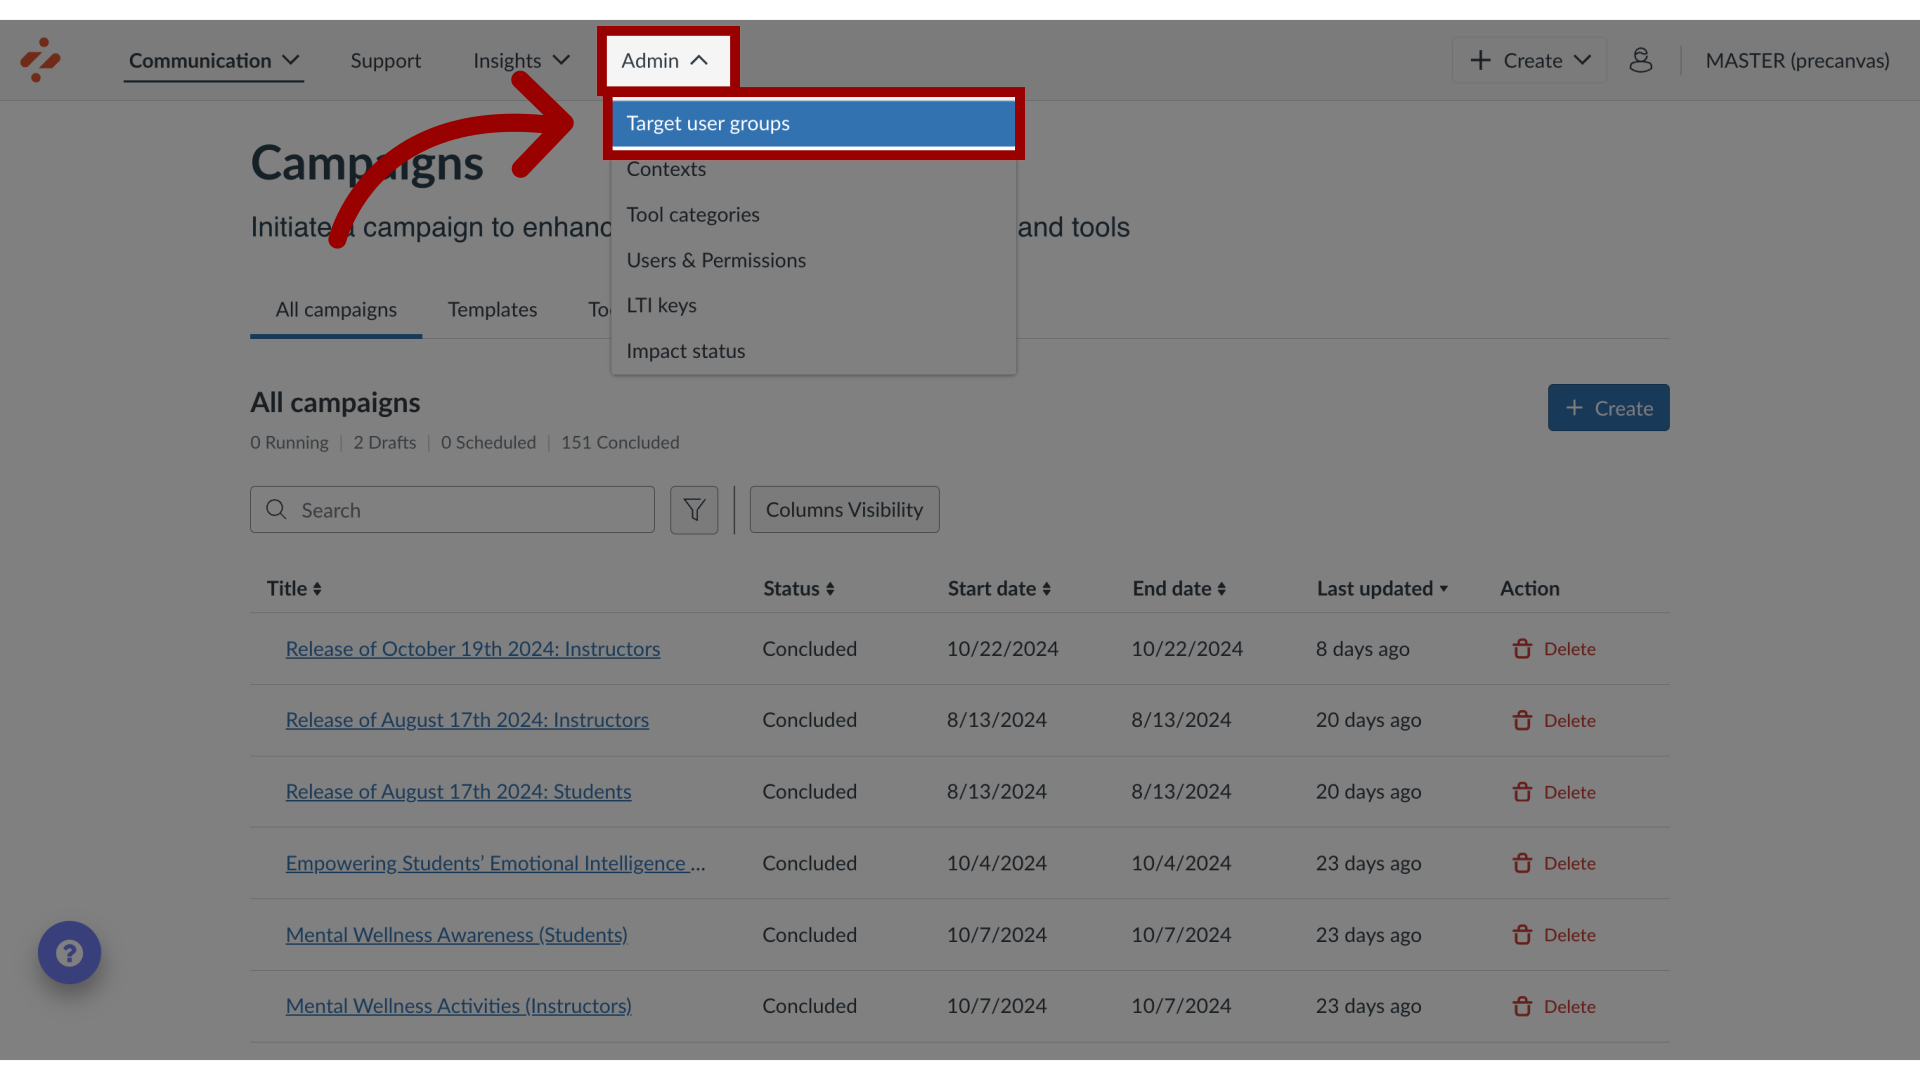
In the Global Navigation, click the Admin dropdown menu. Then click the Target User Groups link.
2. Open Custom User Groups
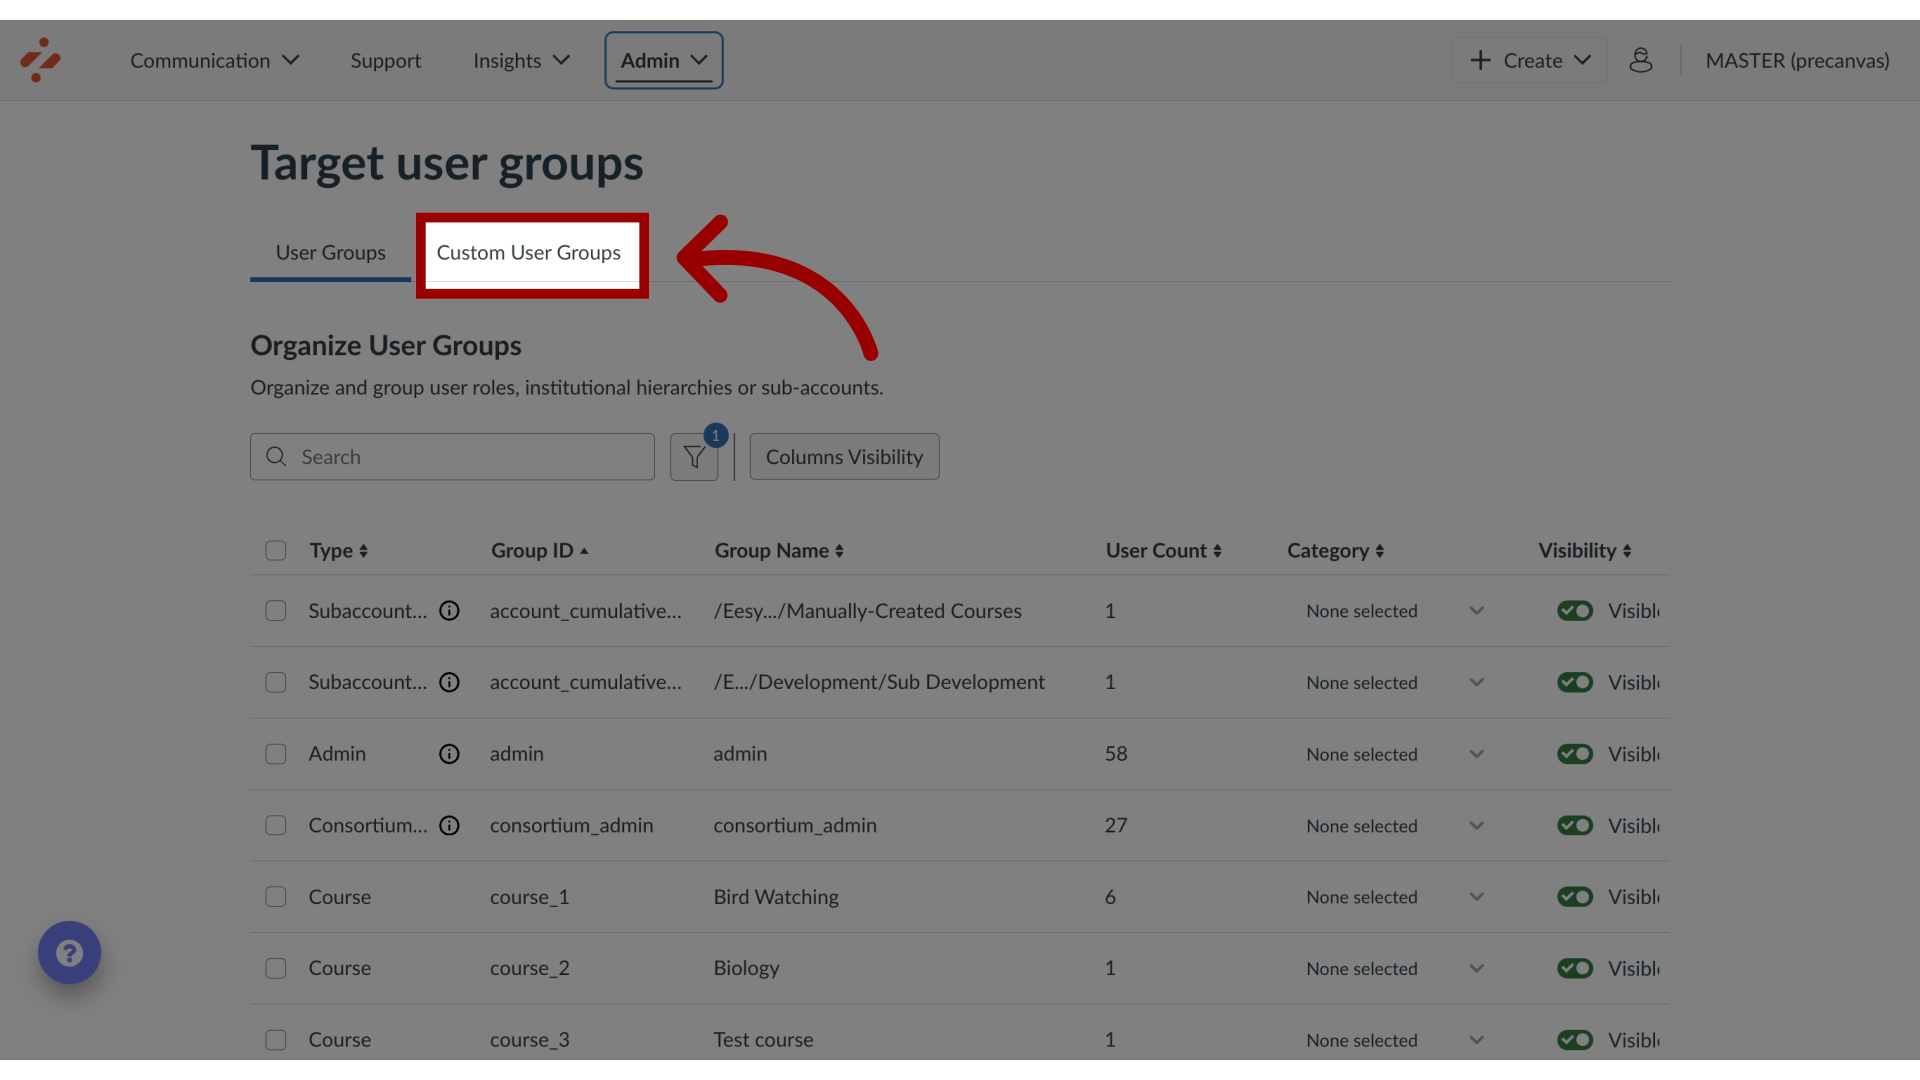
Click the Custom User Groups tab.
3. Create New Custom Group
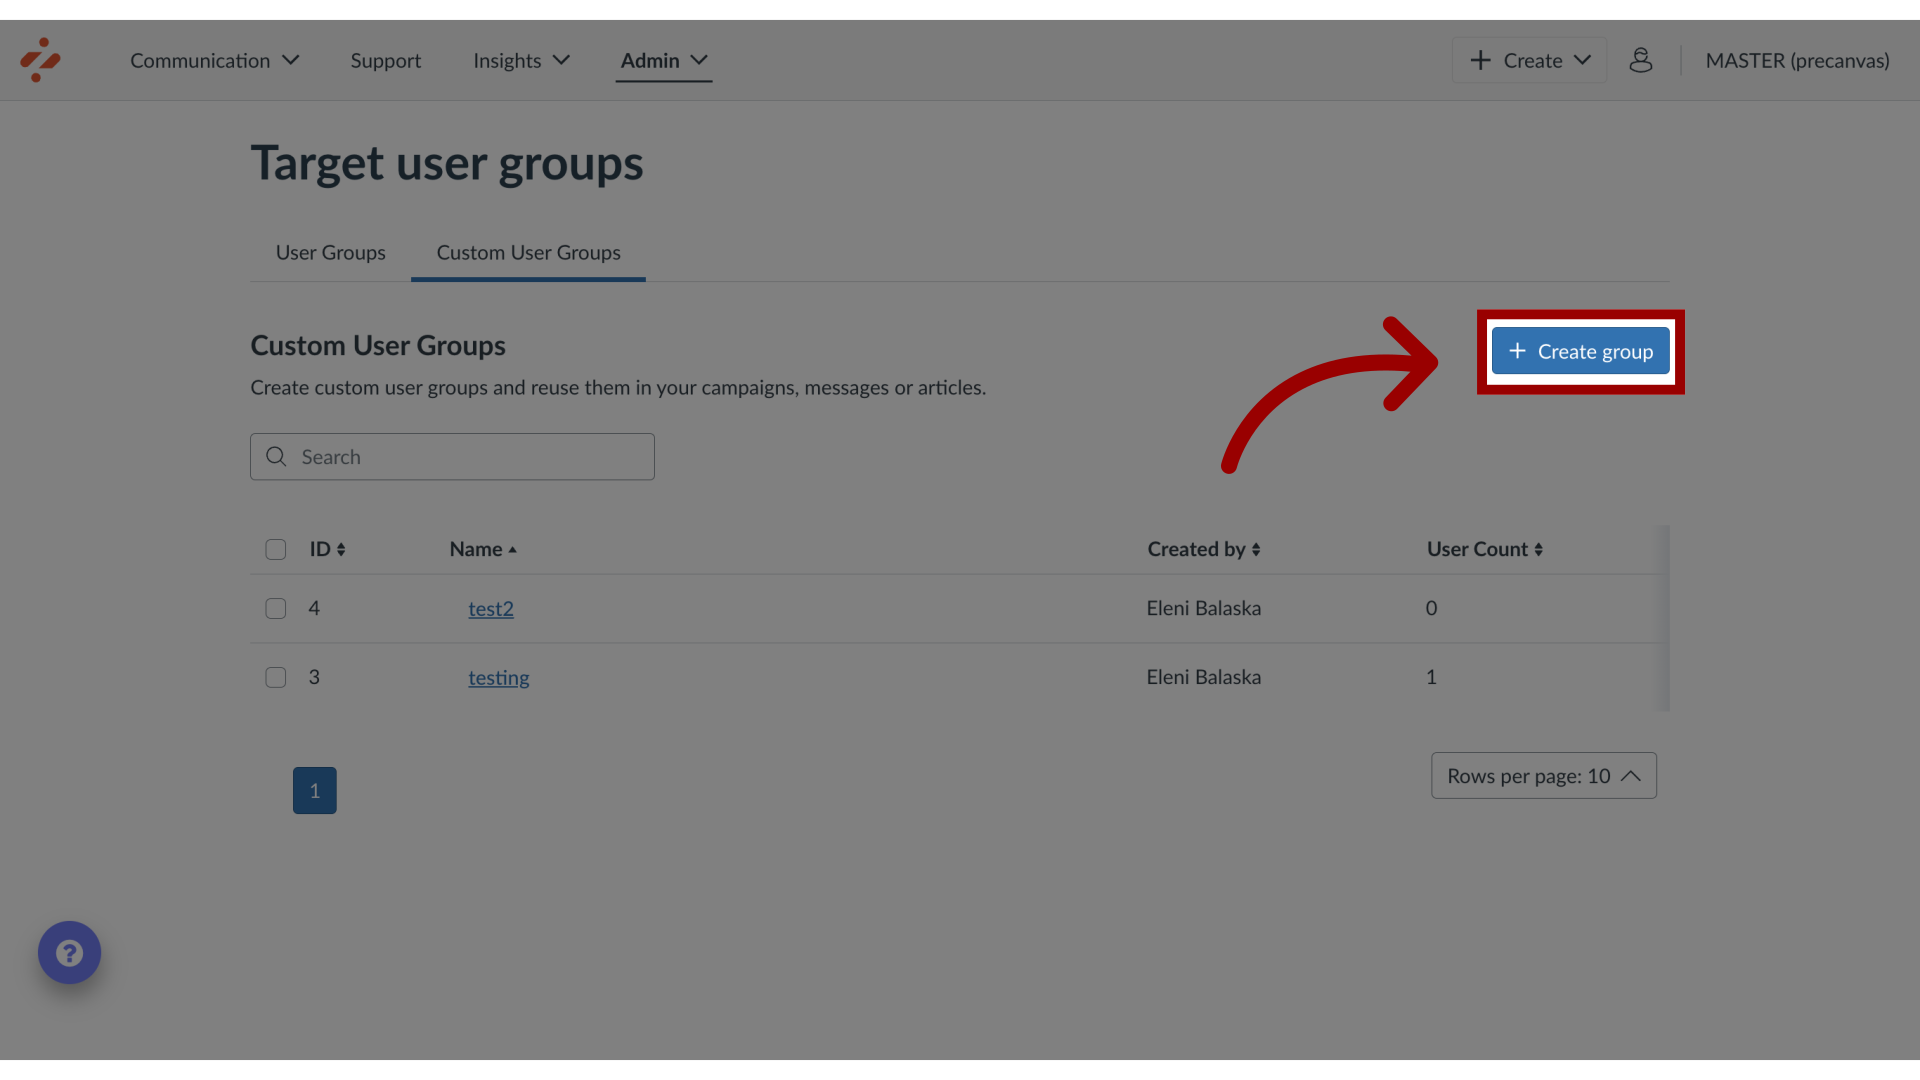
Click the Create Group button.
4. Edit Custom Group Information
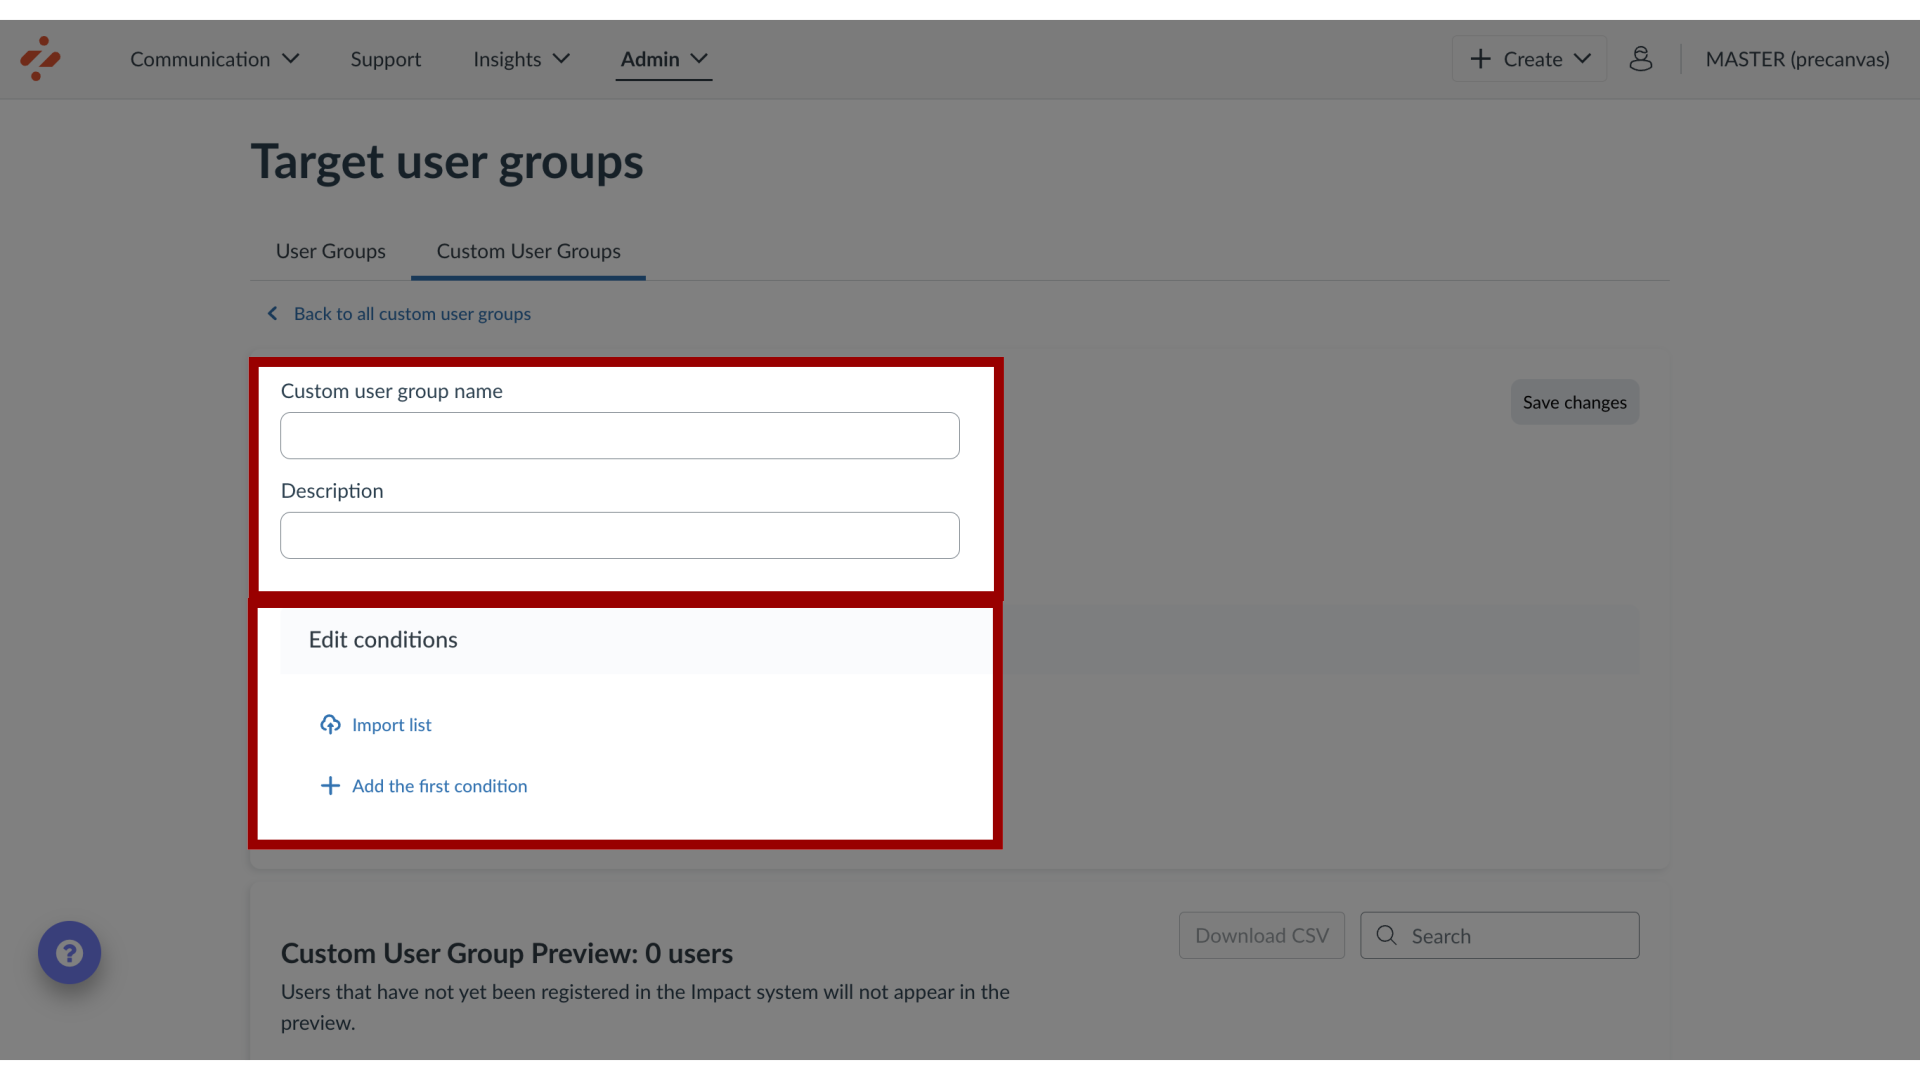
Enter a custom user group name and description. You can import a group list, or create the group list automatically using conditions.
5. Add First Condition
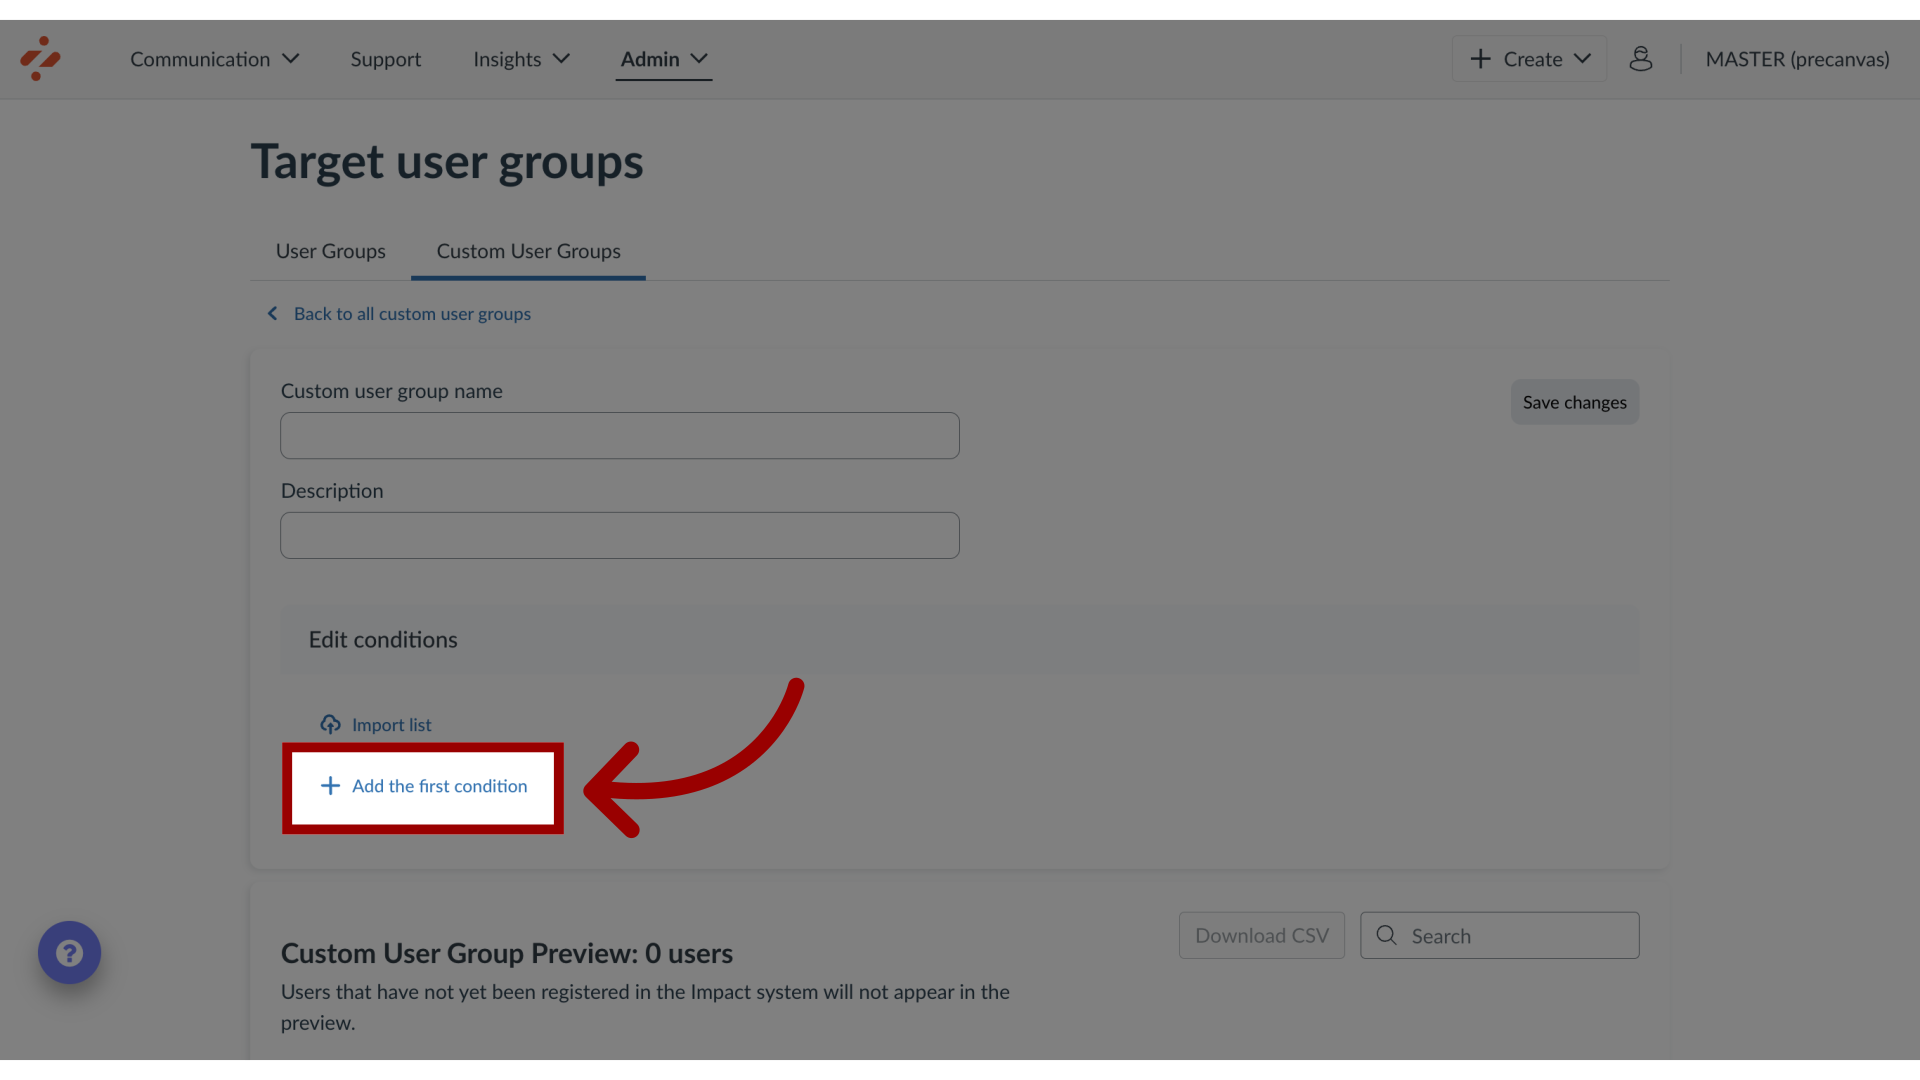
To create a list using conditions, click the Add the first condition link.
6. Add Condition
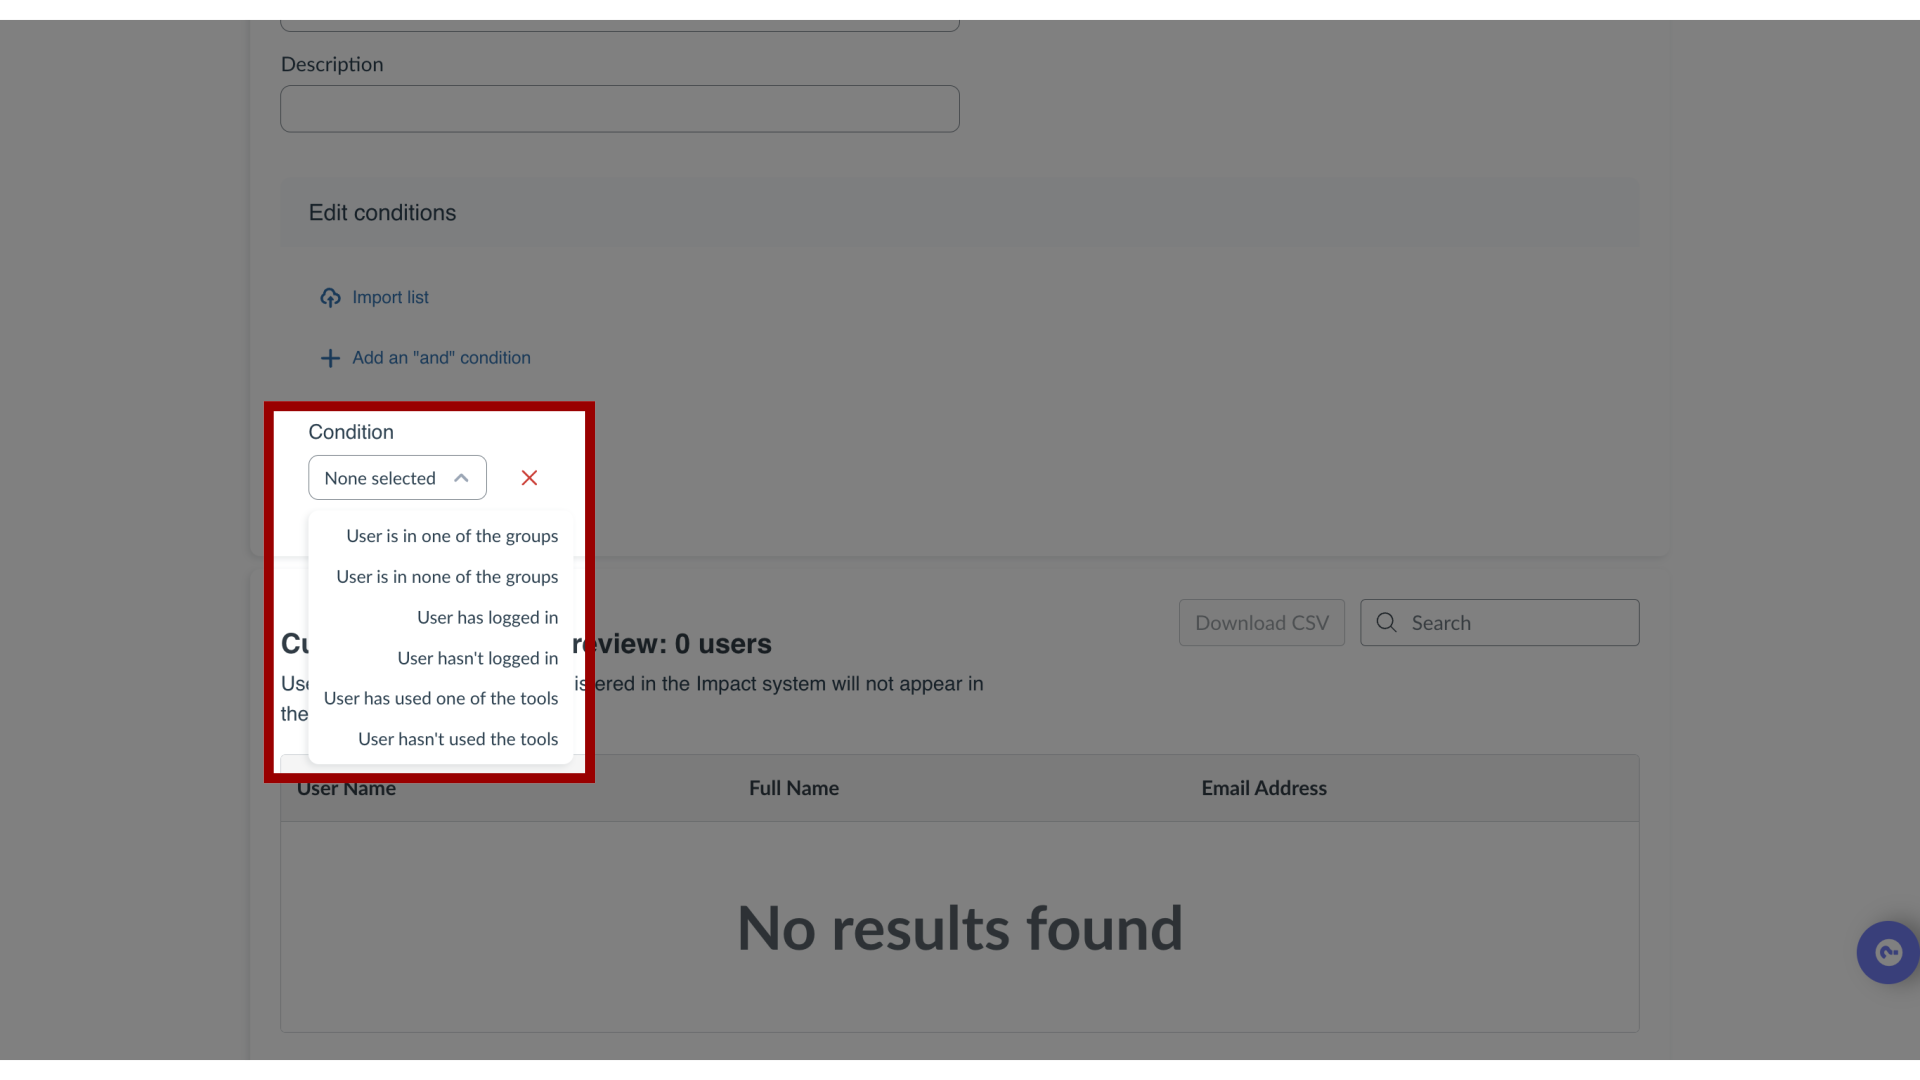
Conditions are statements that specify the types of users included in the group. To specify the users to whom the formula should apply click the Application drop-down menu and select your condition. The available conditions are for roles, user log-ins, and tools used.
7. Create Role Condition
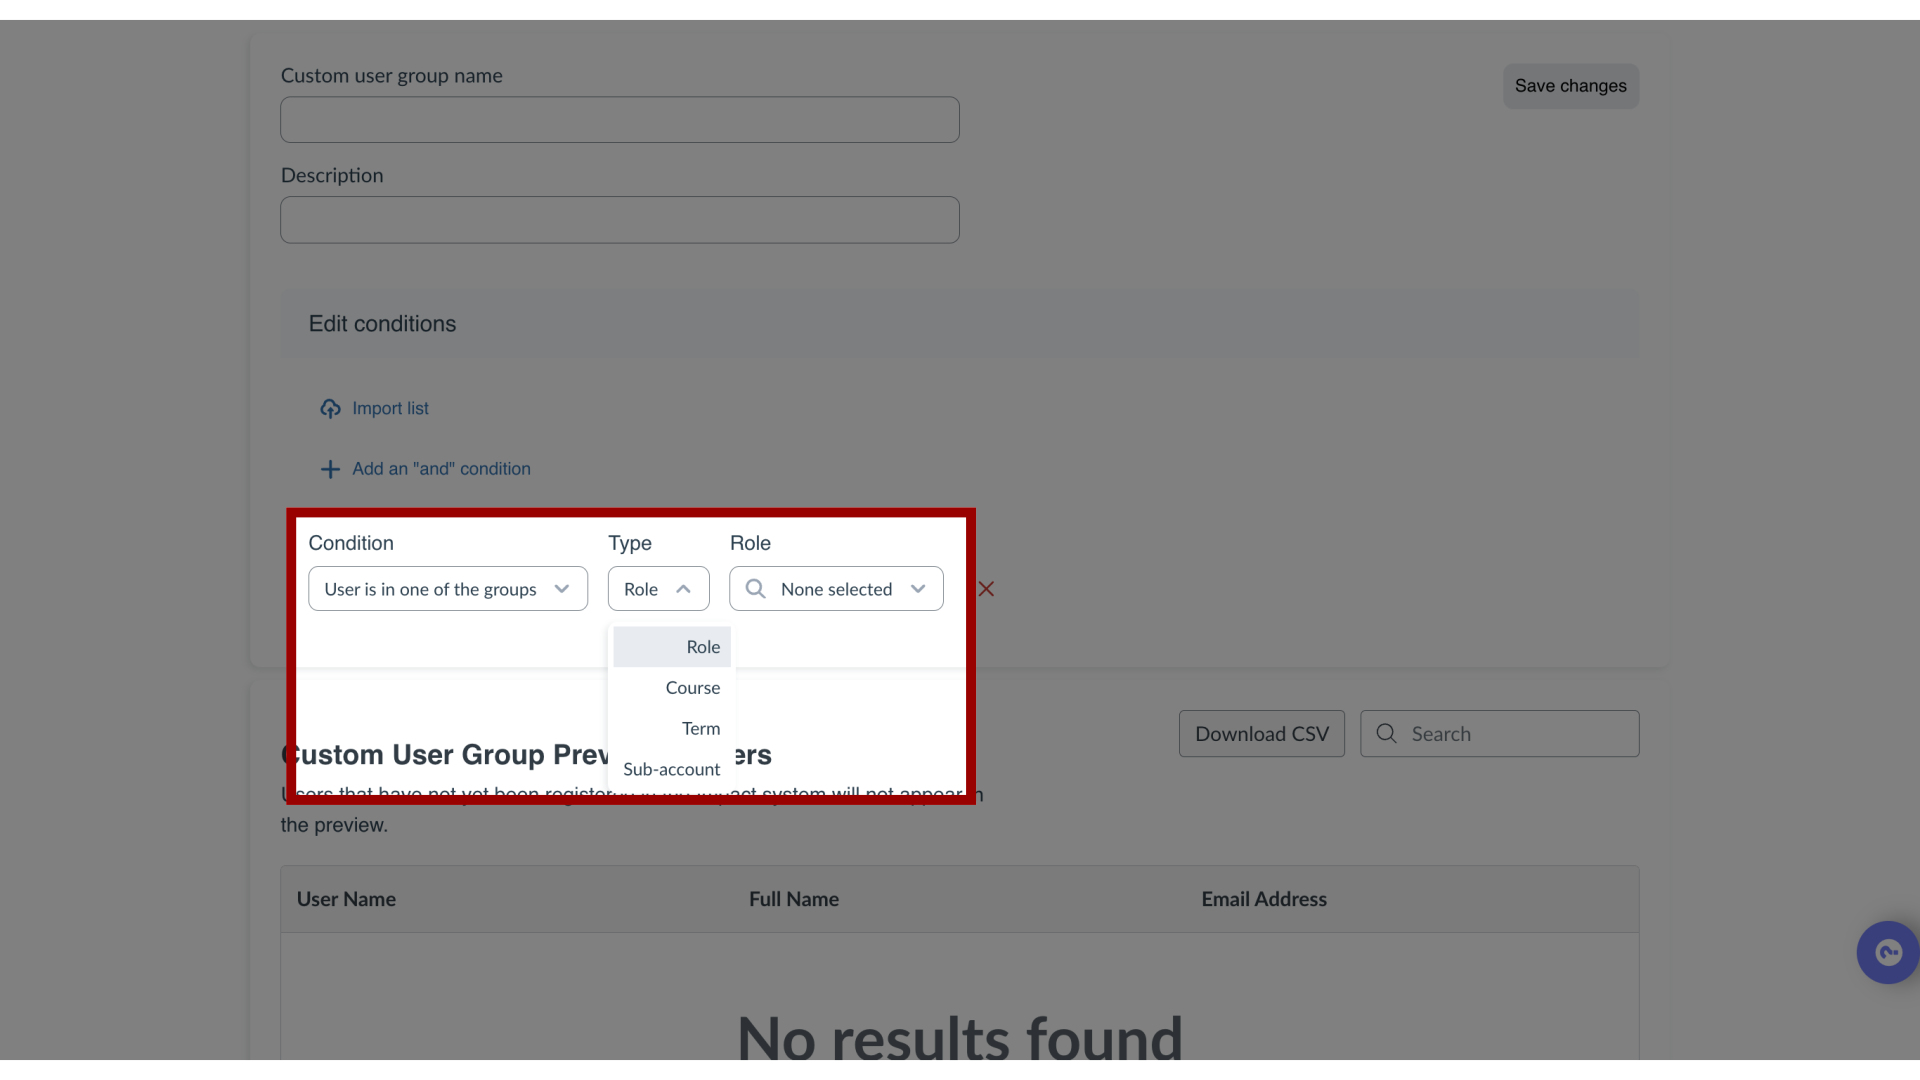
The role condition type allows you to create a list of users based on their role: User is in one of the groups or User is not in one of the groups. In the Type drop-down menu, select the user type:
Role
Course
Term,
Sub-account
In the Role drop-down menu you can select from the list of user roles identified in your account.
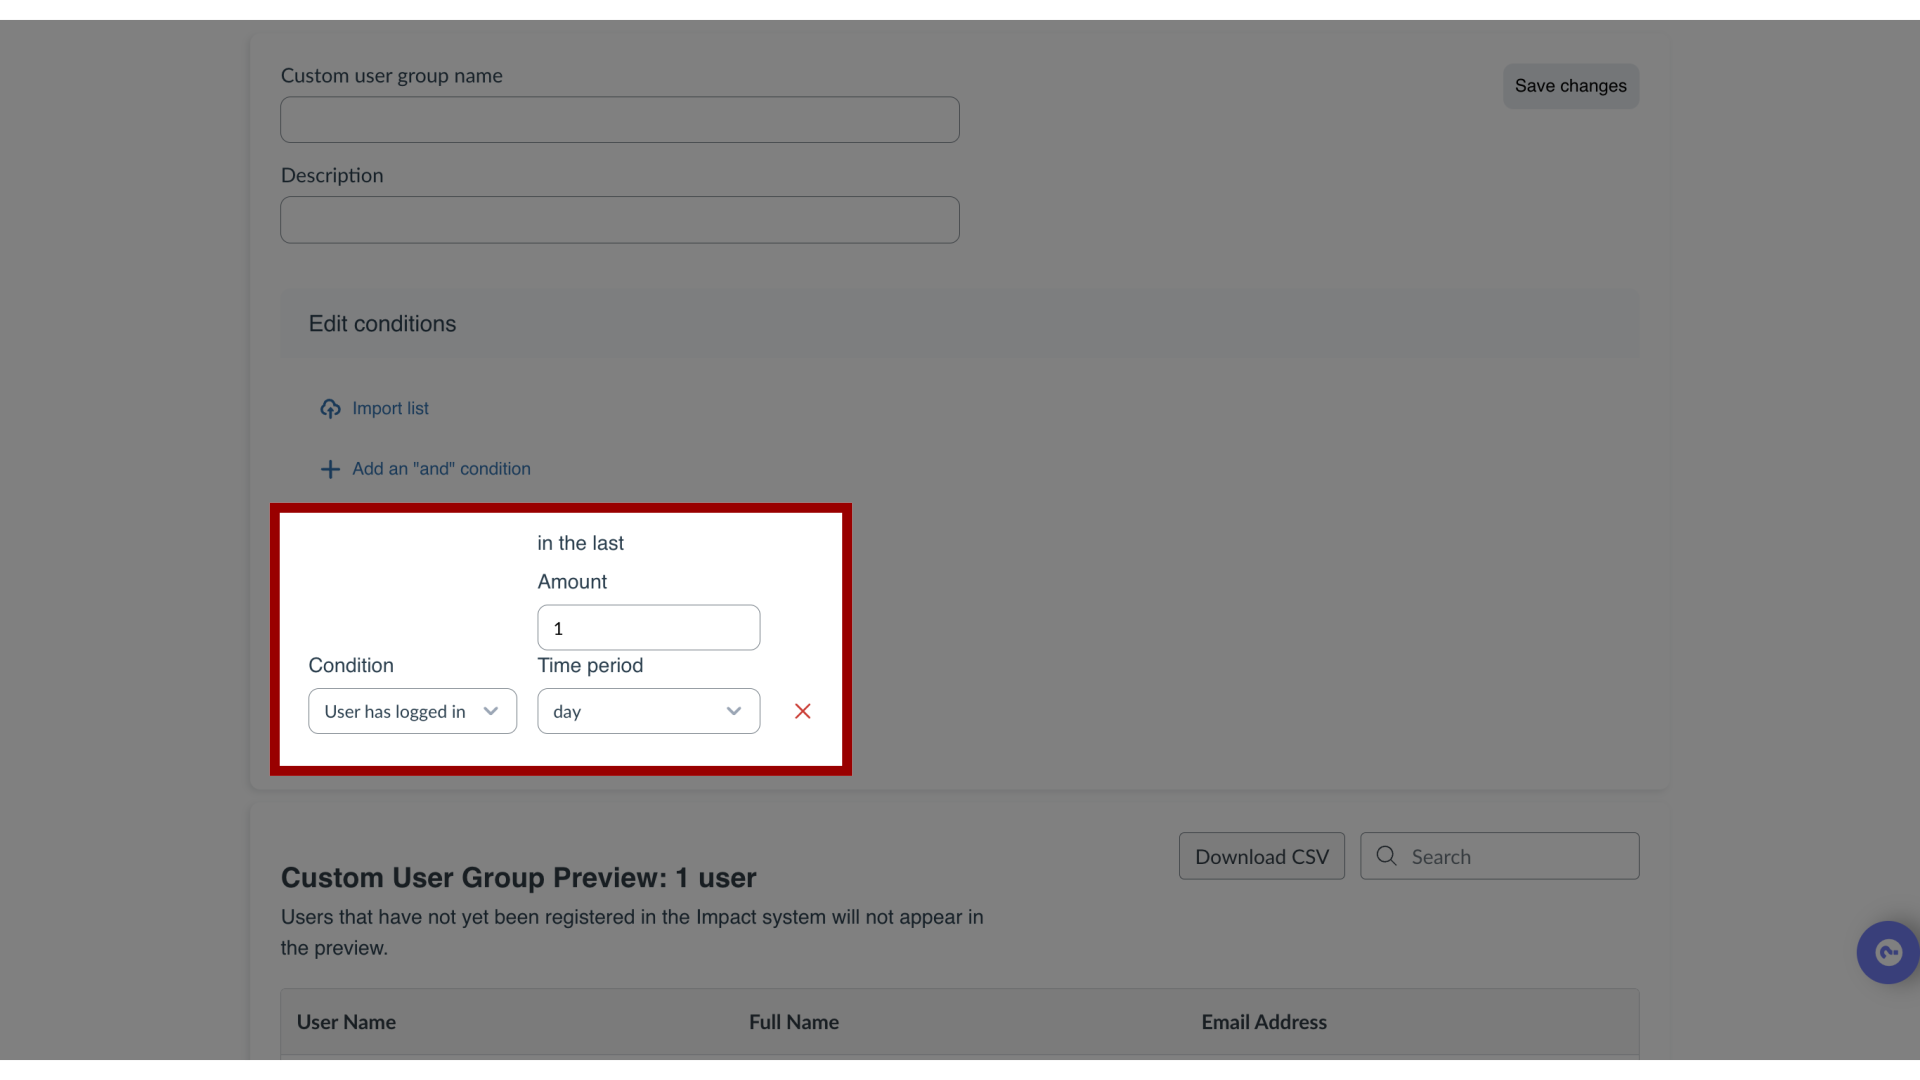
8. Create Logged In Condition
The logged in condition type allows you to create a list of users based on log in activity:
User has logged in
User has not logged in
Enter a value in the number field. Then select a time frame from the duration drop-down menu. You can select from the day, week, month, and year options.
9. Create Used Tool Condition
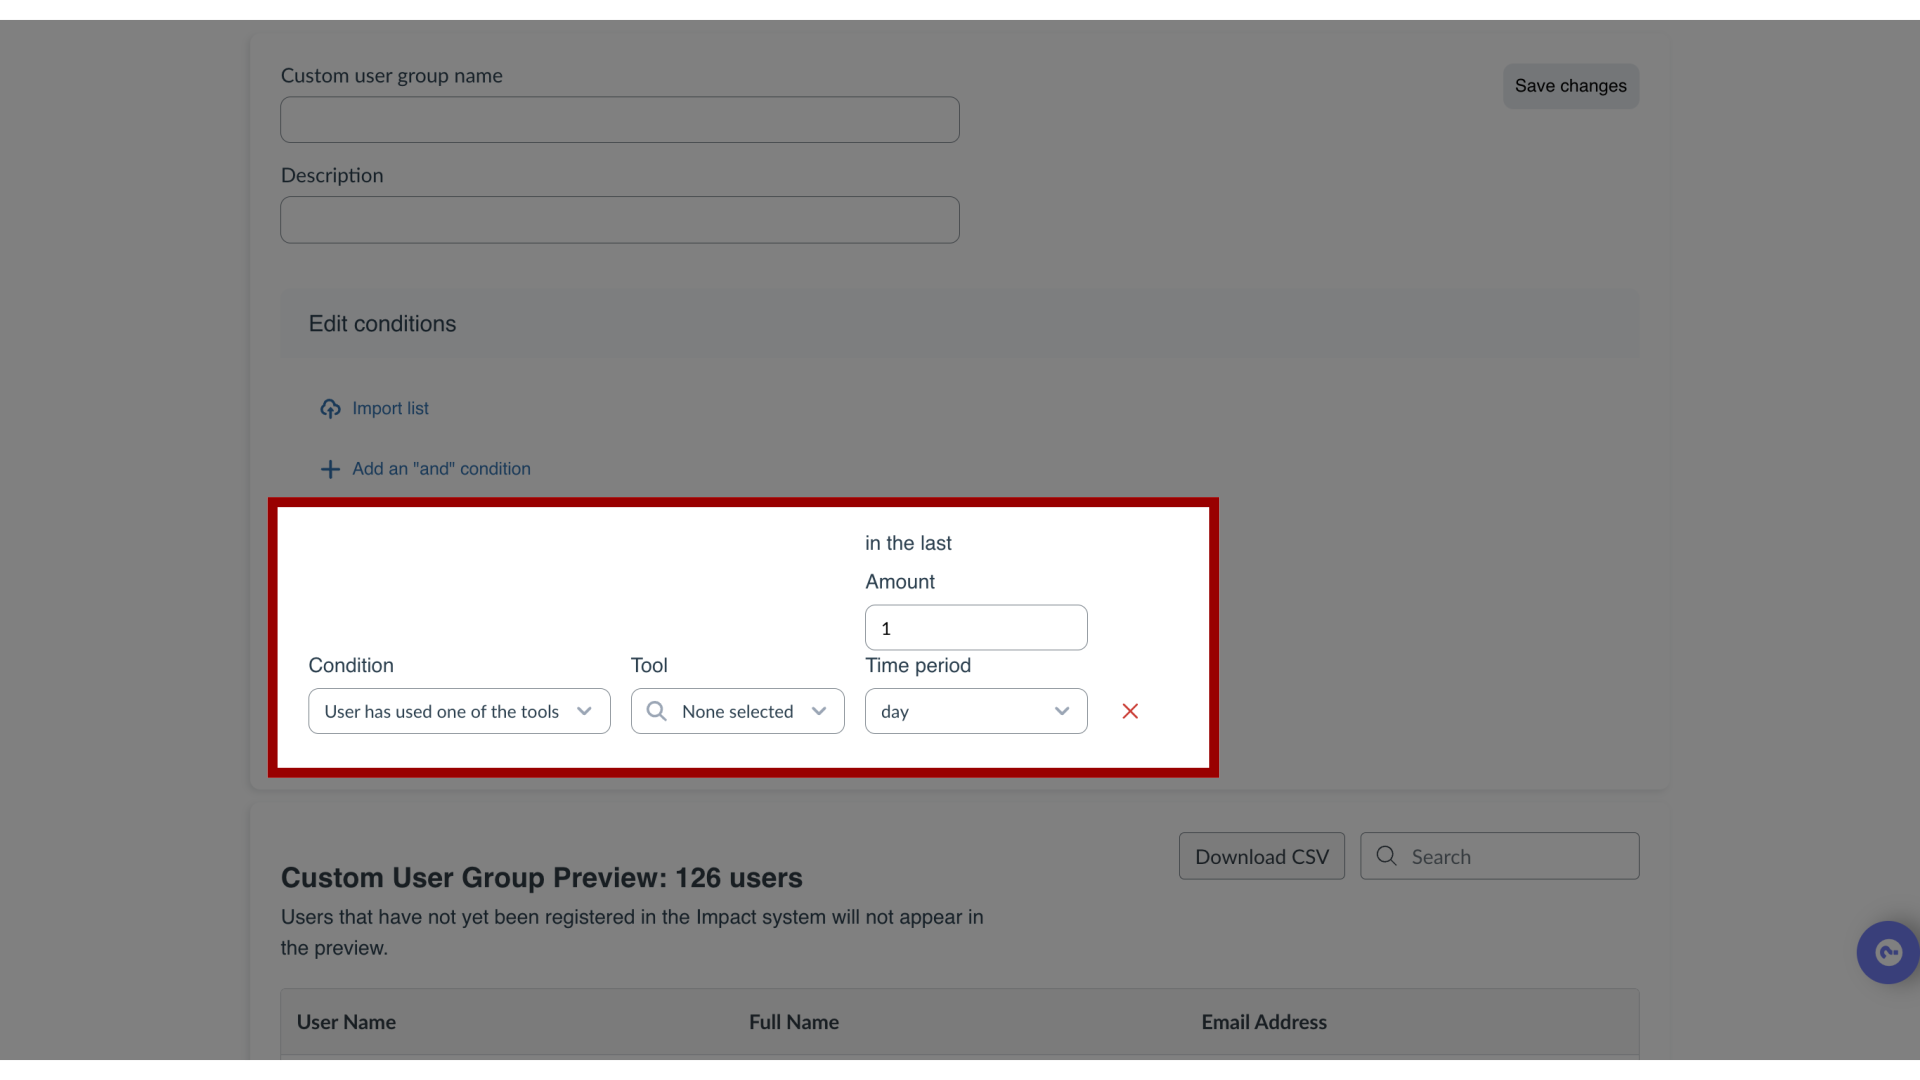
The used the tool condition type allows you to create a list of users based on their use of Impact:
User has used one of the tools
User has not used one of the tools
Select a report type in the Reports drop-down menu. Enter a value in the number field. Then select a time frame from the duration drop-down menu. You can select from the day, week, month, and year options.
10. Add or Remove Conditions
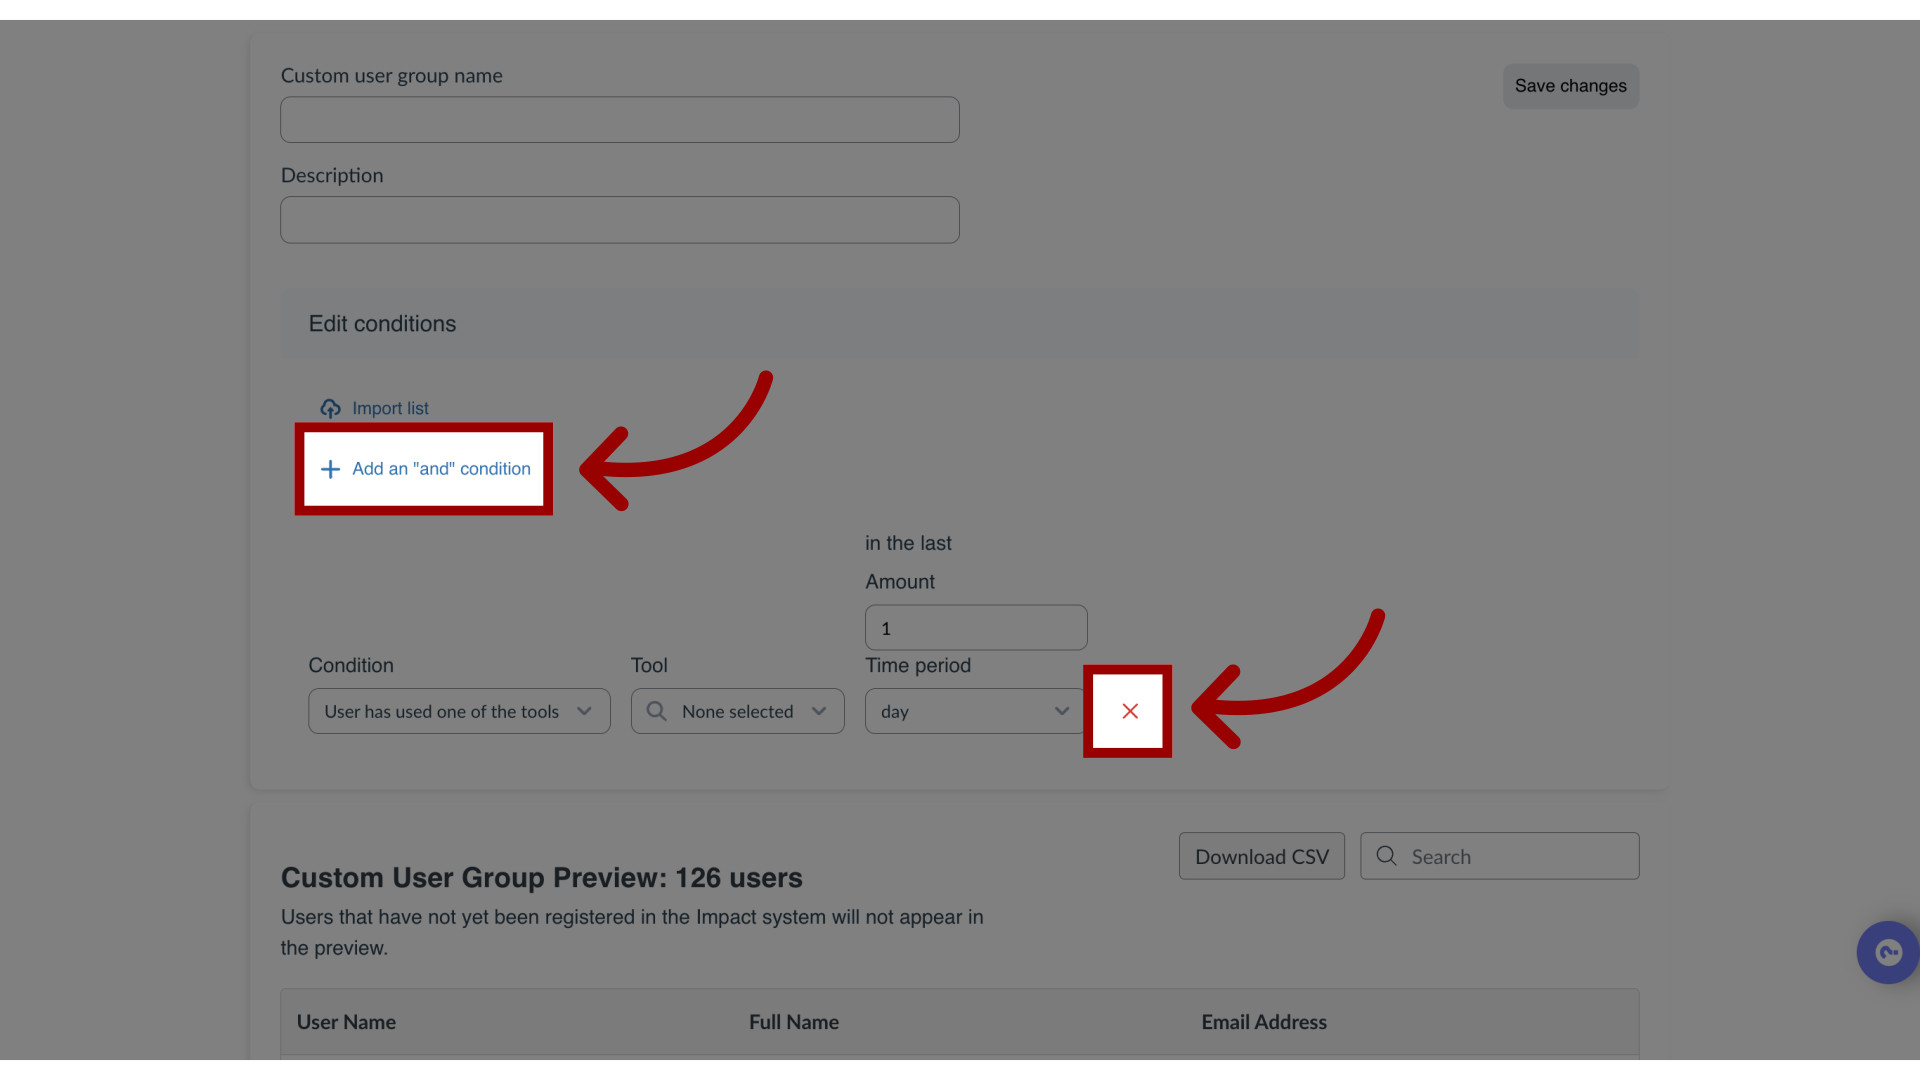
To add a condition, click the Add an "and" condition link. To remove a condition, click the Remove icon.
11. Preview Group List
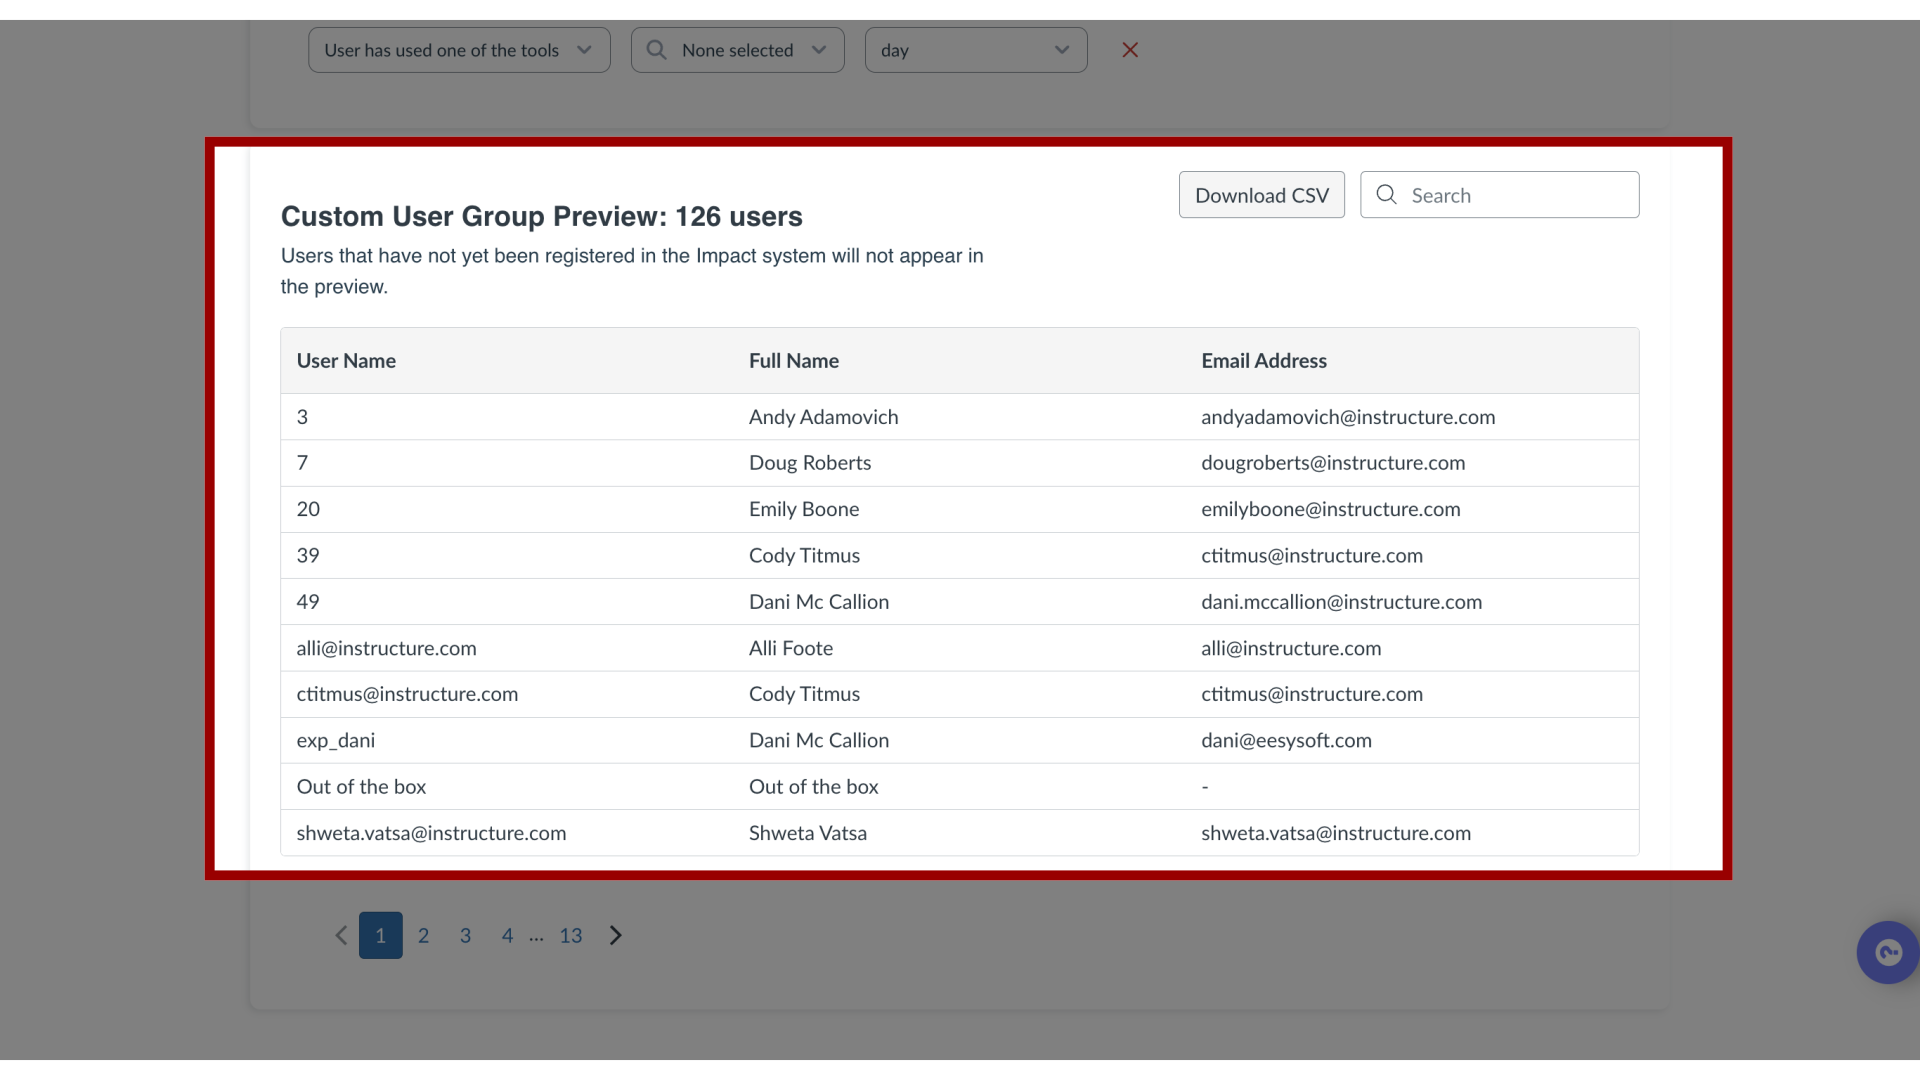
Based on your added conditions, you can view the list of users included in the group. To download the group list, click the Download CSV button. To search for a specific user in the list, use the Search field.
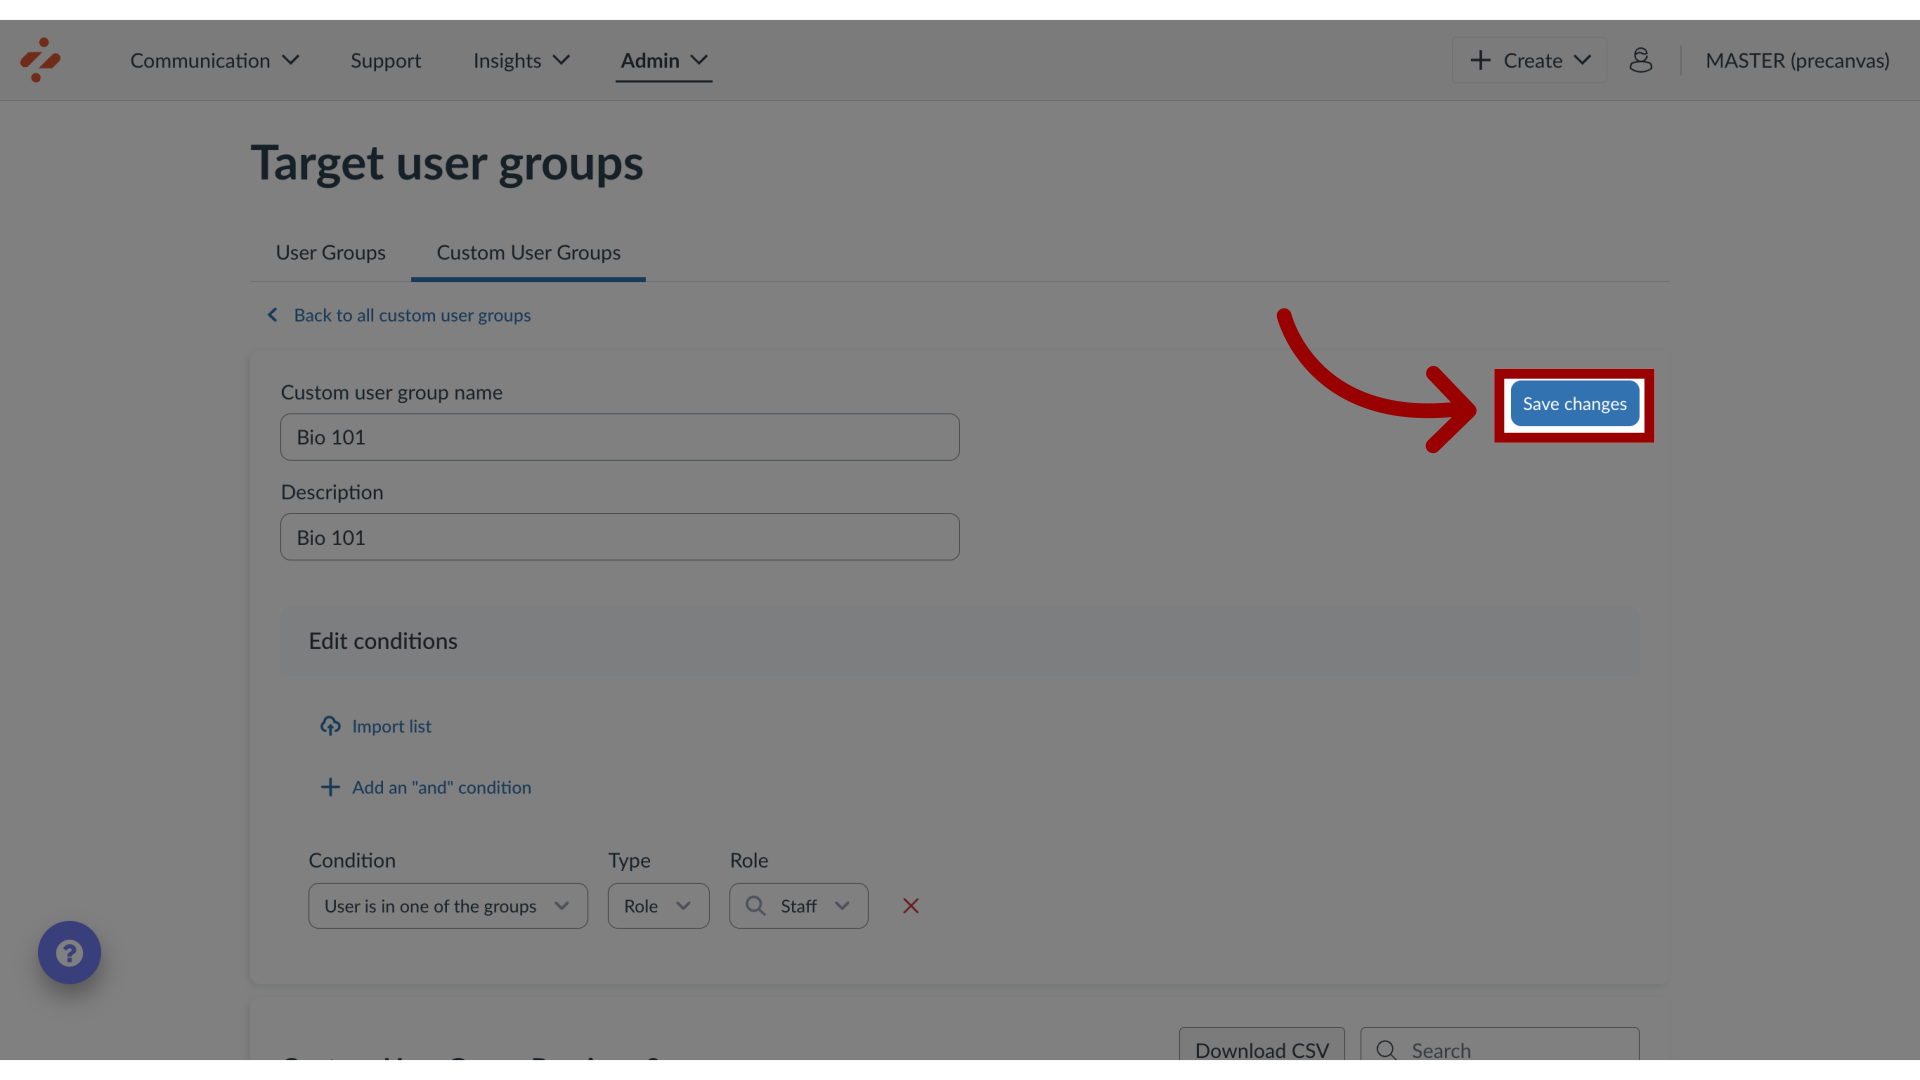
12. Save Group
Click the Save changes button.
13. View User Group
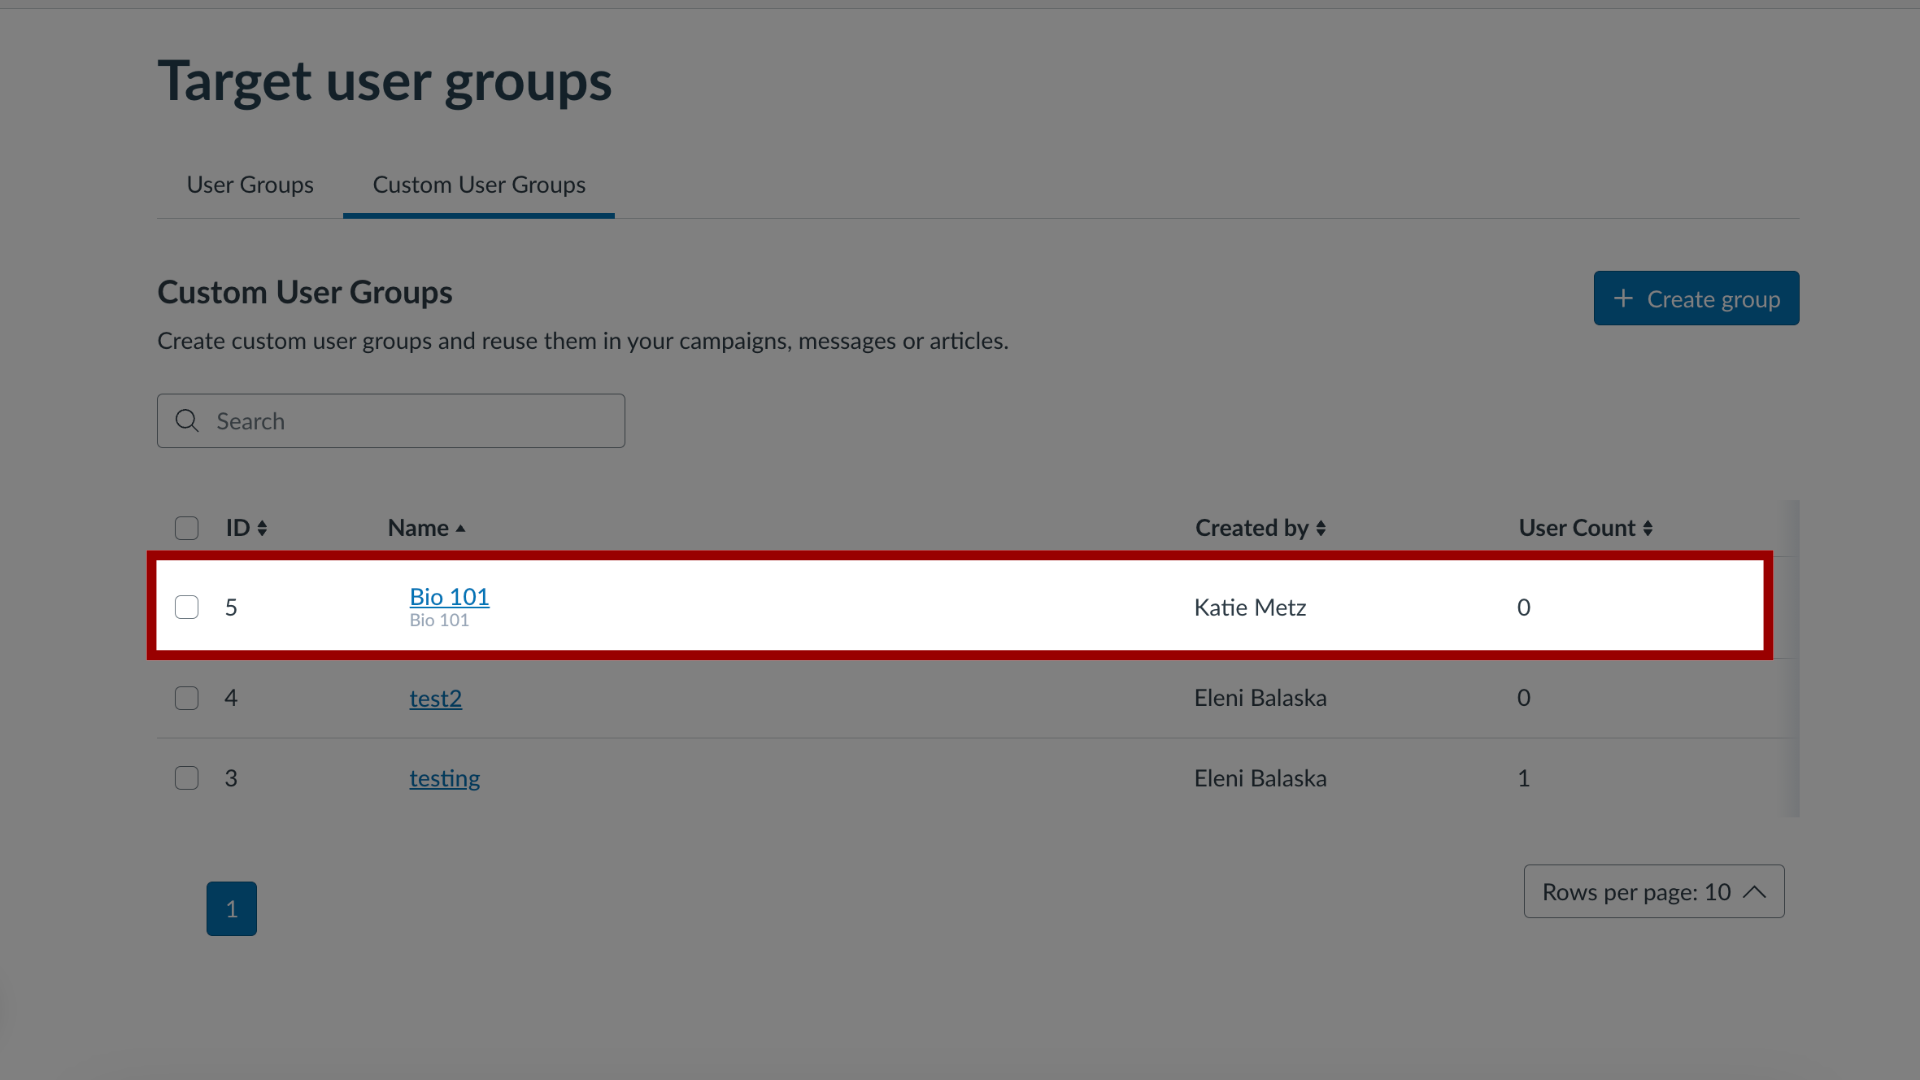
View the group in the Custom User Groups list.
