How do I create a Walkthrough in the Impact Dashboard?
When creating walkthrough steps, admins can select from the following step types: hints, pop-ups, and systrays. Hints can be used to direct users to another page in their LMS. Pop-up and systray messages can be used to provide information.
Notes:
- Walkthrough steps must include a context that triggers the step, such as an action or navigating to a page. Free Select Mode is not available when selecting a context.
- Buttons can be added to allow users to navigate between steps or close the walkthrough.
- The Walkthroughs feature preview is in active development.
How do I create a Walkthrough in the Impact Dashboard?
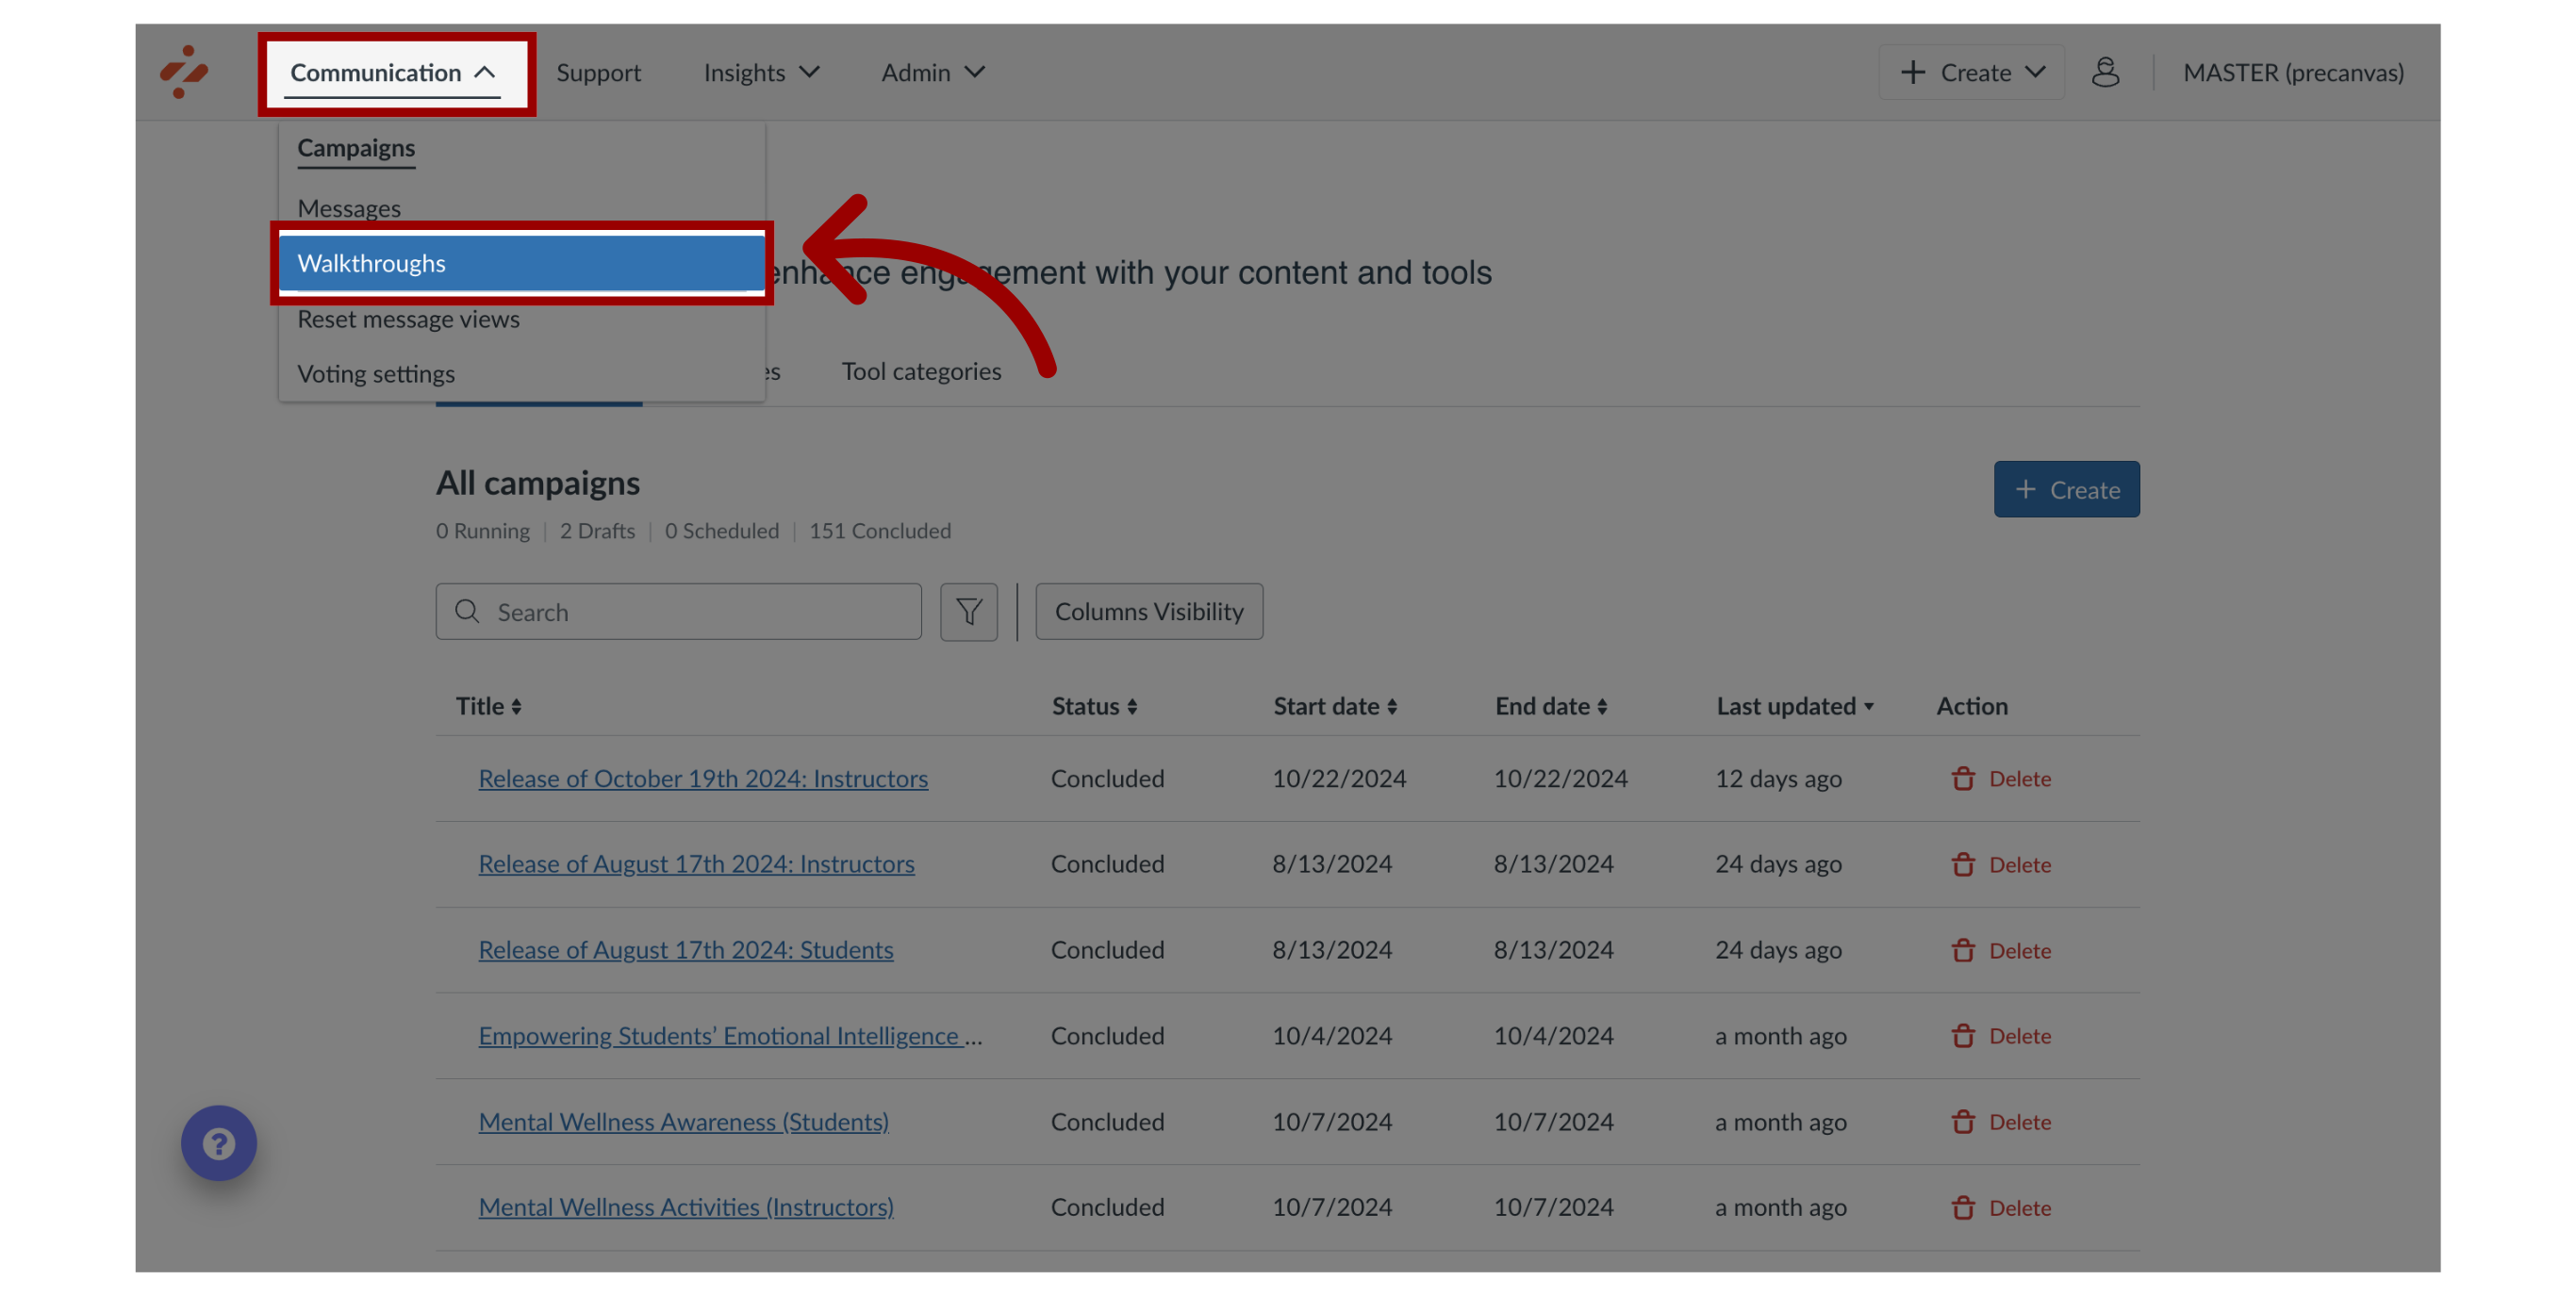
1. Open Walkthroughs
In the Global Navigation, click the Communication dropdown menu. Then click the Walkthroughs link.
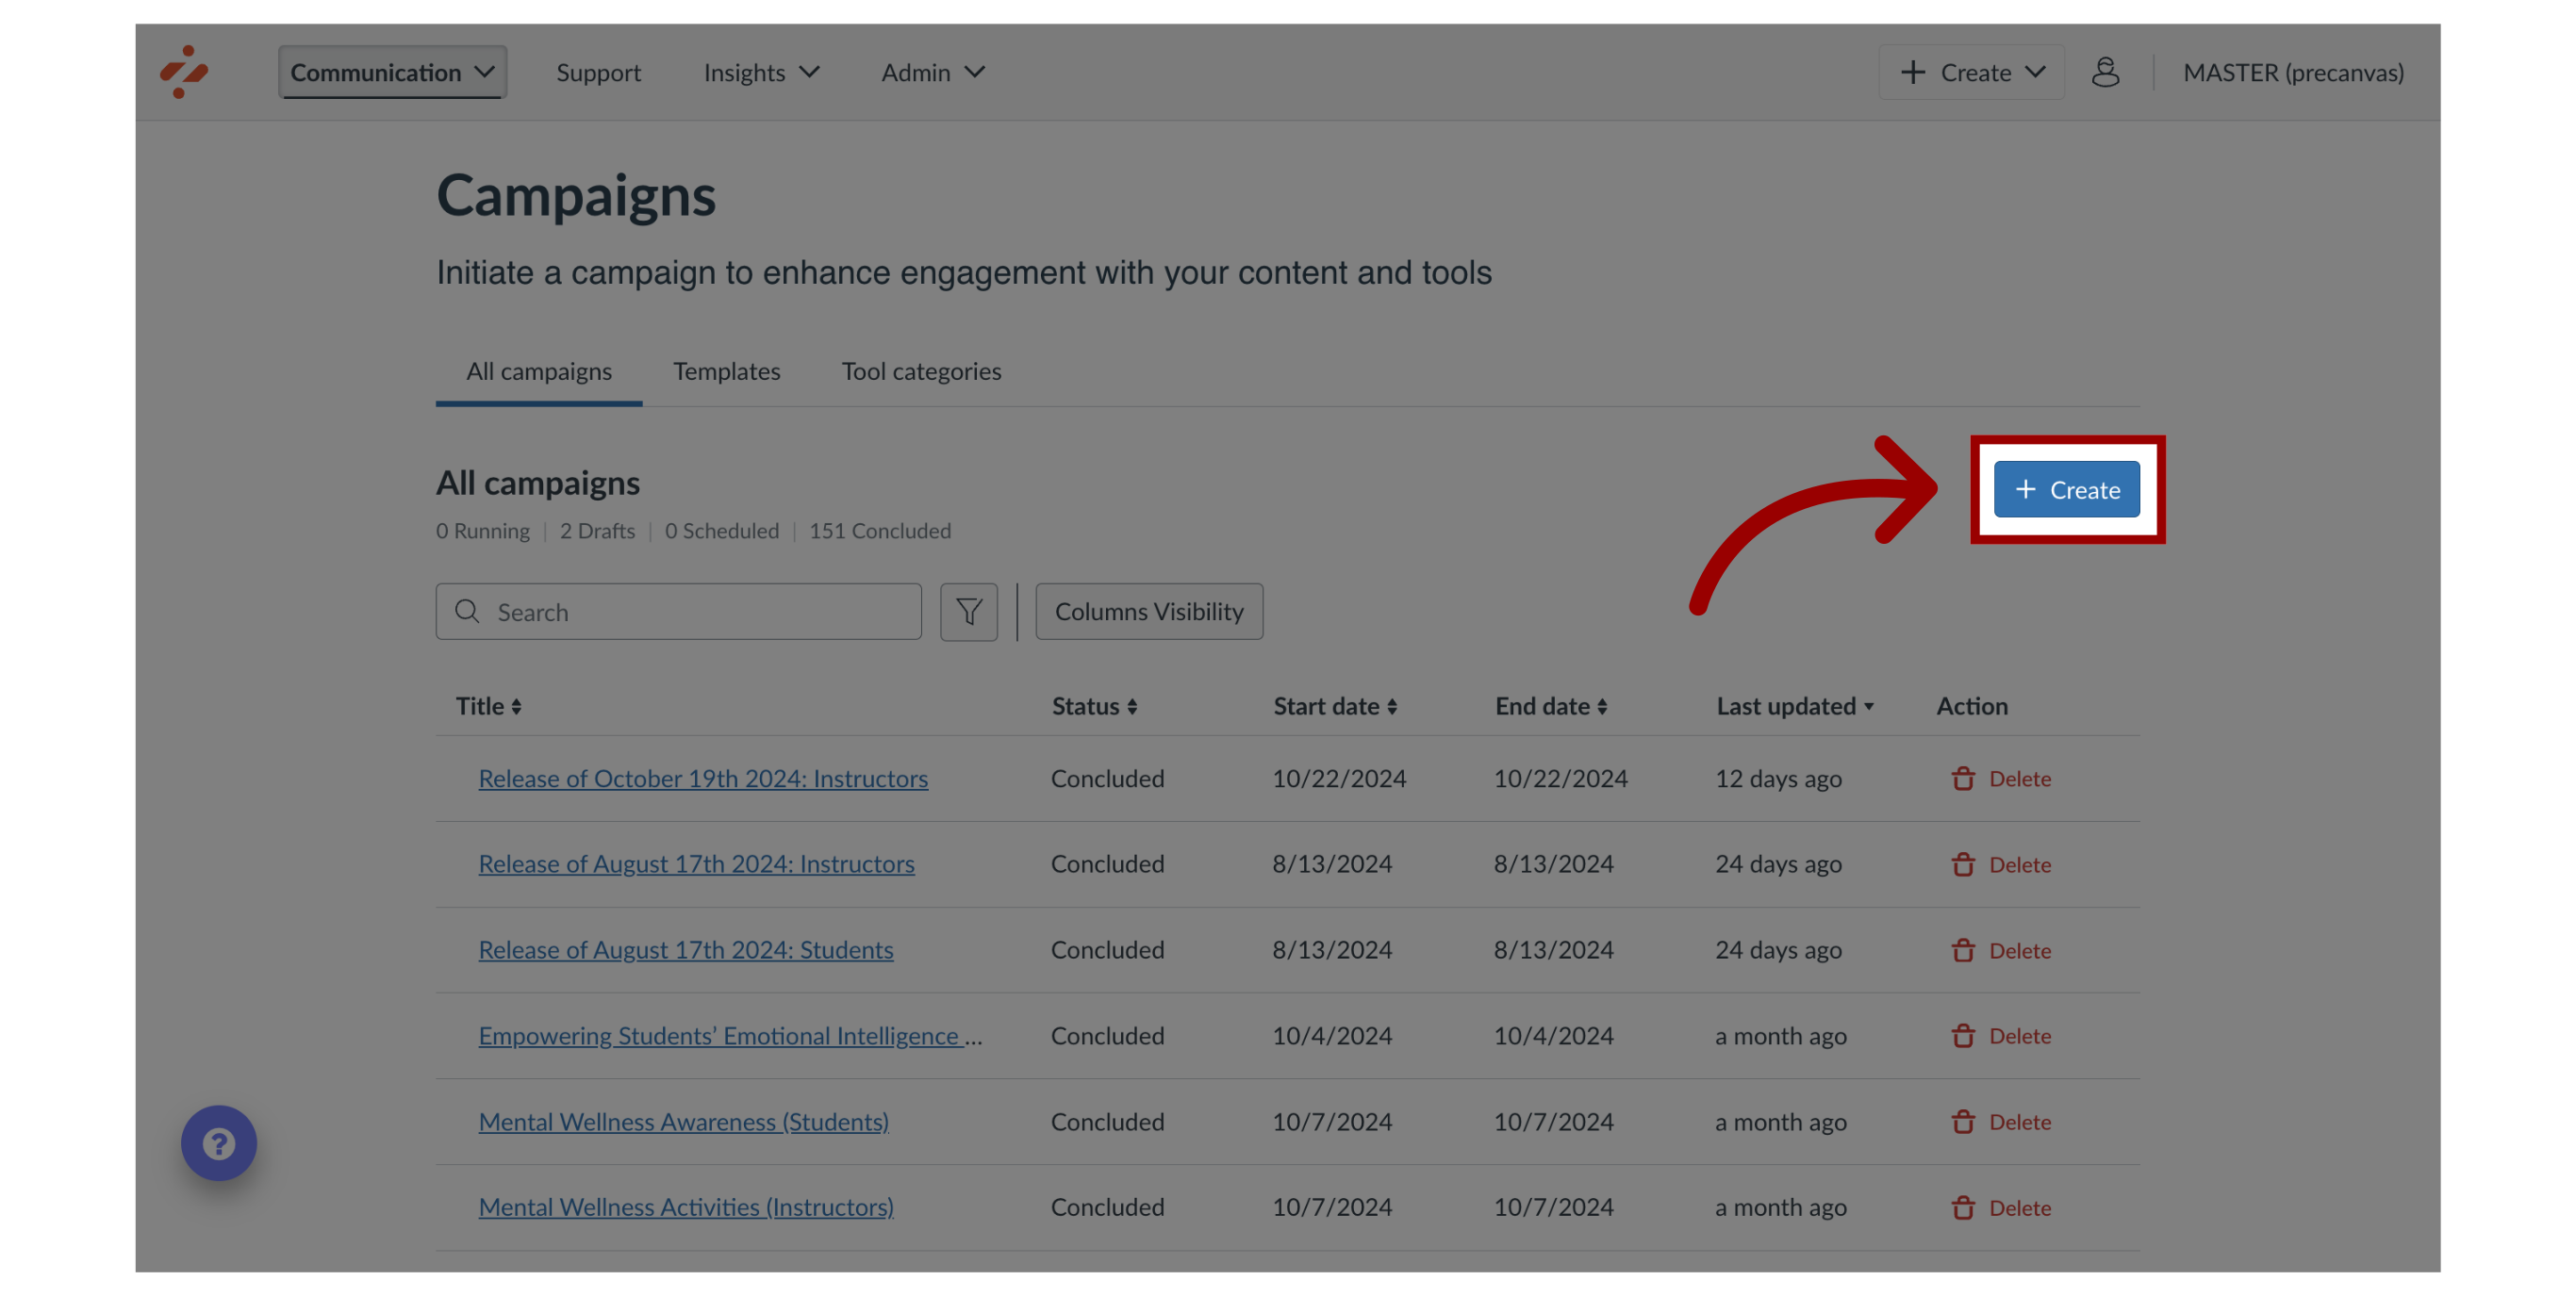
2. Create Walkthrough
Click the Create button.
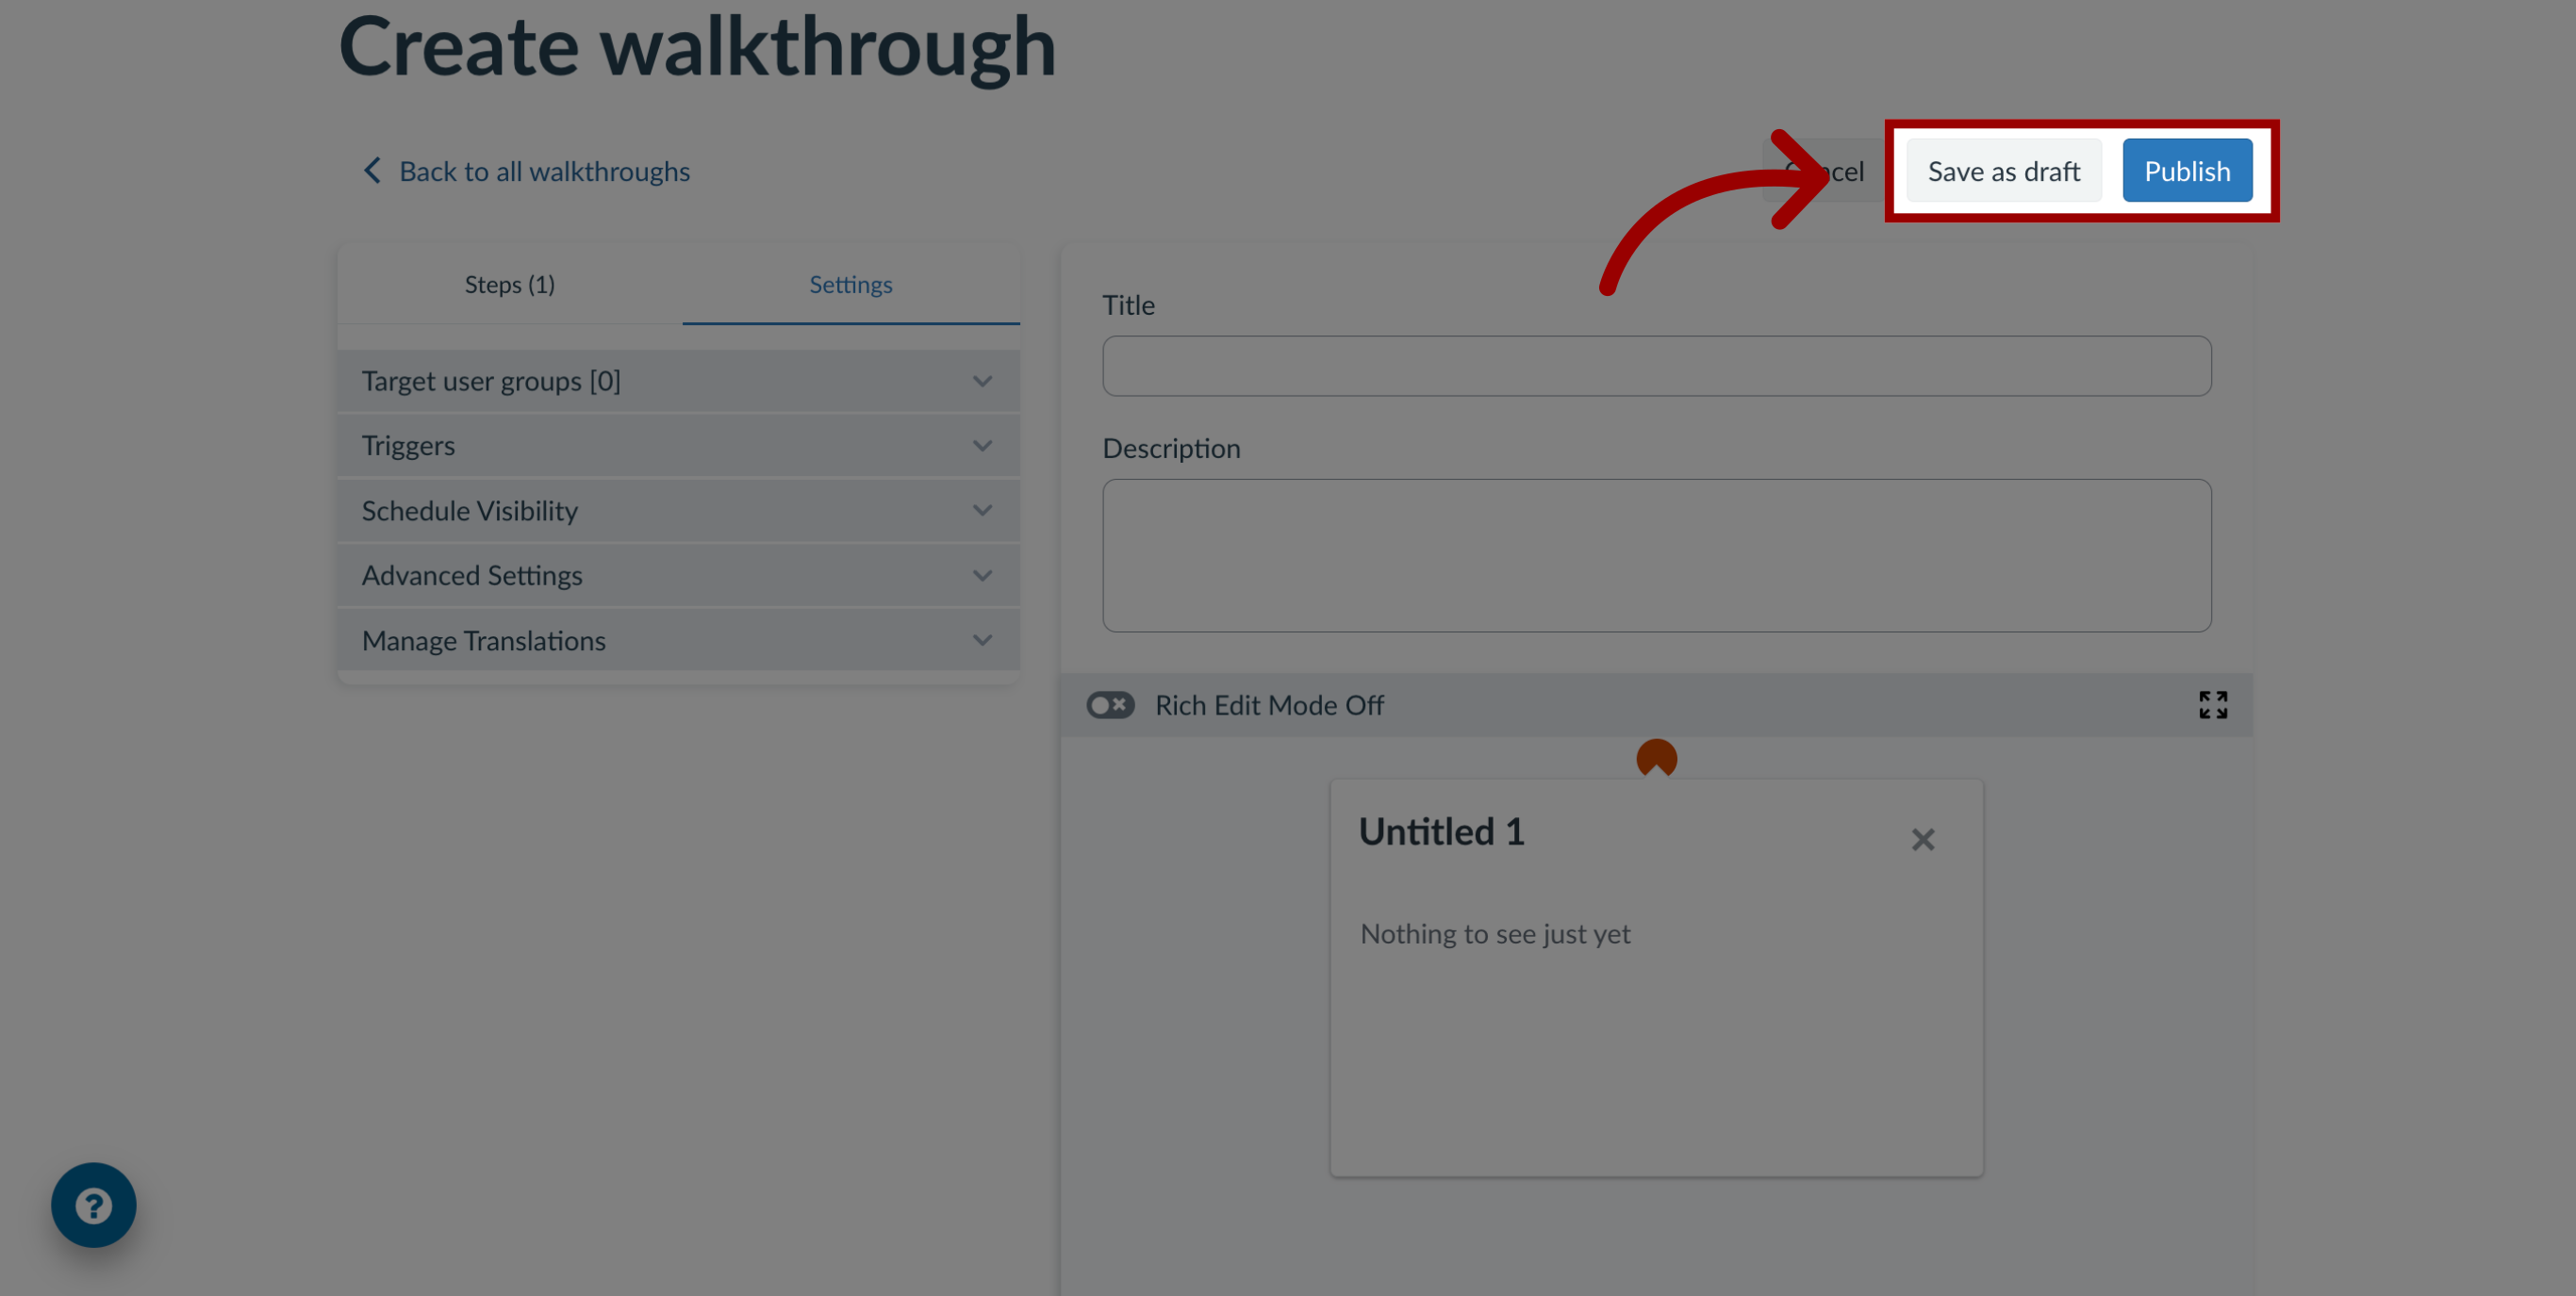
3. Add Walkthrough Details
In the Title field, enter a title for your walkthrough. In the Description field, add description text.

4. View Title
In the Untitled 1 field, view the title you entered.
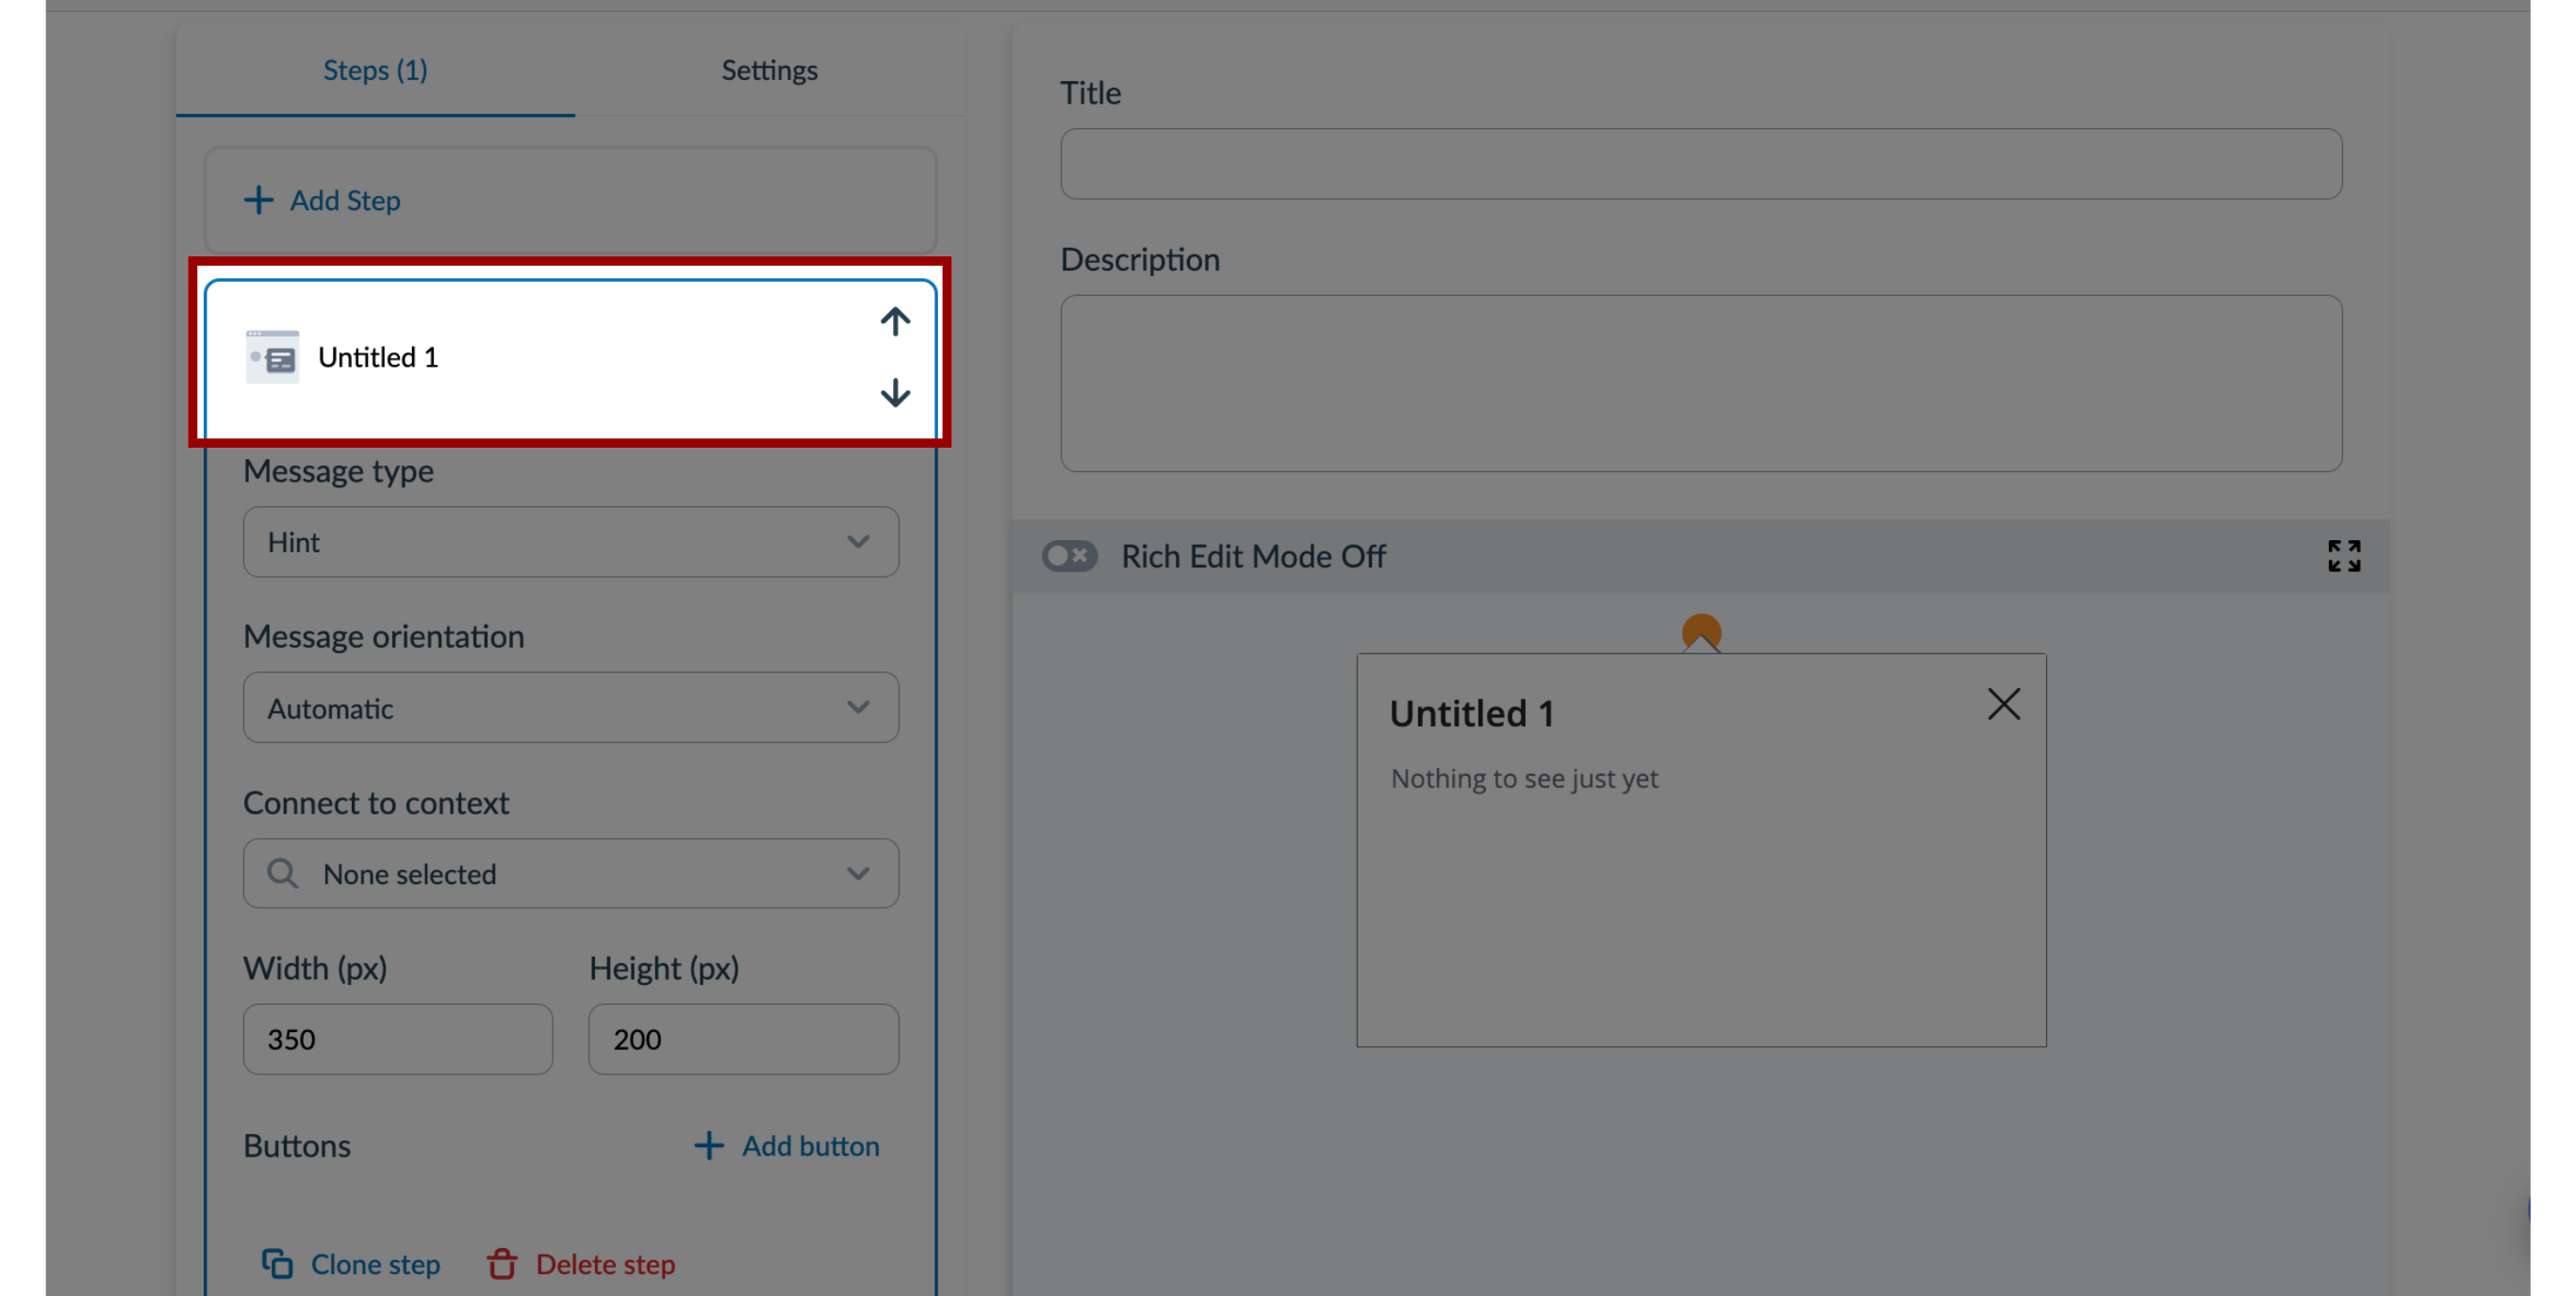
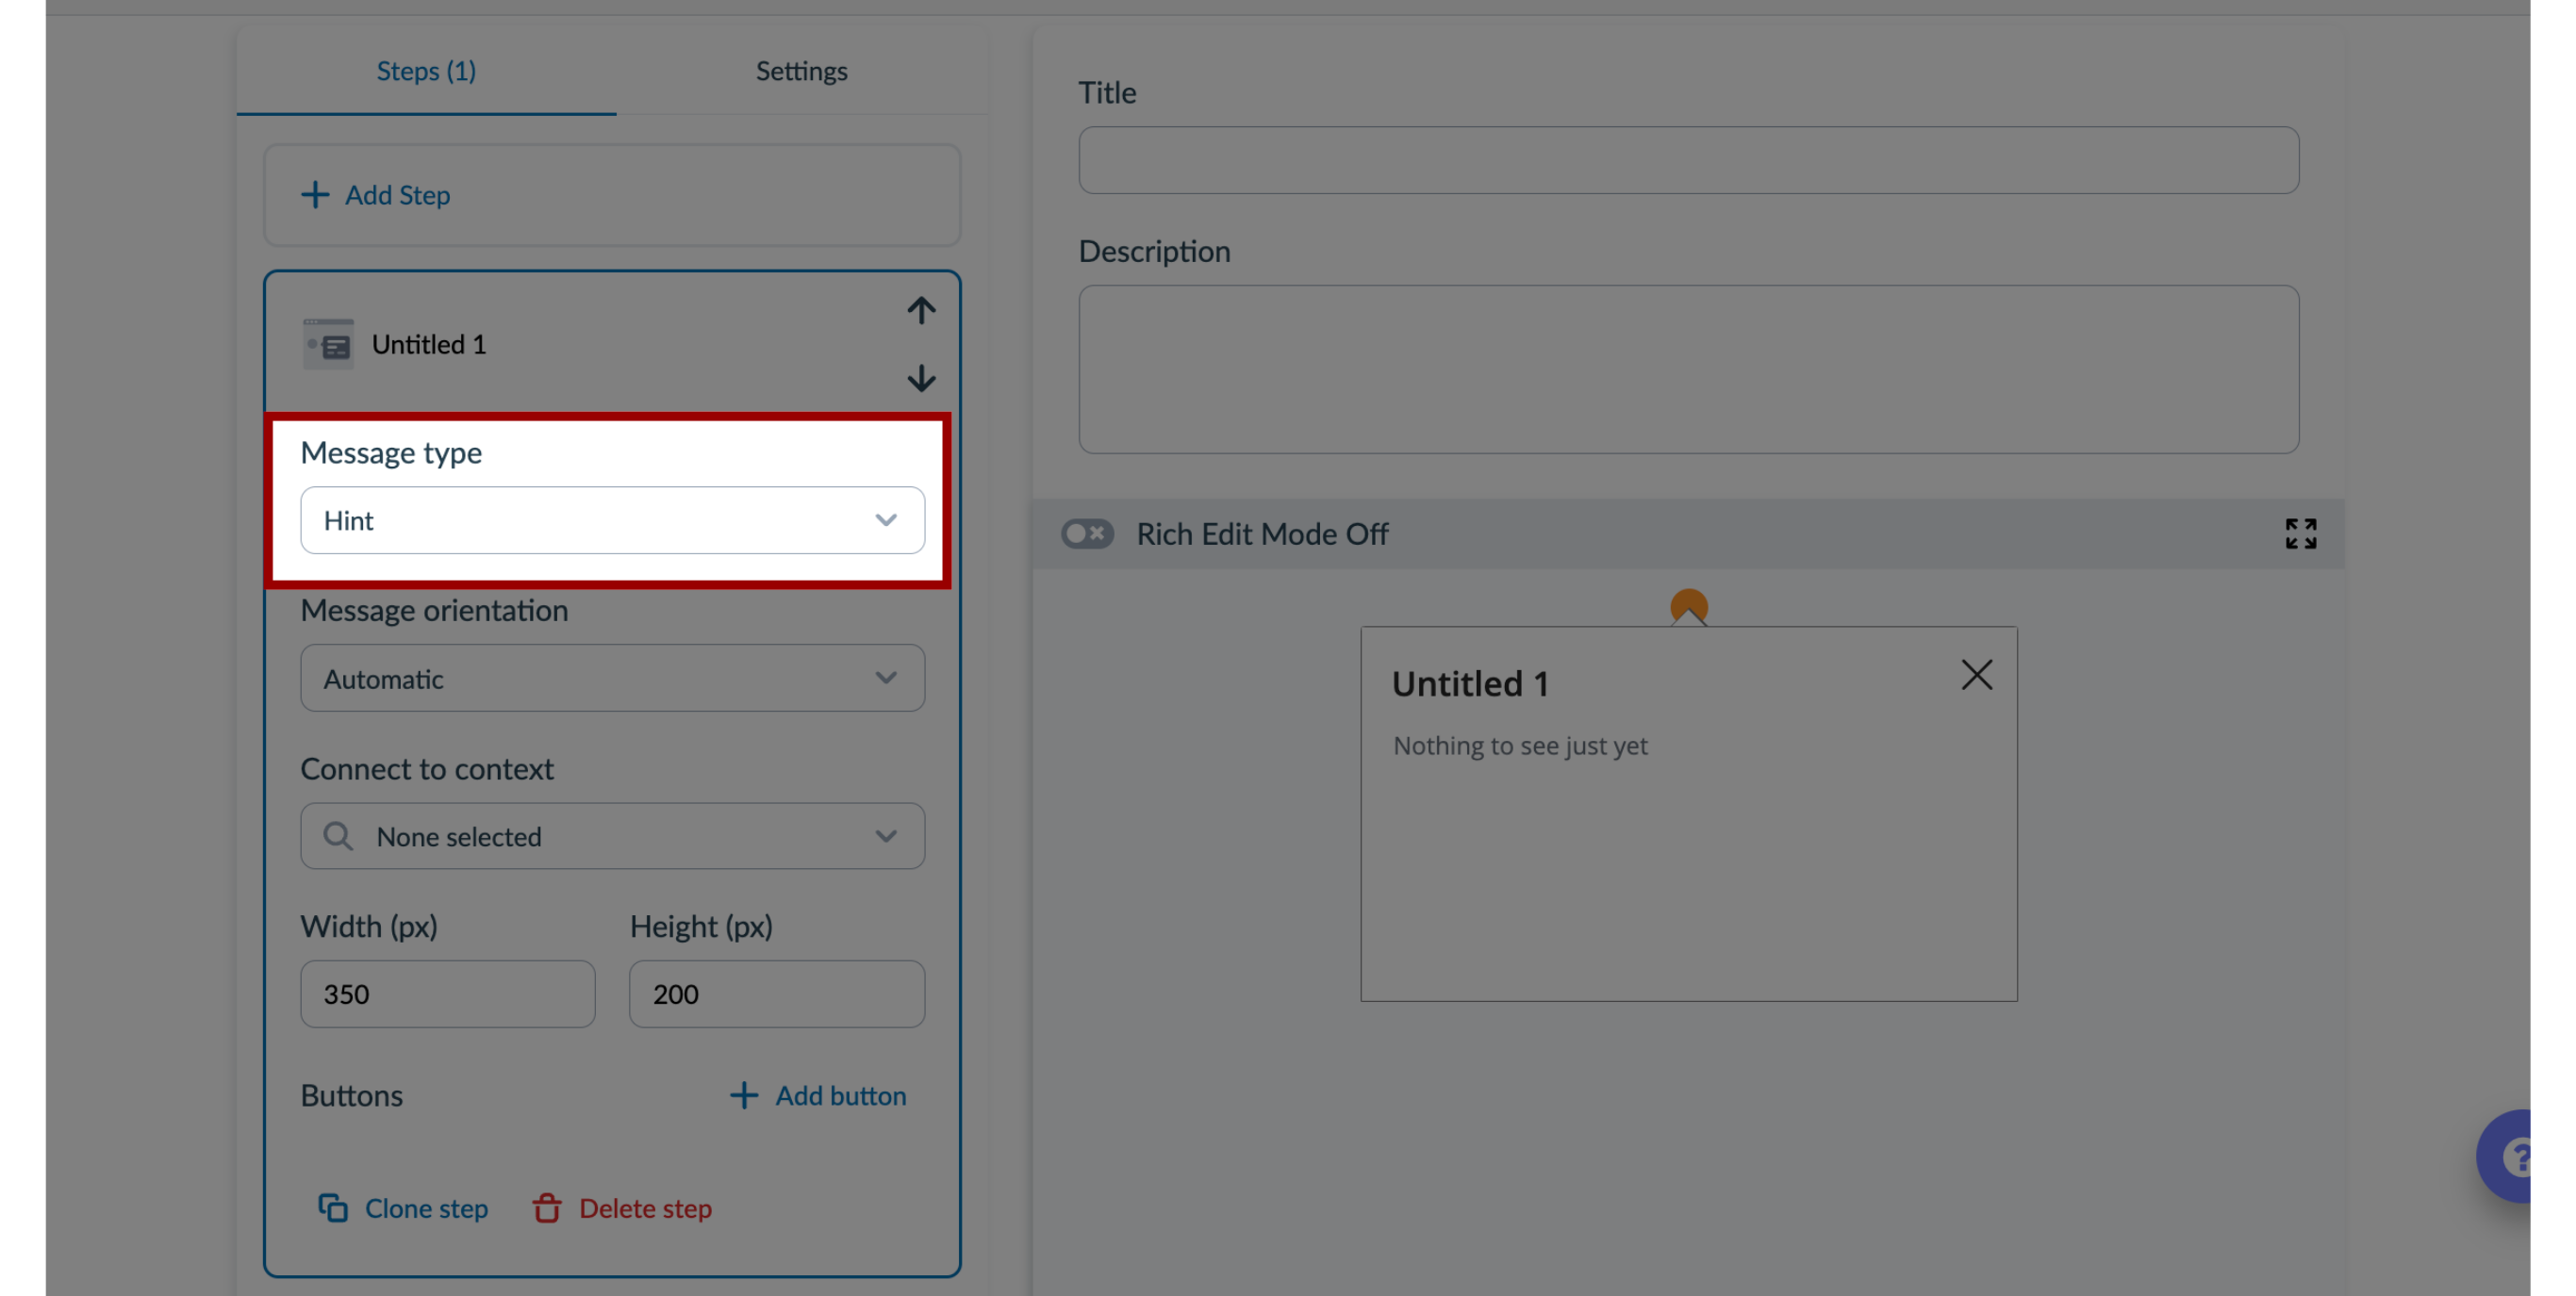
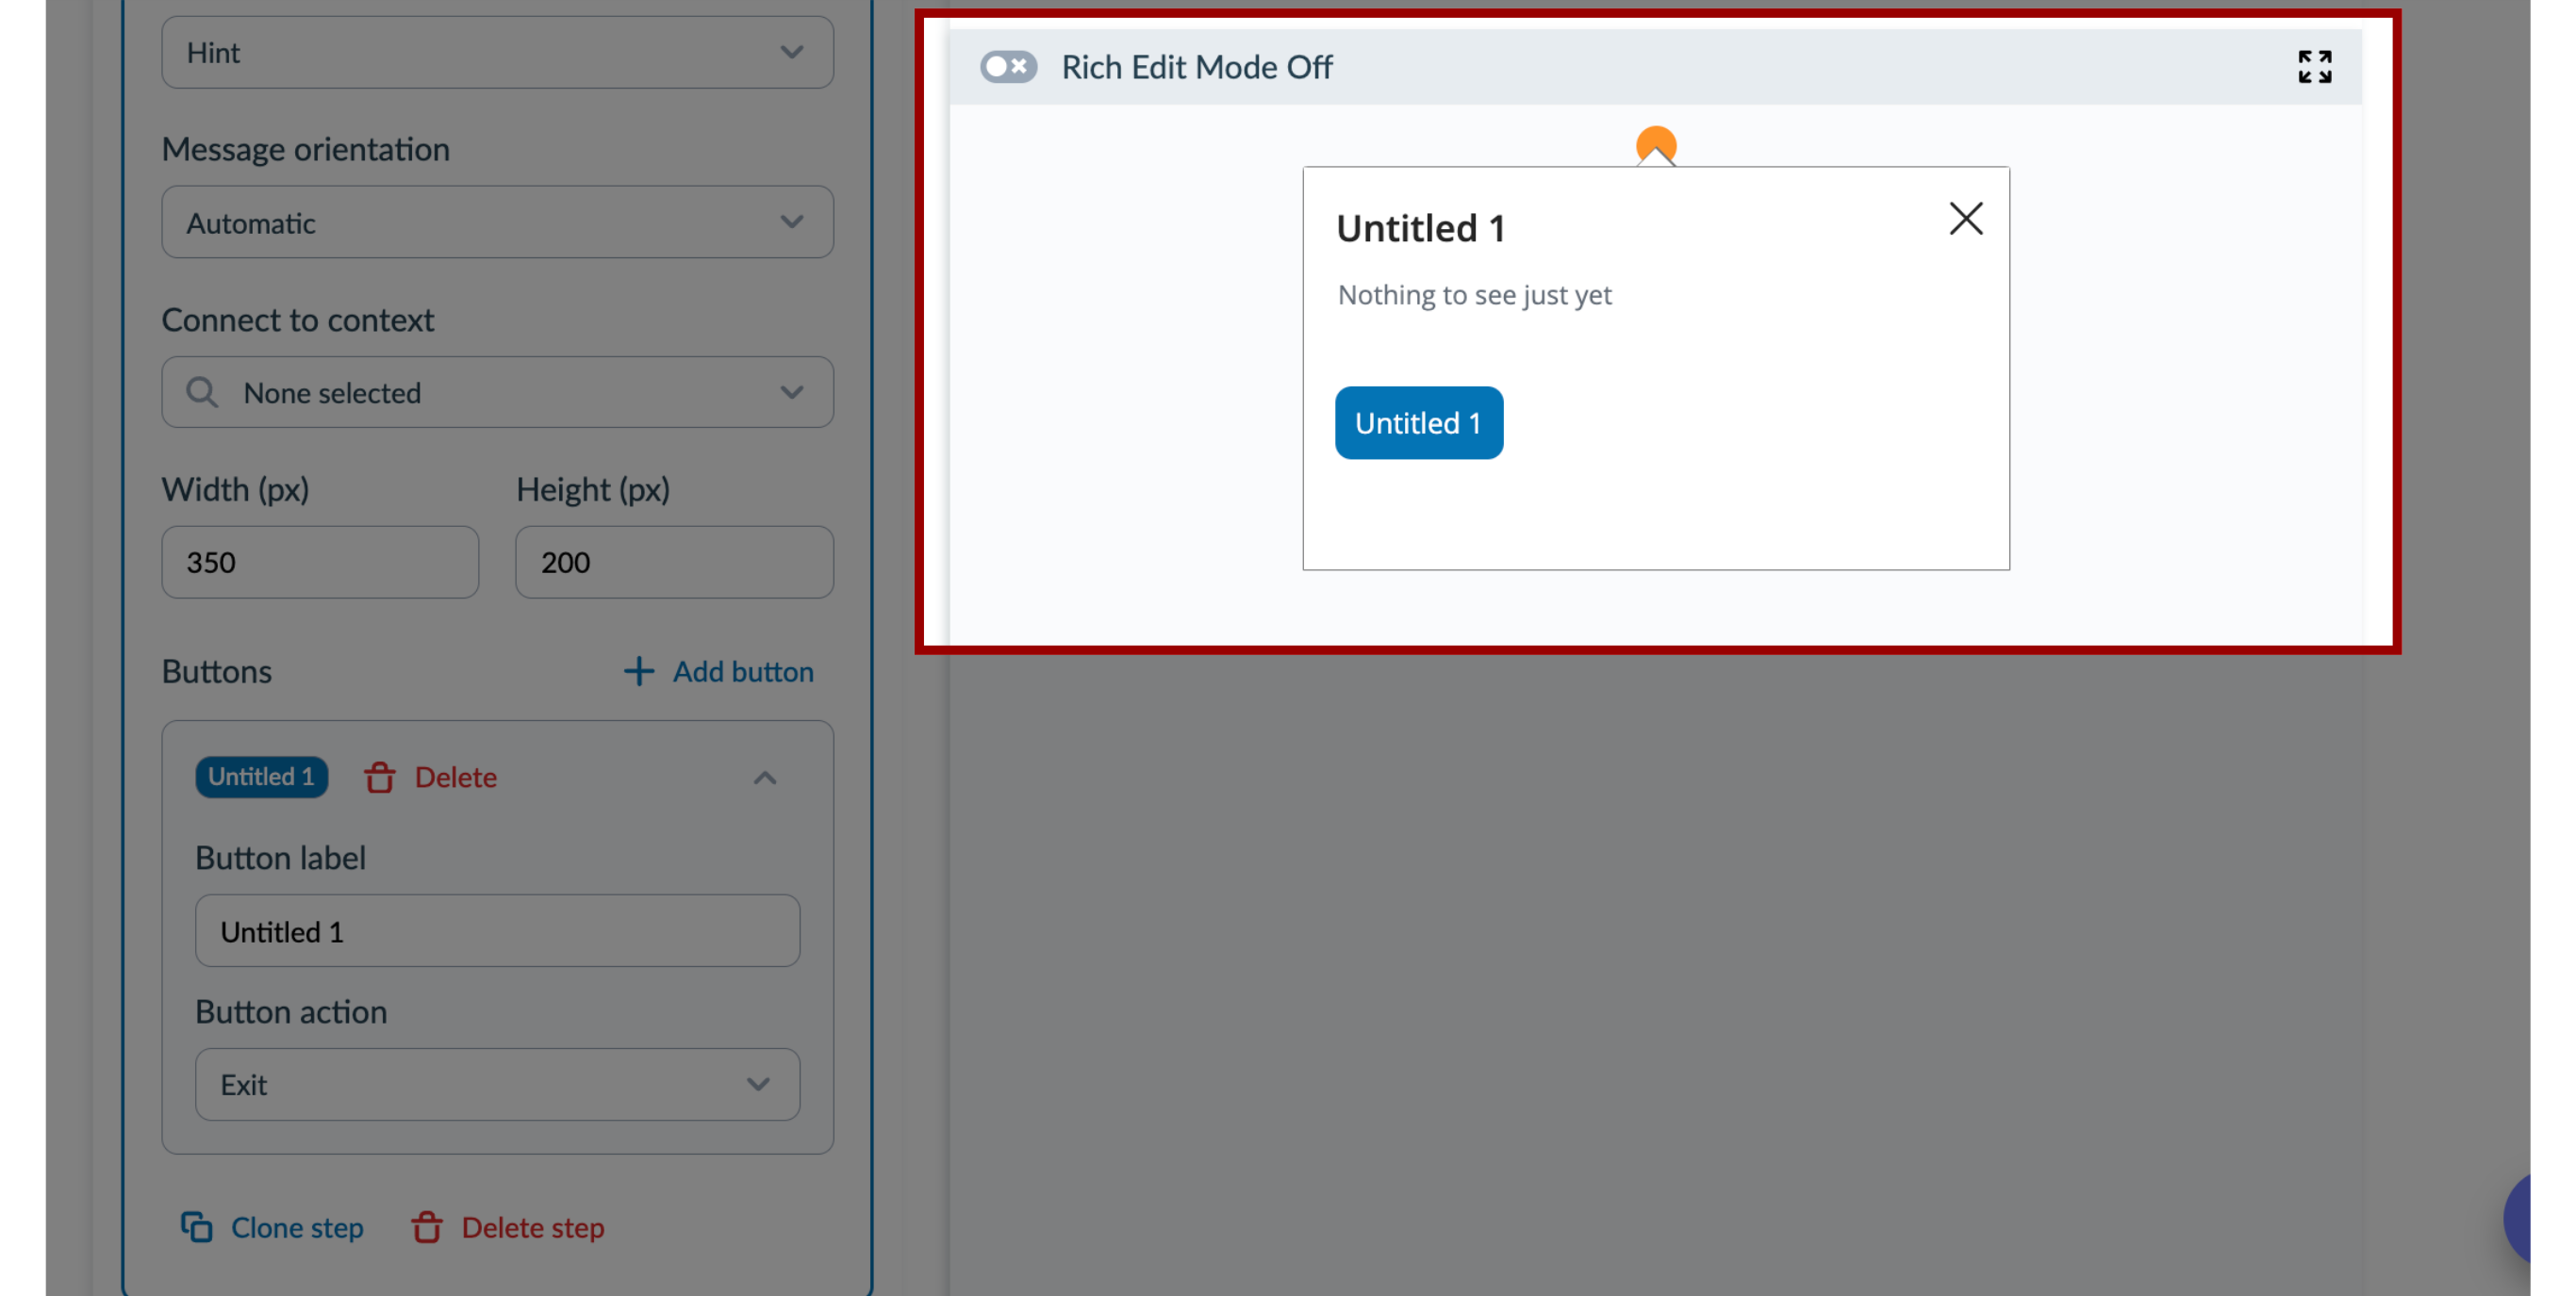
5. Select Message Type
In the Message type drop-down menu, select the message type you would like to display. You can select between hint, pop-up, or systray messages.
6. Select Message Orientation
In the Message orientation drop-down menu, select where you would like to display your step.

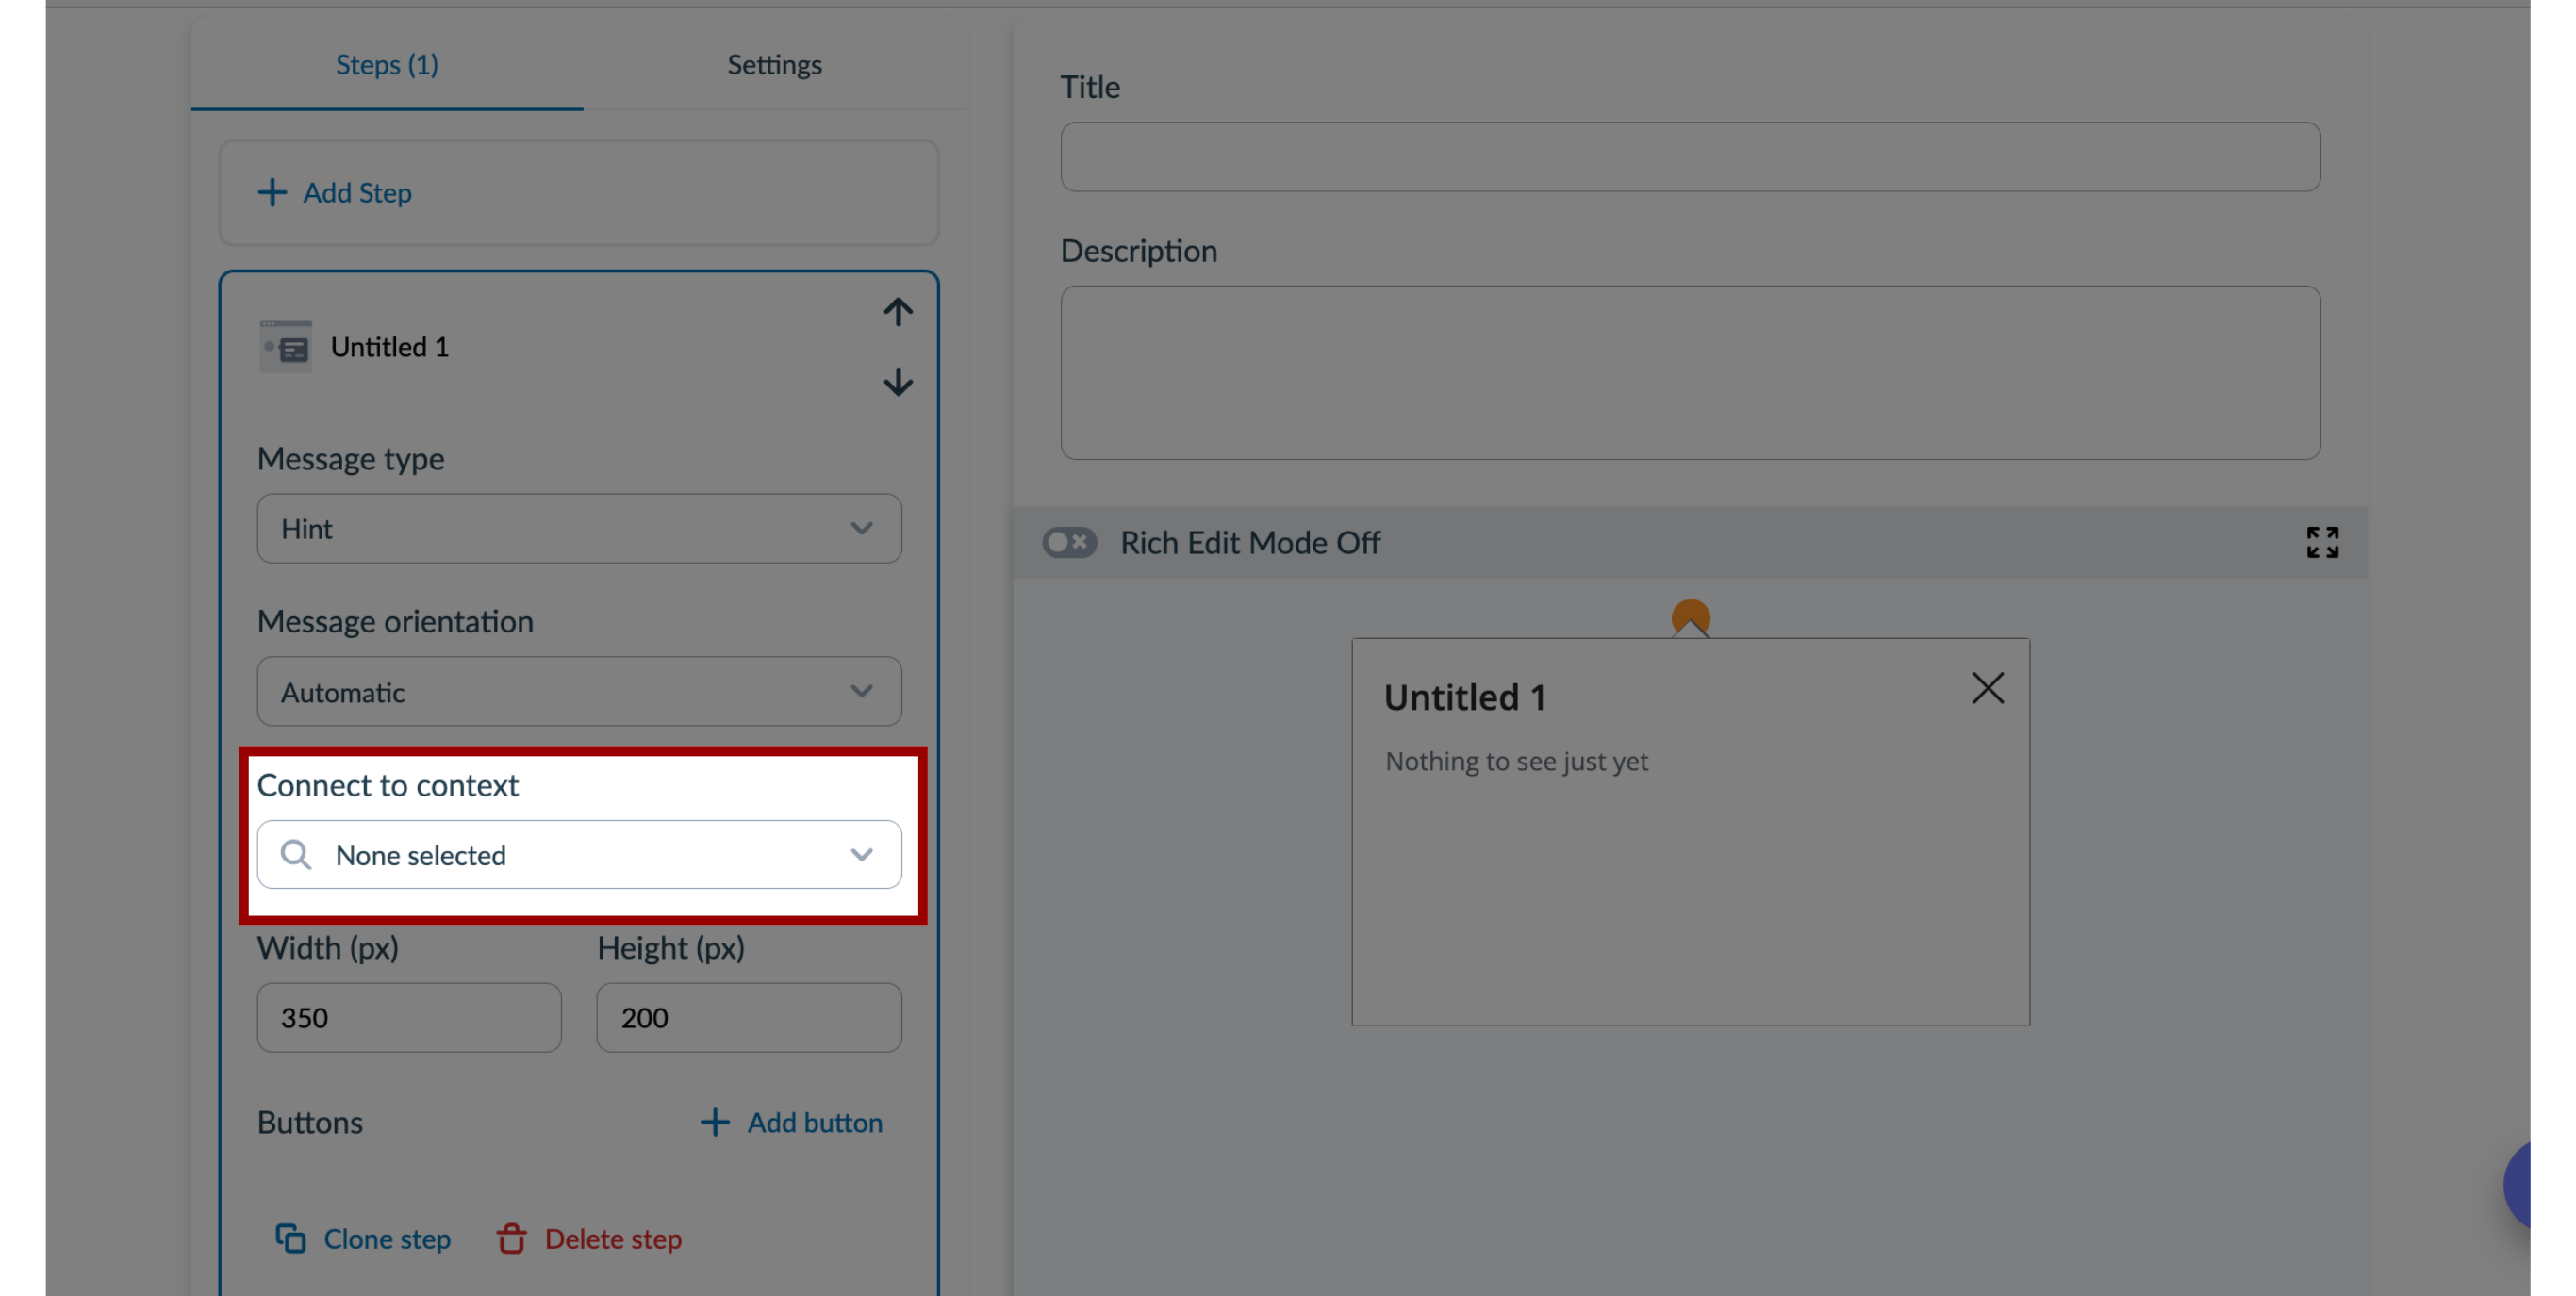
7. Select Context
In the Connect to context drop-down menu, select where you want the step to display. Connected contexts display where the step is displayed.
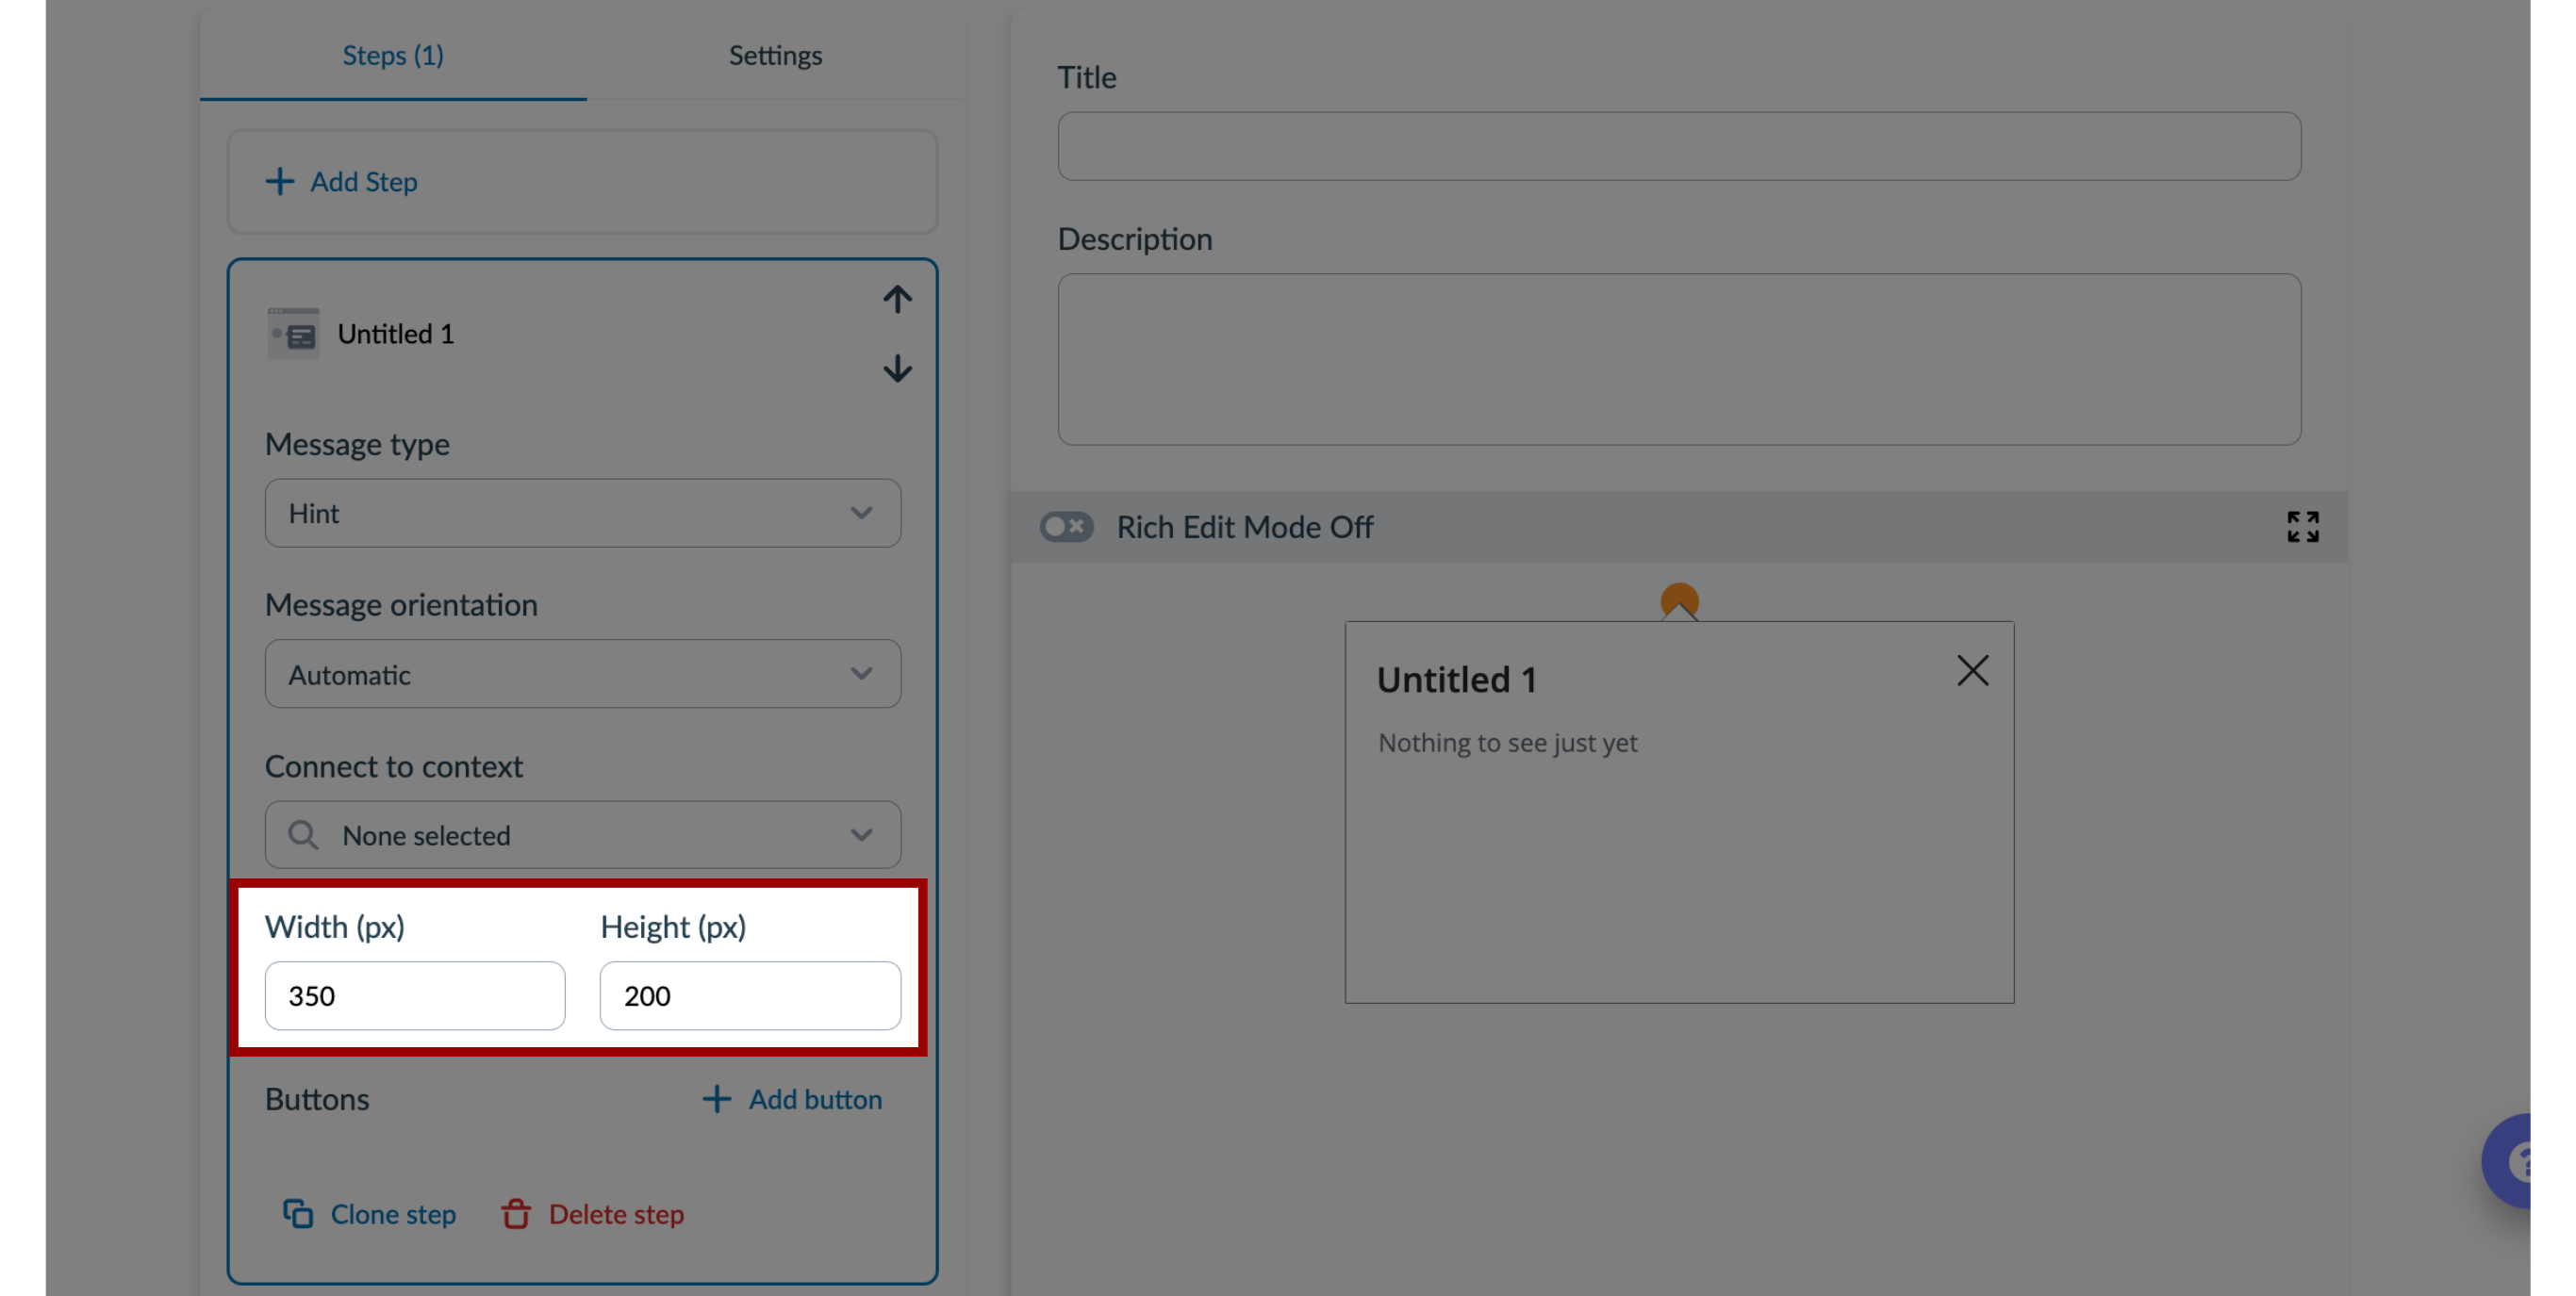
8. Select Size
If you would like to modify the size of your message, enter a number in the Width field and Height field.
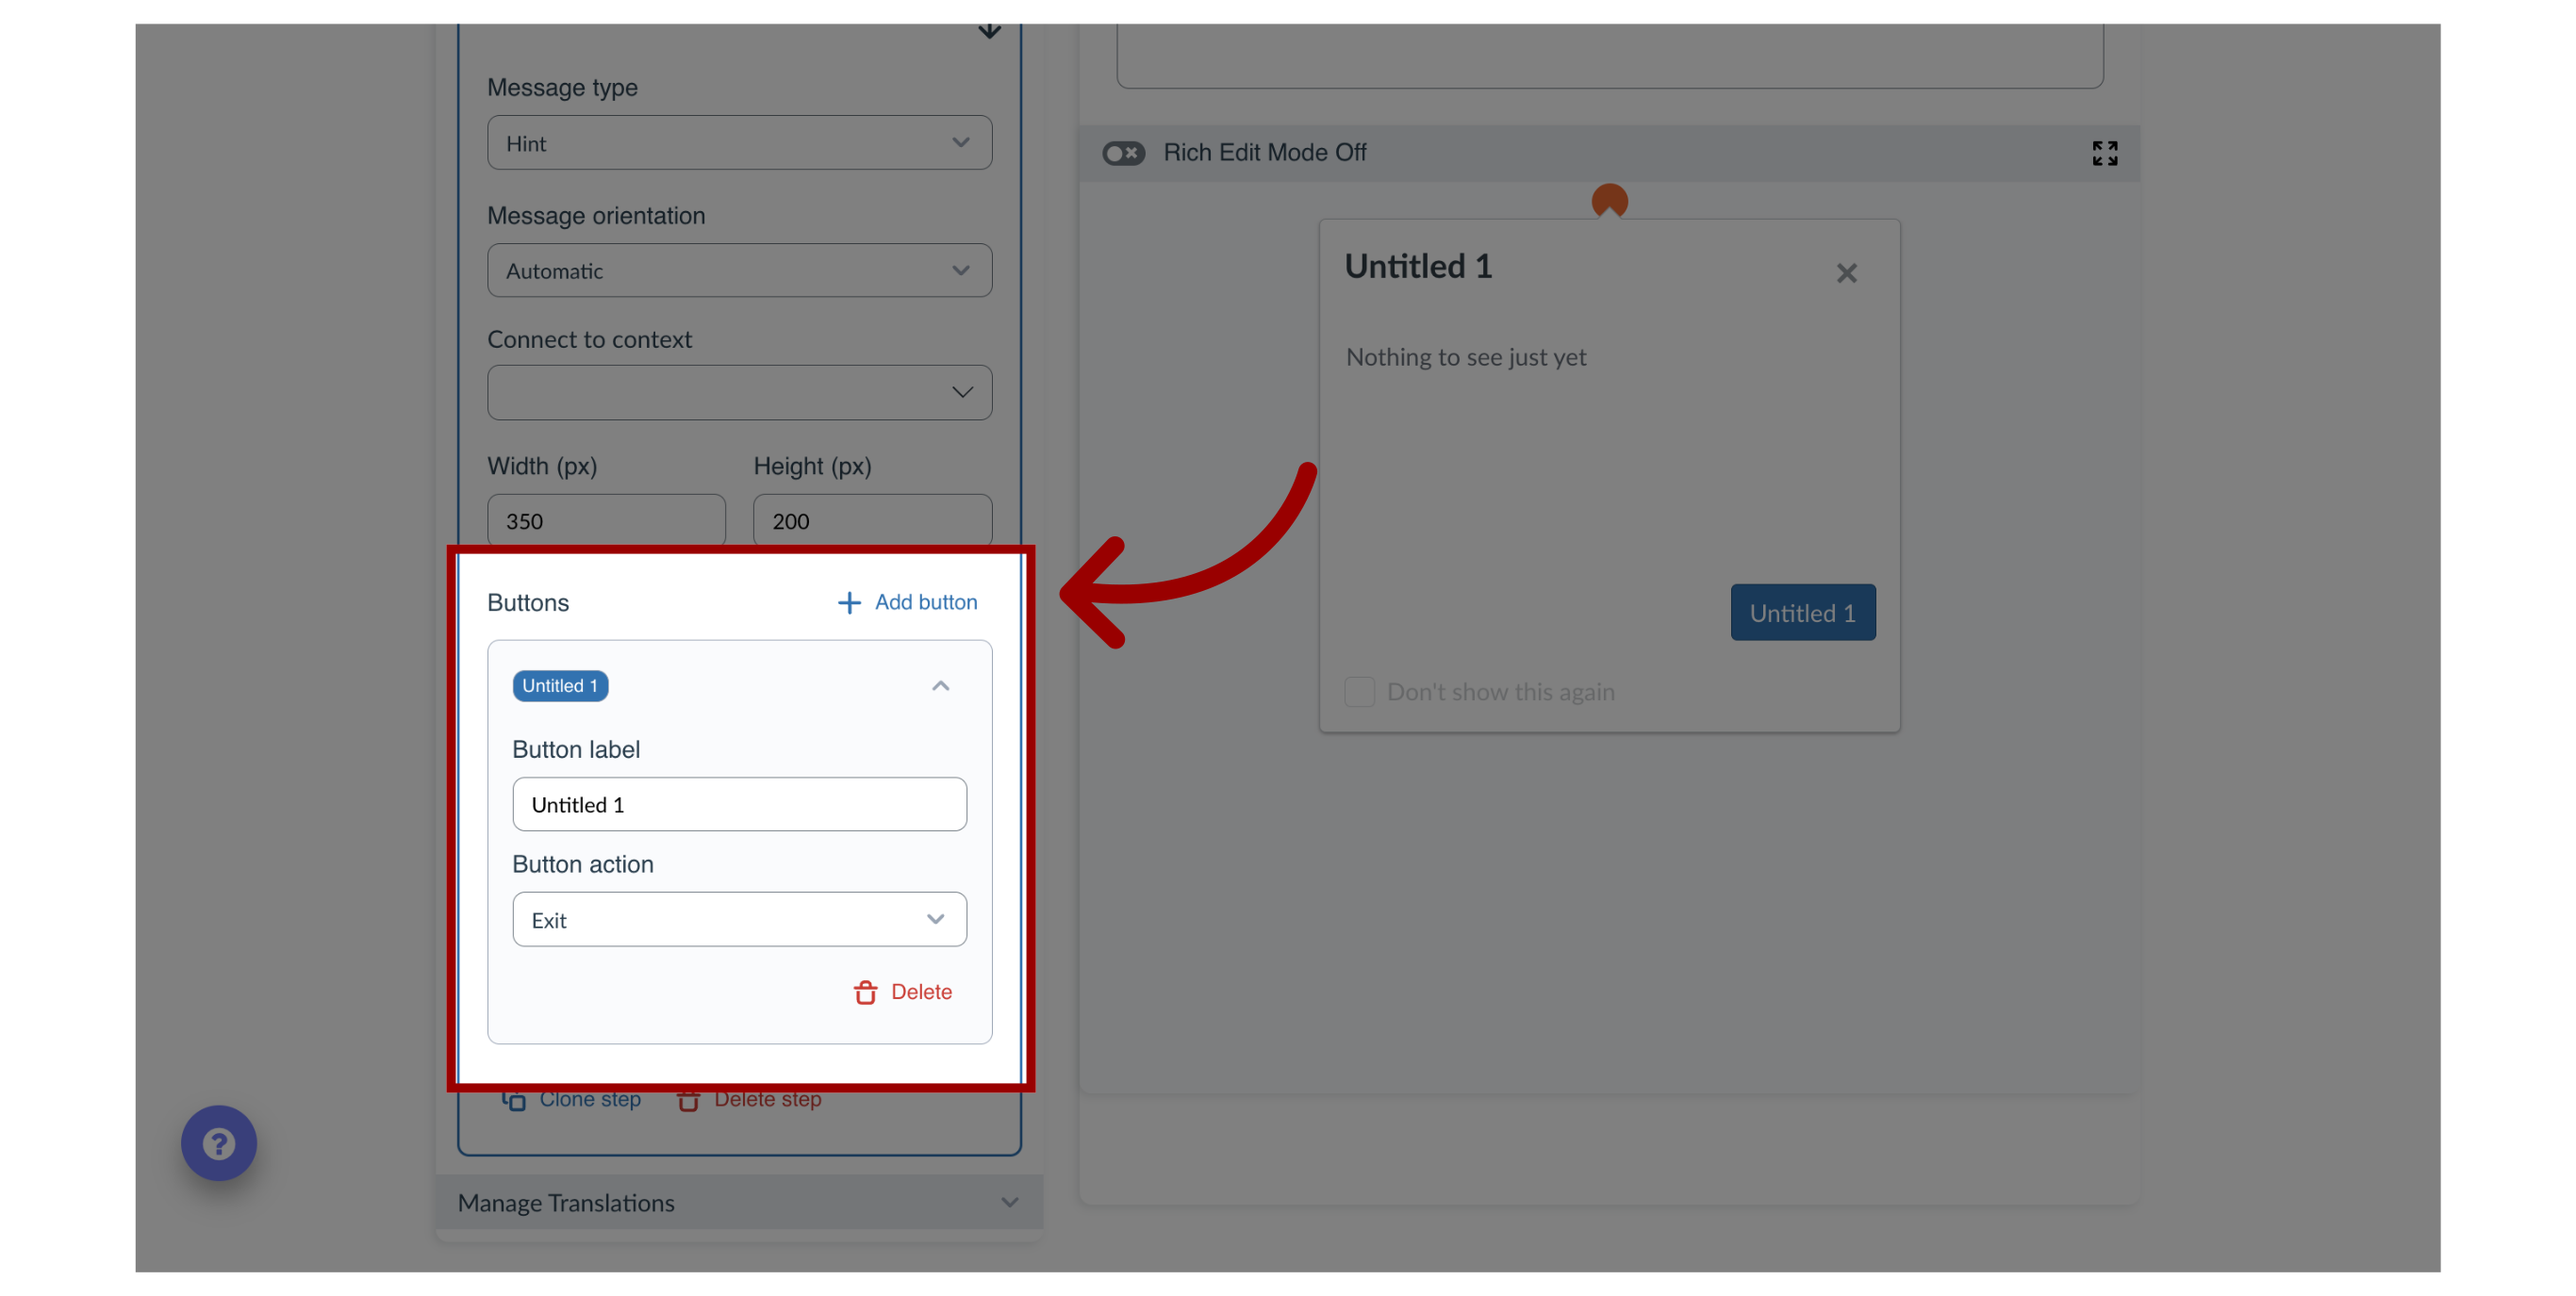
9. Add Button
To add a button, click the Add button. In the Button label field, type the button name.
To change the action of the button, click the Button action drop-down menu. Depending on the order of the button’s action, you can select between next, previous, and exit.
10. Add Step Details
To enable the rich content editor, click the Rich Edit Mode toggle button.
In the Untitled field, enter a step title.
In the Nothing to see here just yet field, type the step description. If you have added a button to the step, it will display in the step description.
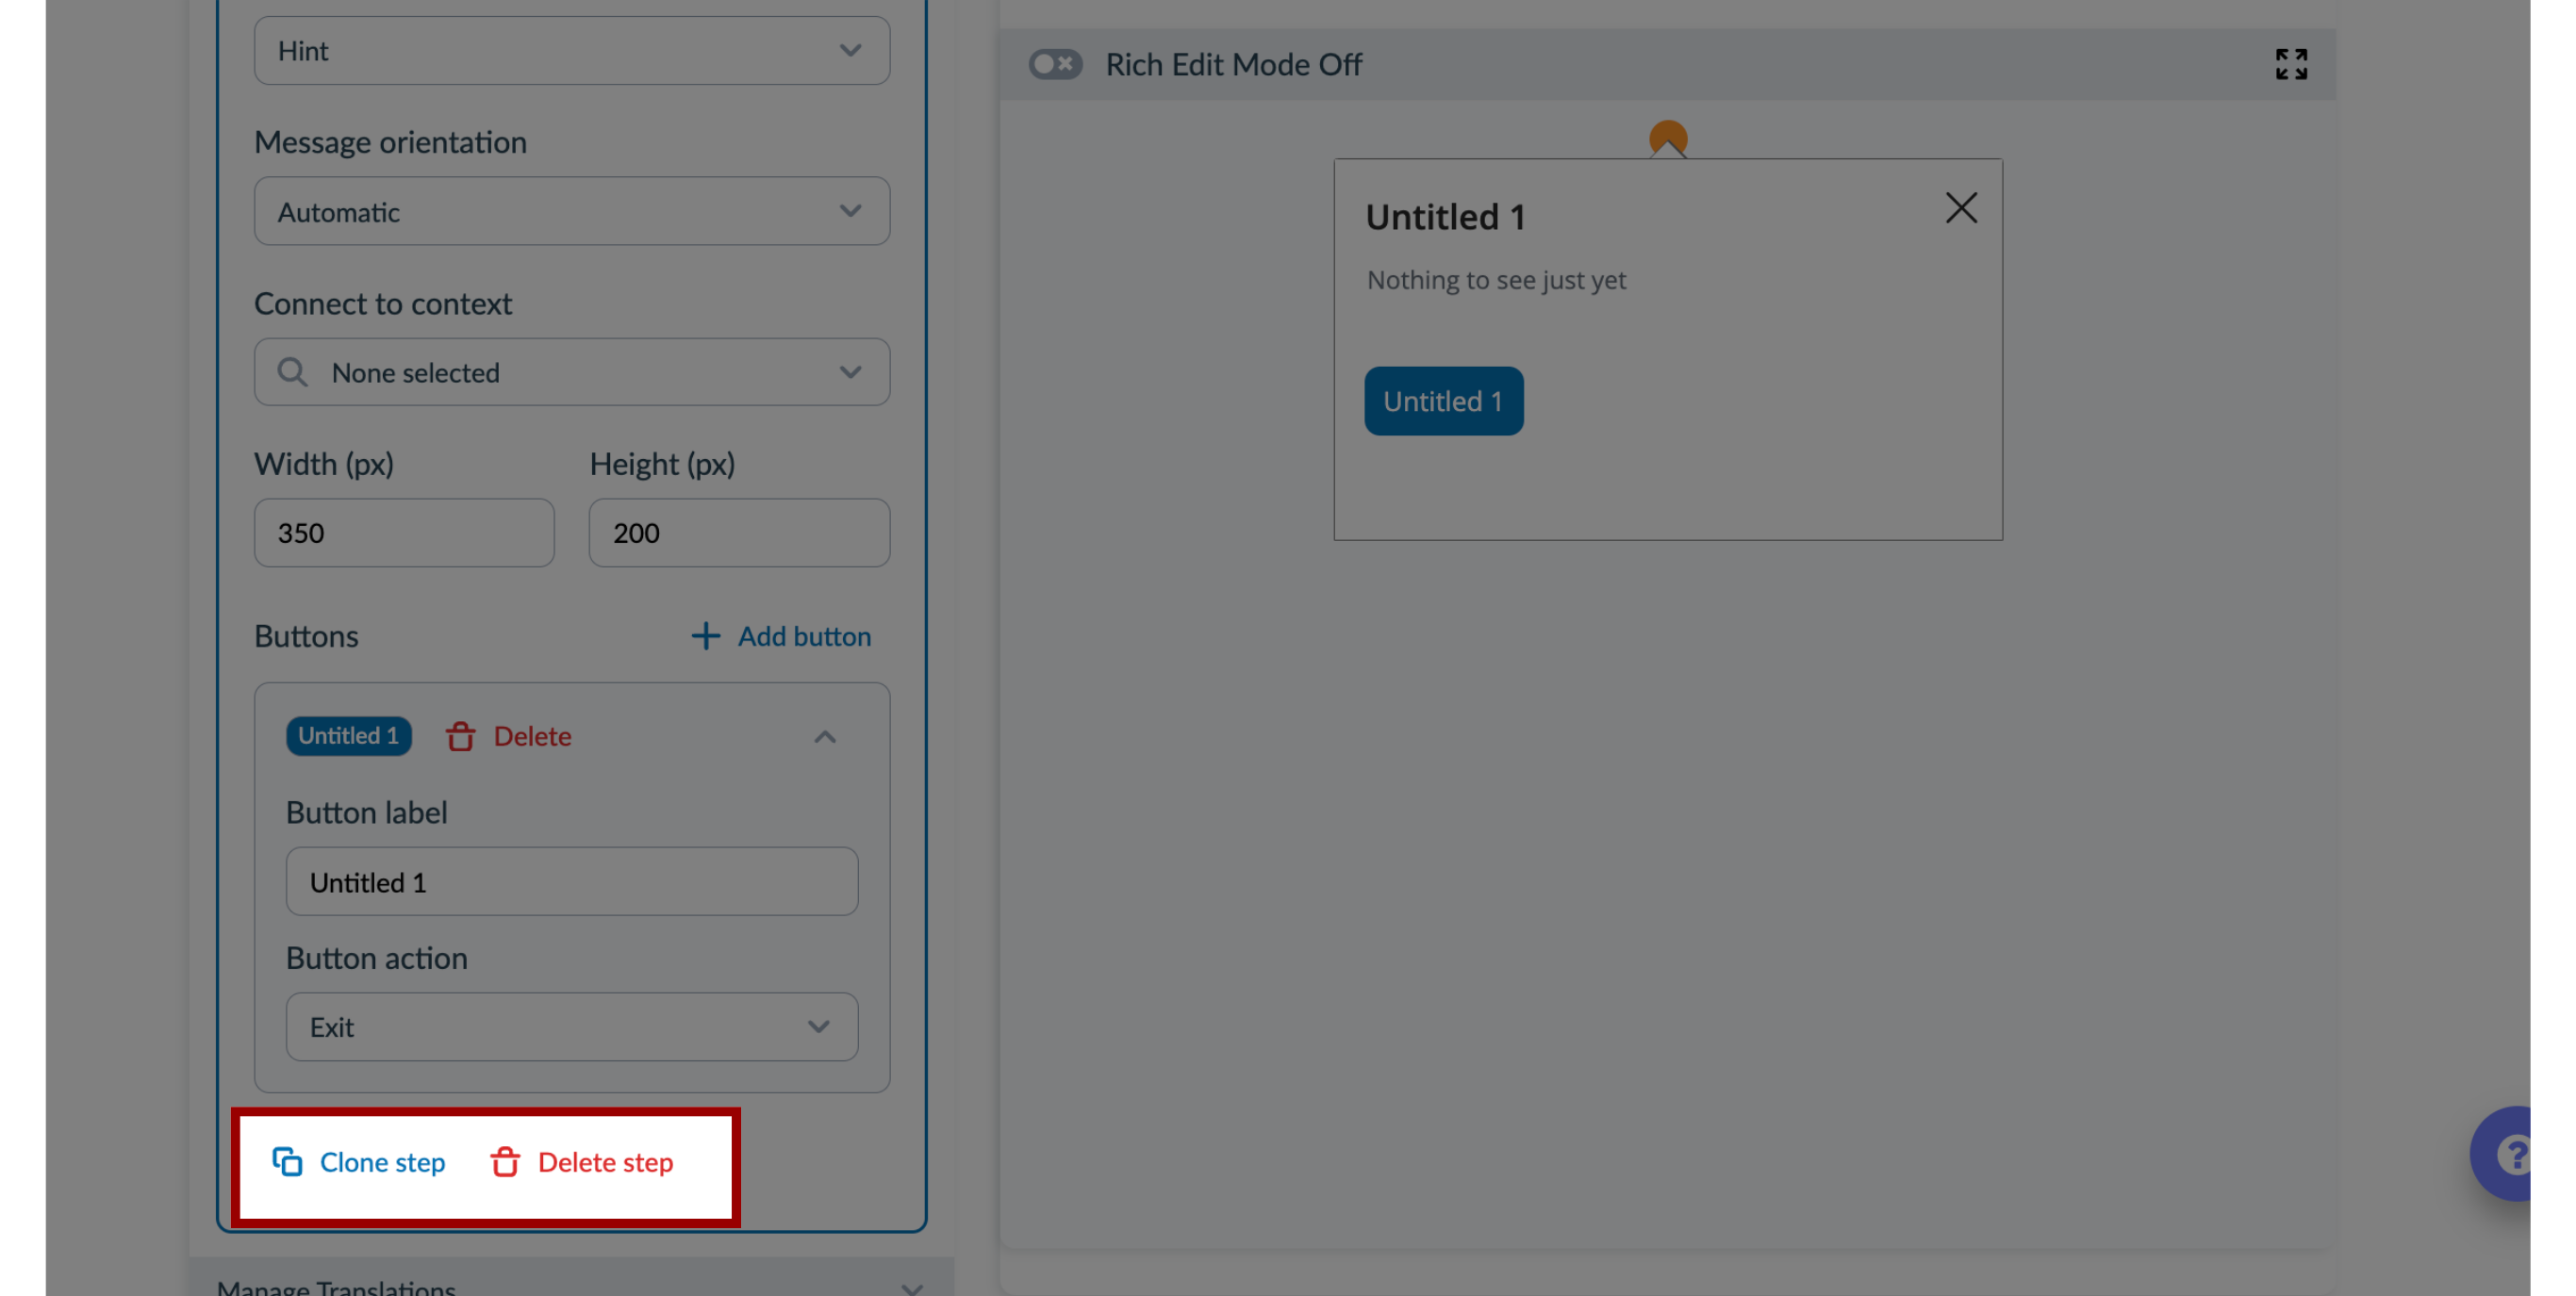
11. Additional Step Options
To duplicate and reuse a step, click the Clone step link. To delete a step, click the Delete step link.
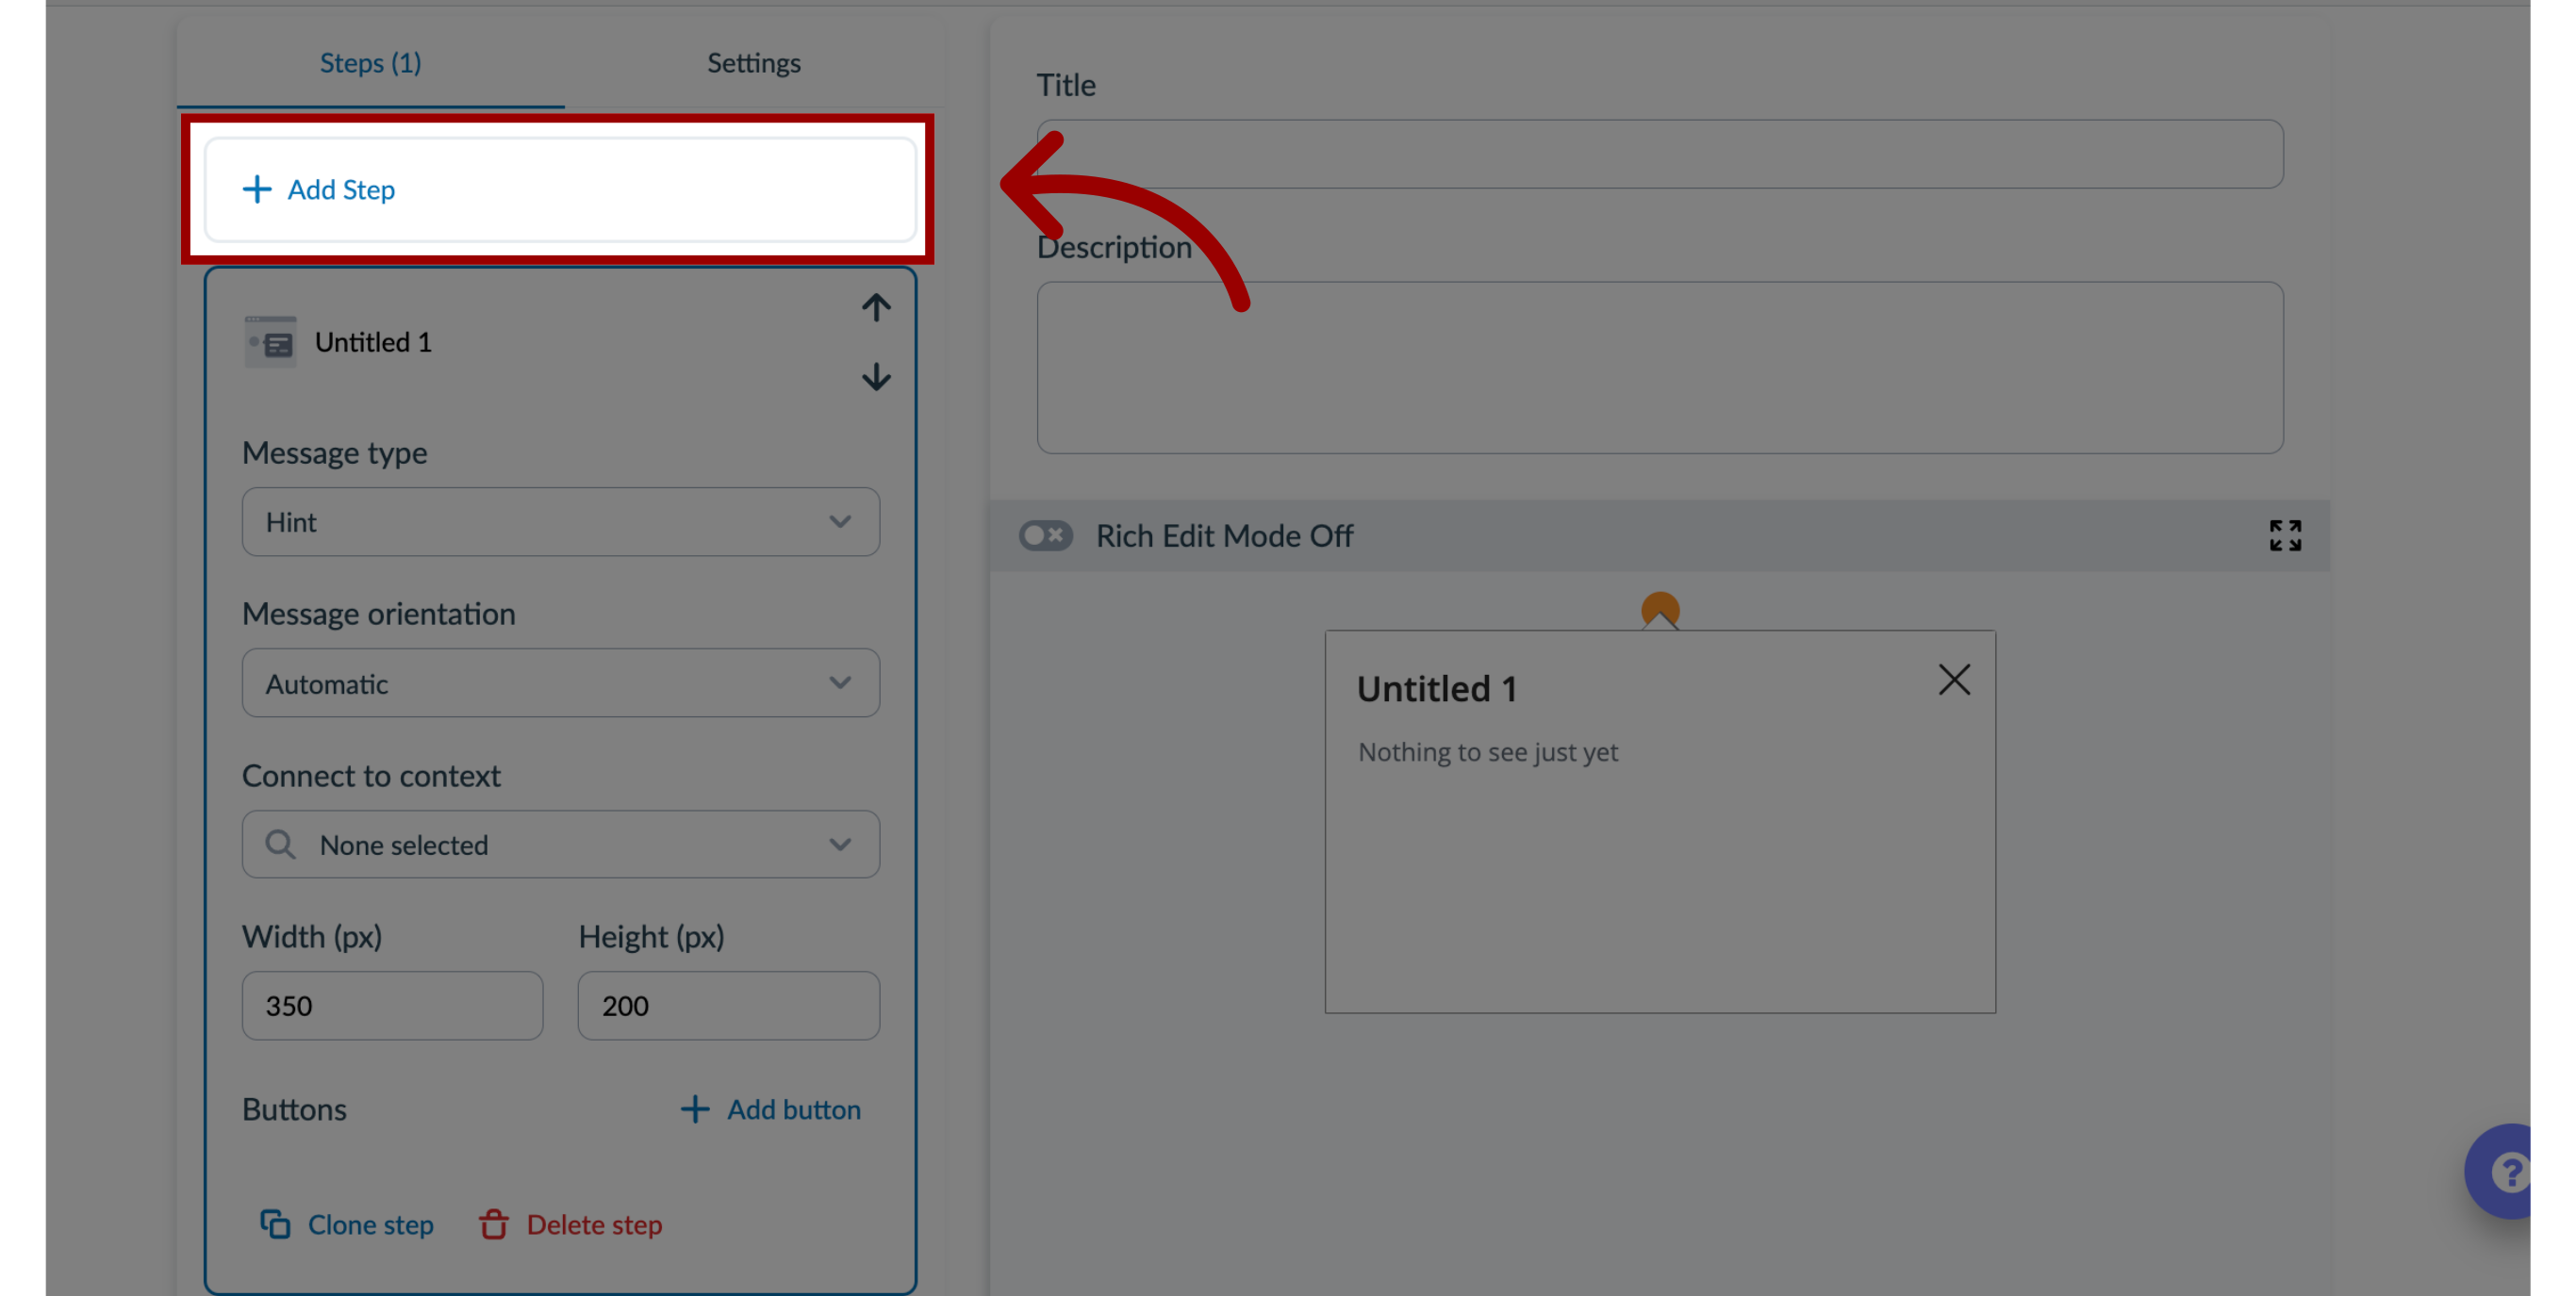
12. Add Additional Steps
To add additional steps to your Walkthrough, click the Add Step button.
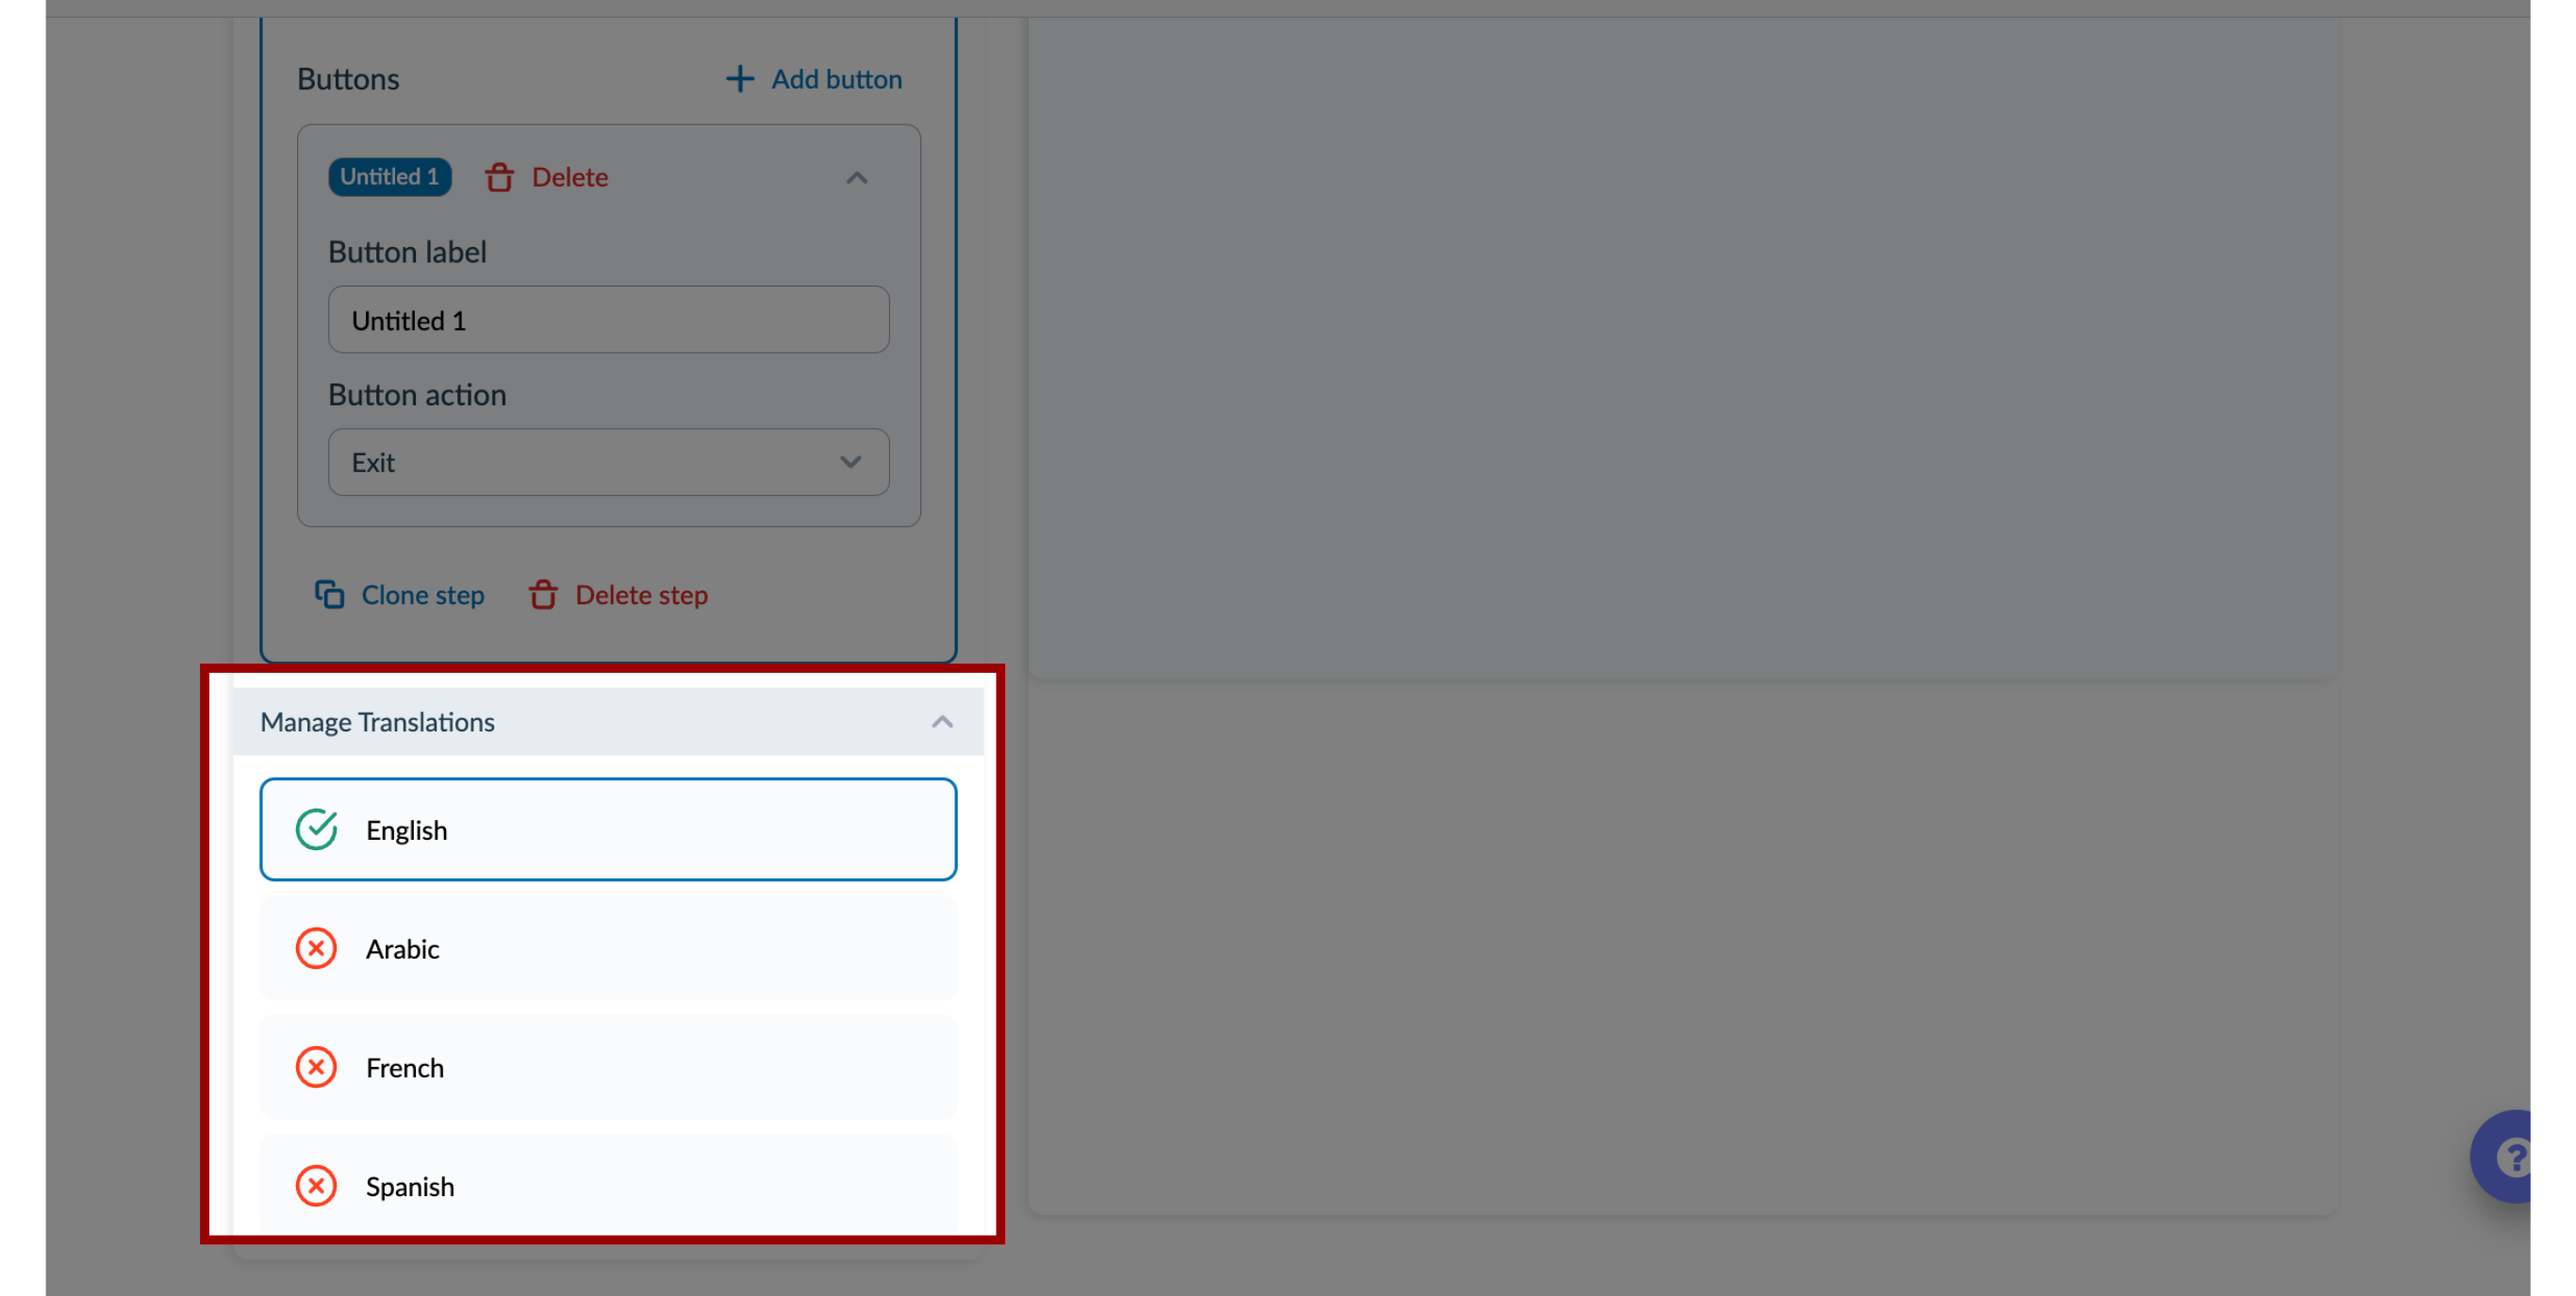
13. Manage Translations
In the Manage Translations section, click the Manage Translations drop-down menu. Click the language in which you want to add or edit the message.
14. Edit Settings
In the Settings tab, you can edit different settings.
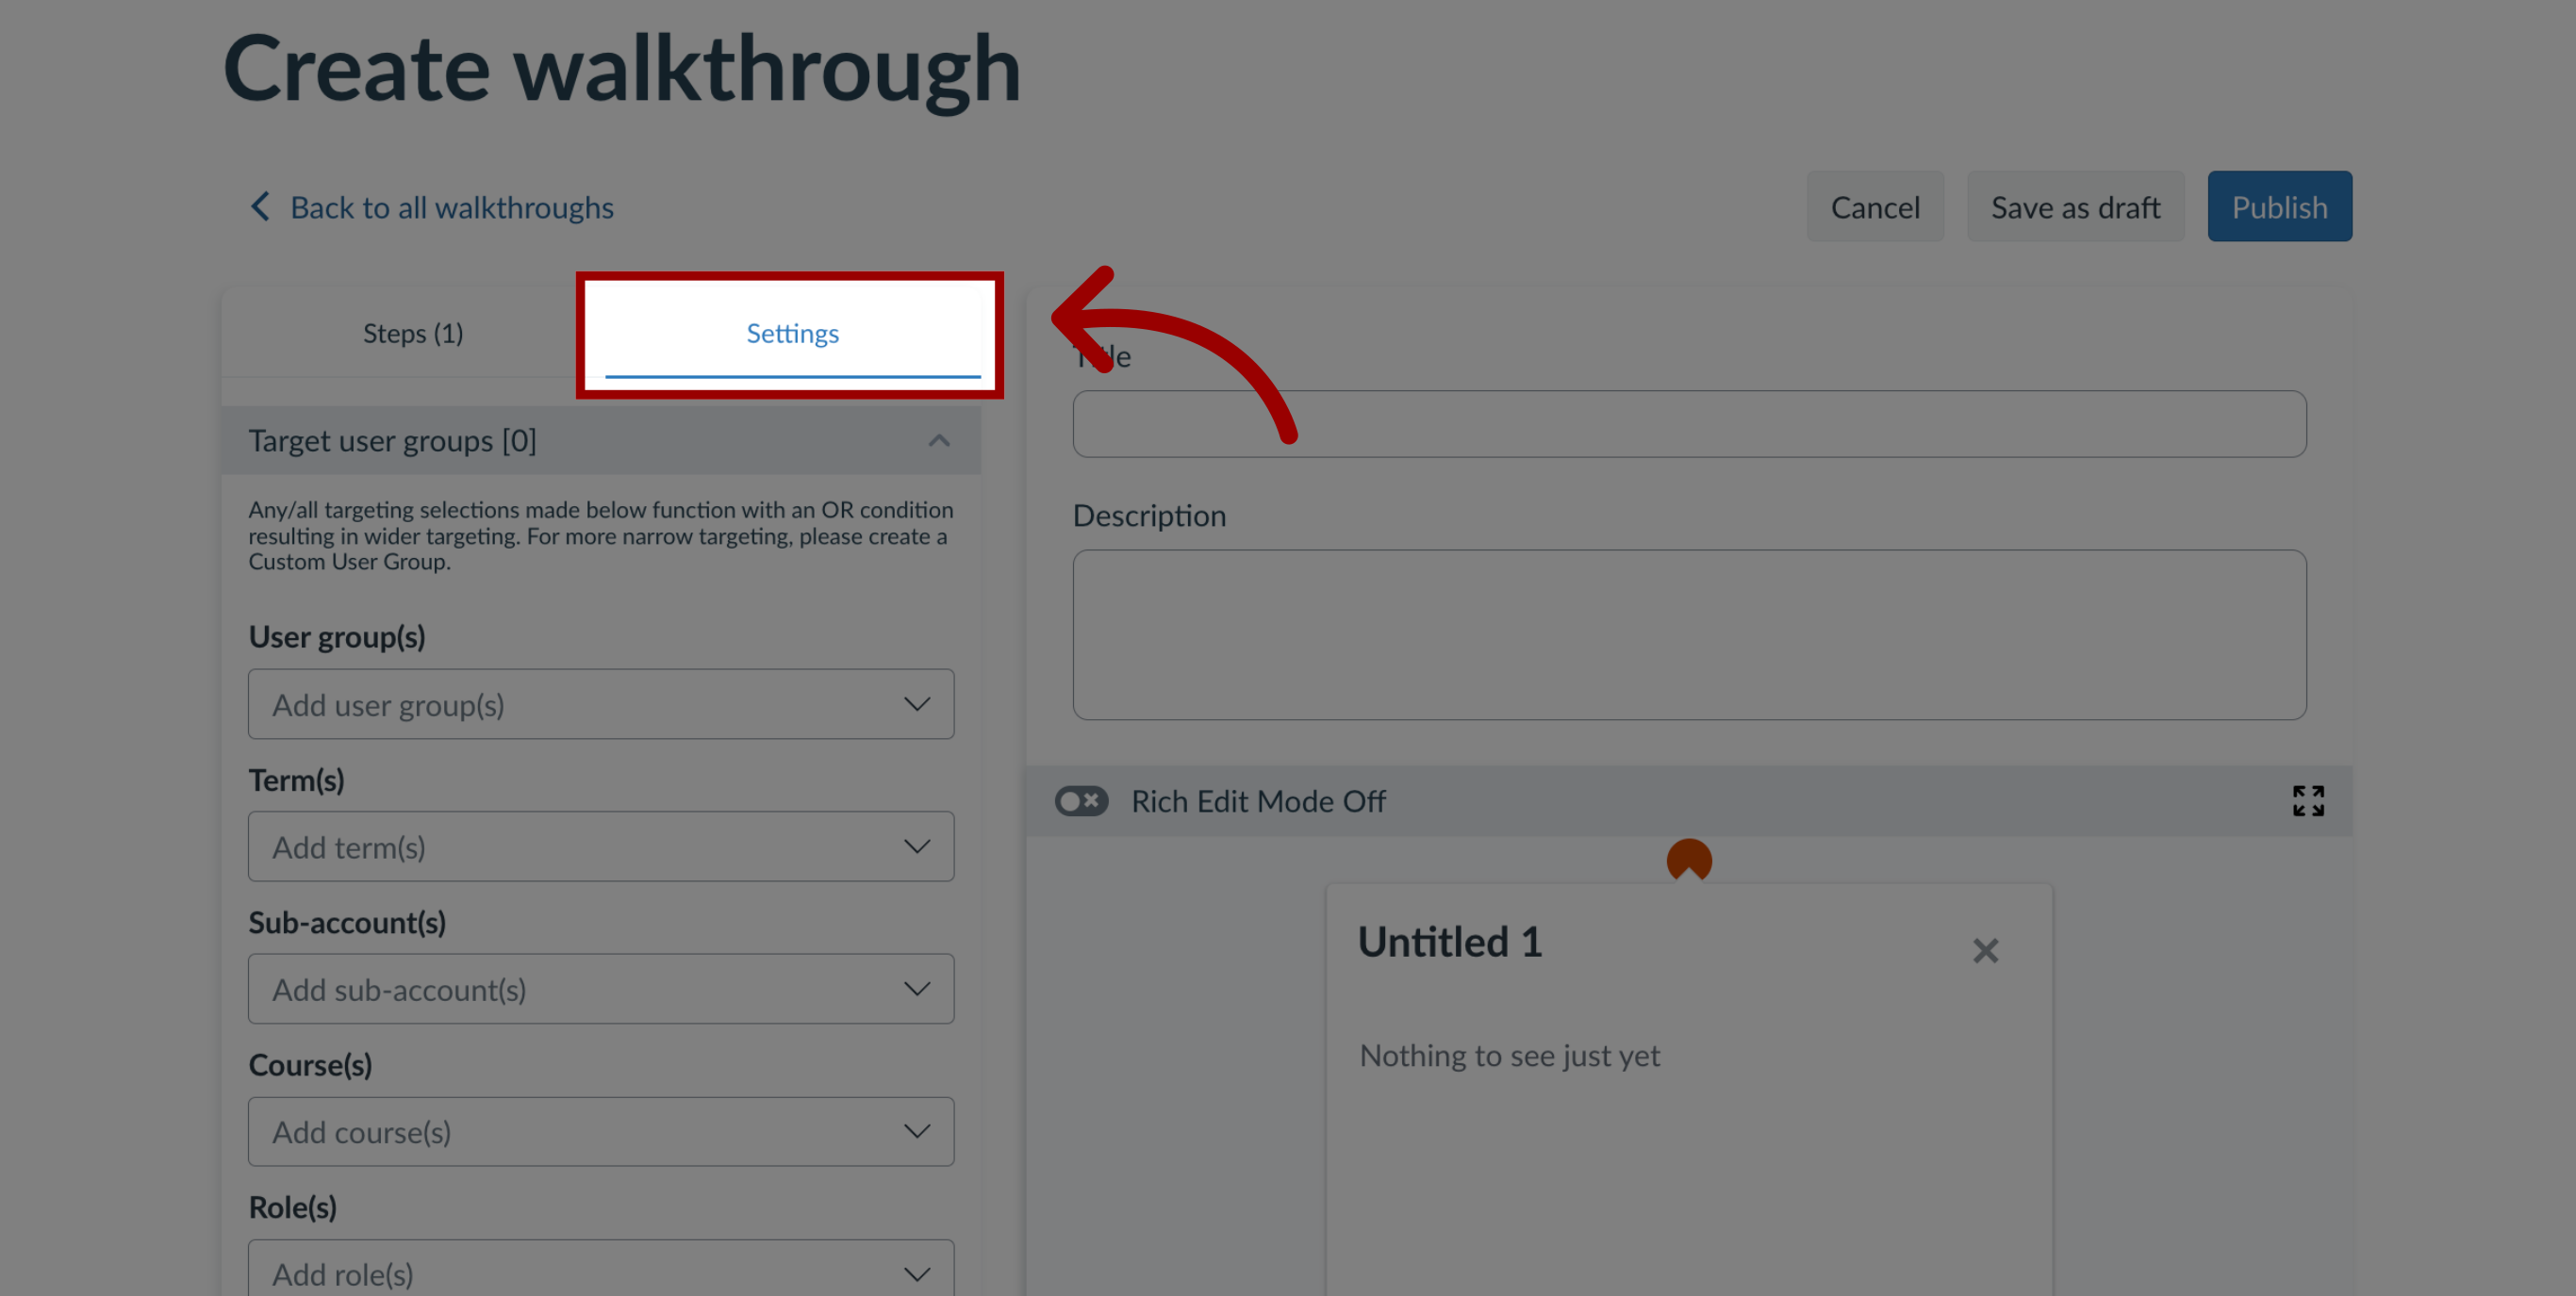
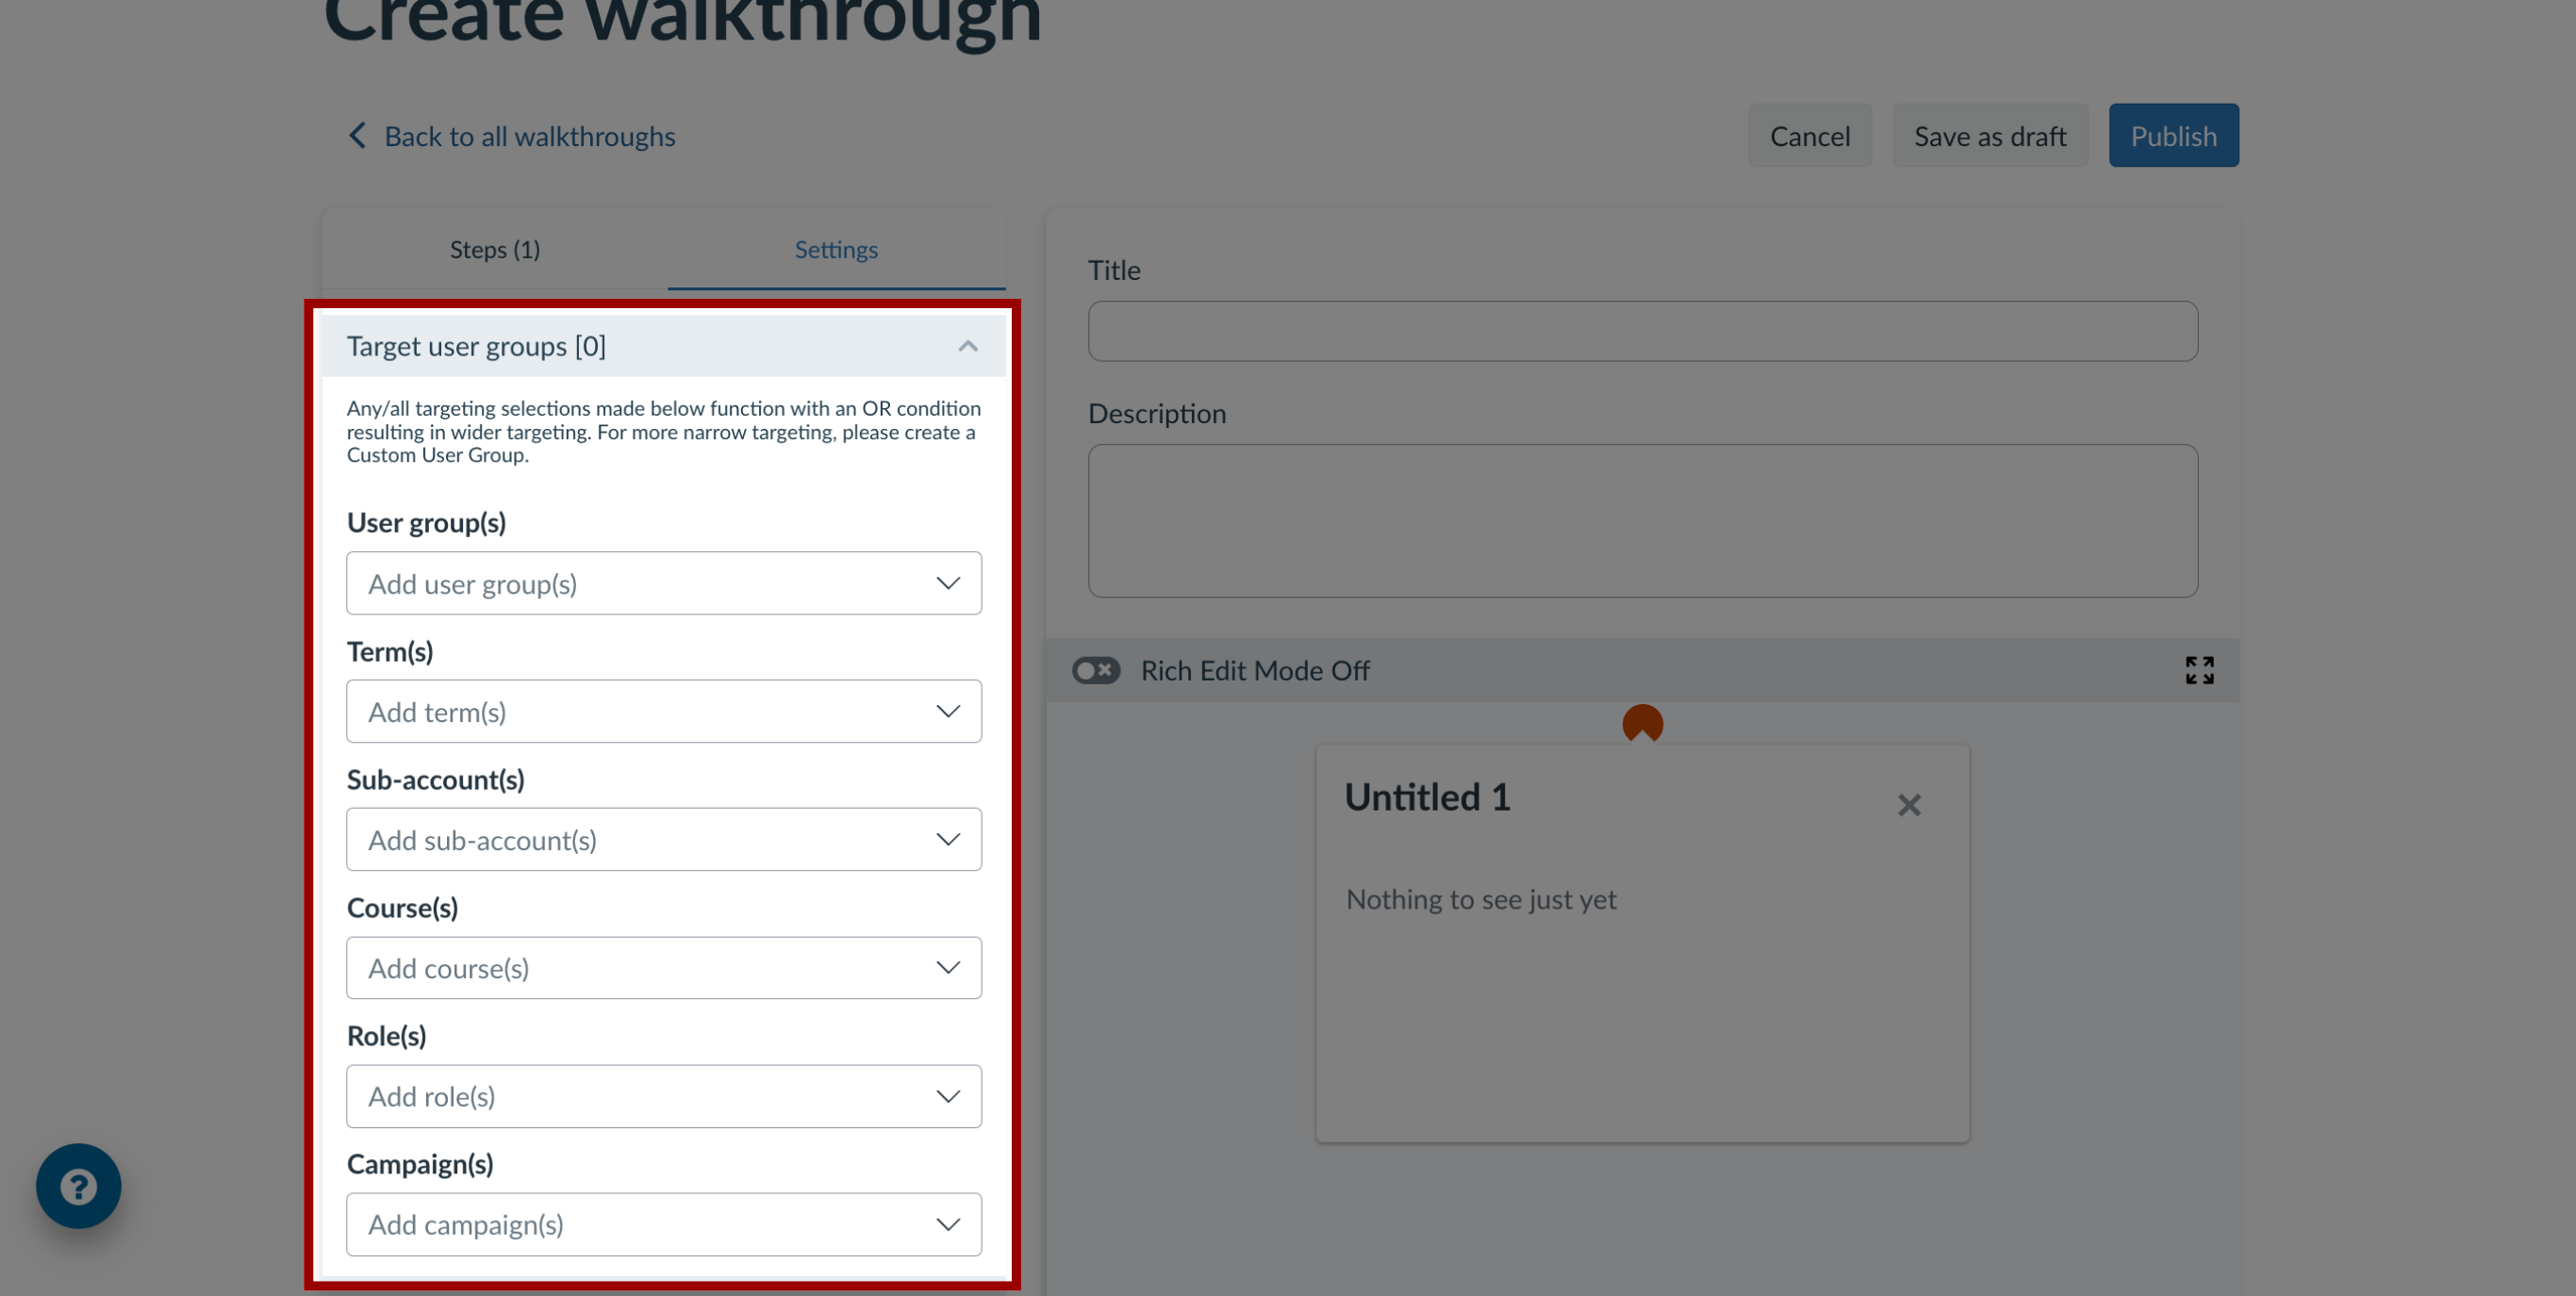
15. Target User Groups
To select who is assigned the Walkthrough, click the Target User Groups drop-down menu.
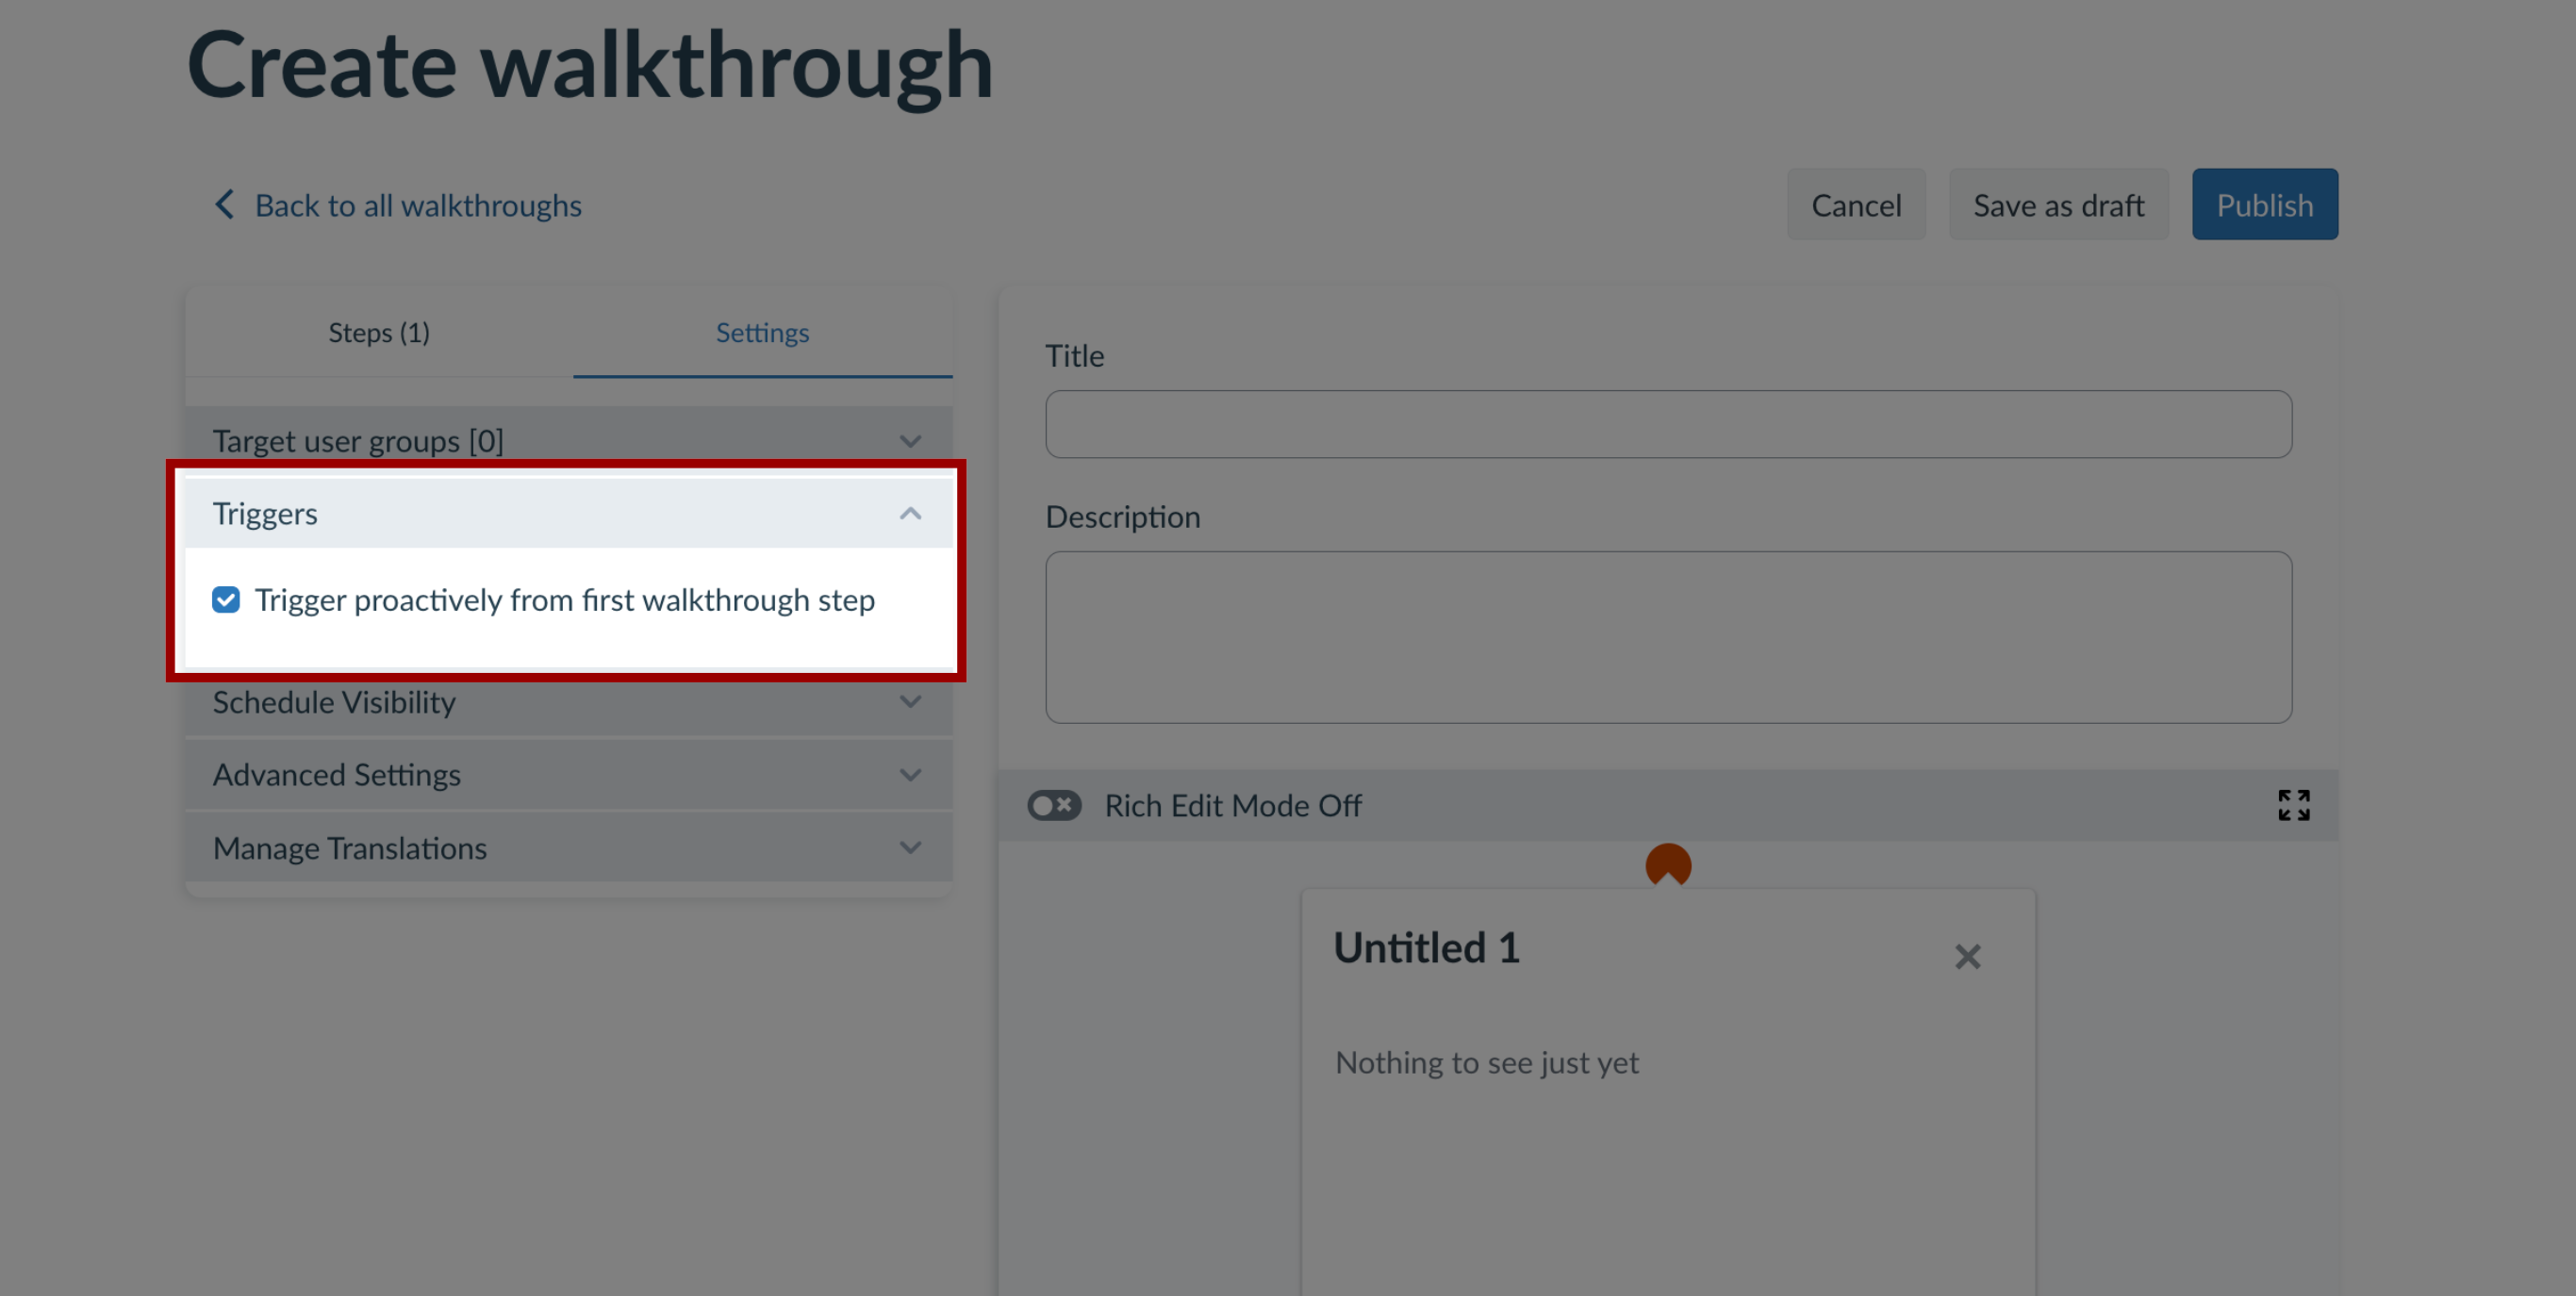
16. Triggers
To immediately begin the Walkthrough when a user opens the page, open the Triggers section and ensure the Trigger proactively from first walkthrough step checkbox is selected.
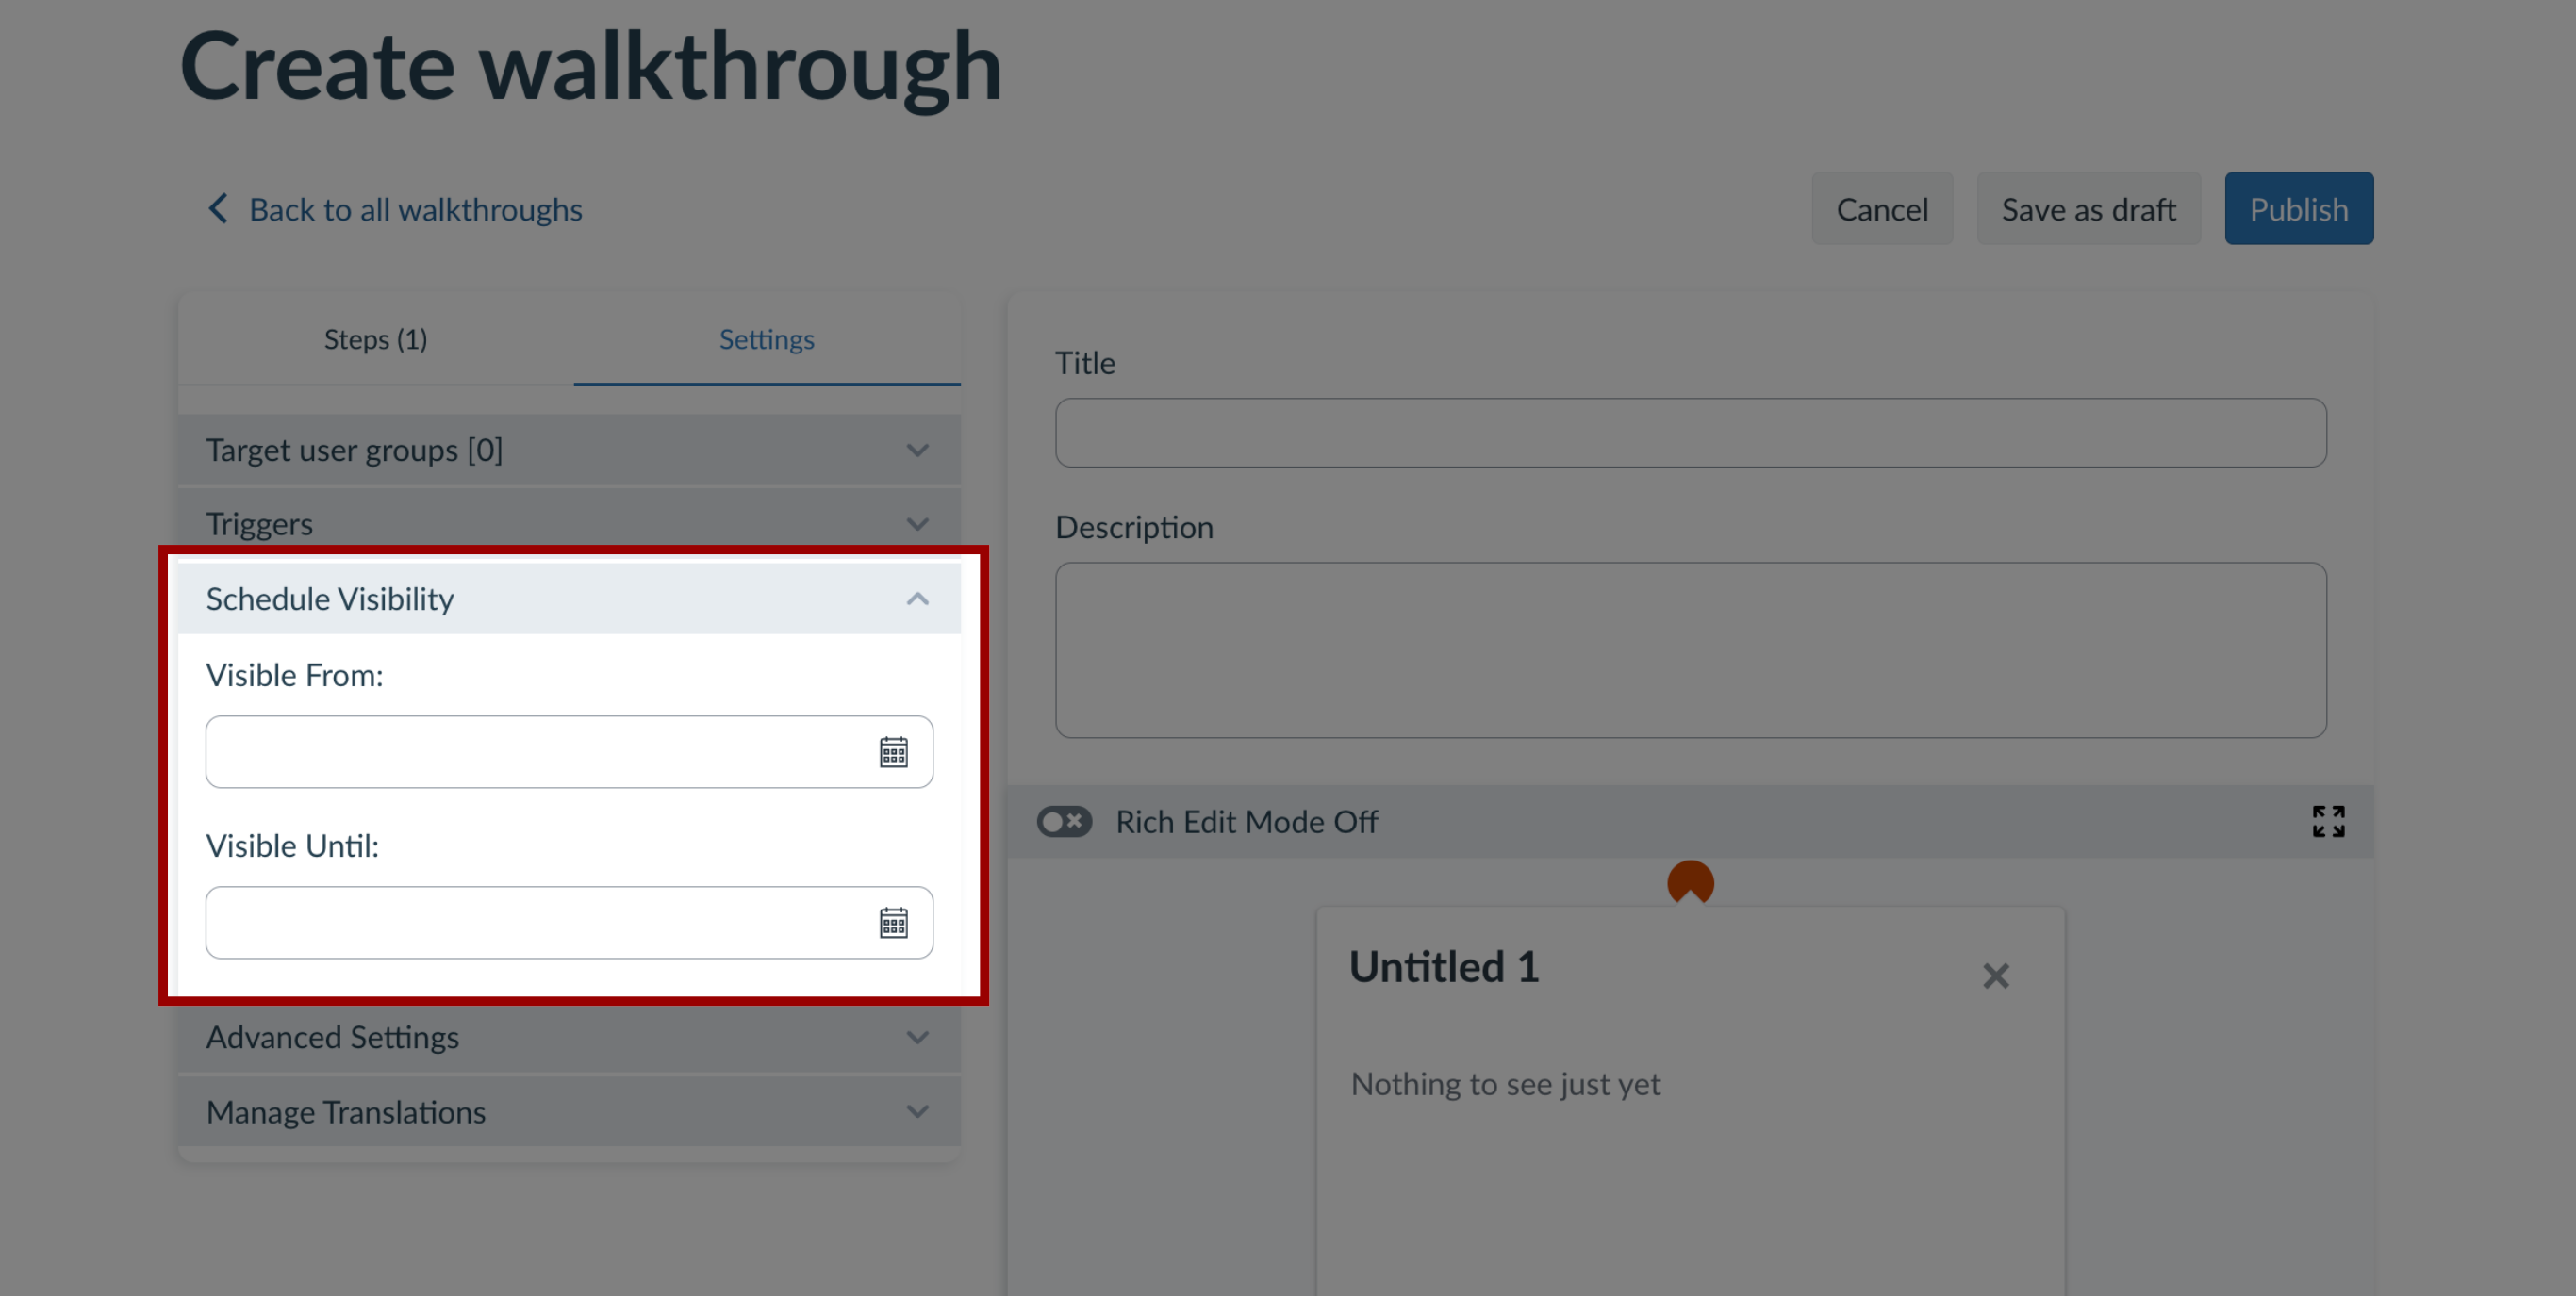
17. Schedule Visibility
To schedule message visibility, in the sidebar, locate and open the Schedule Visibility section.
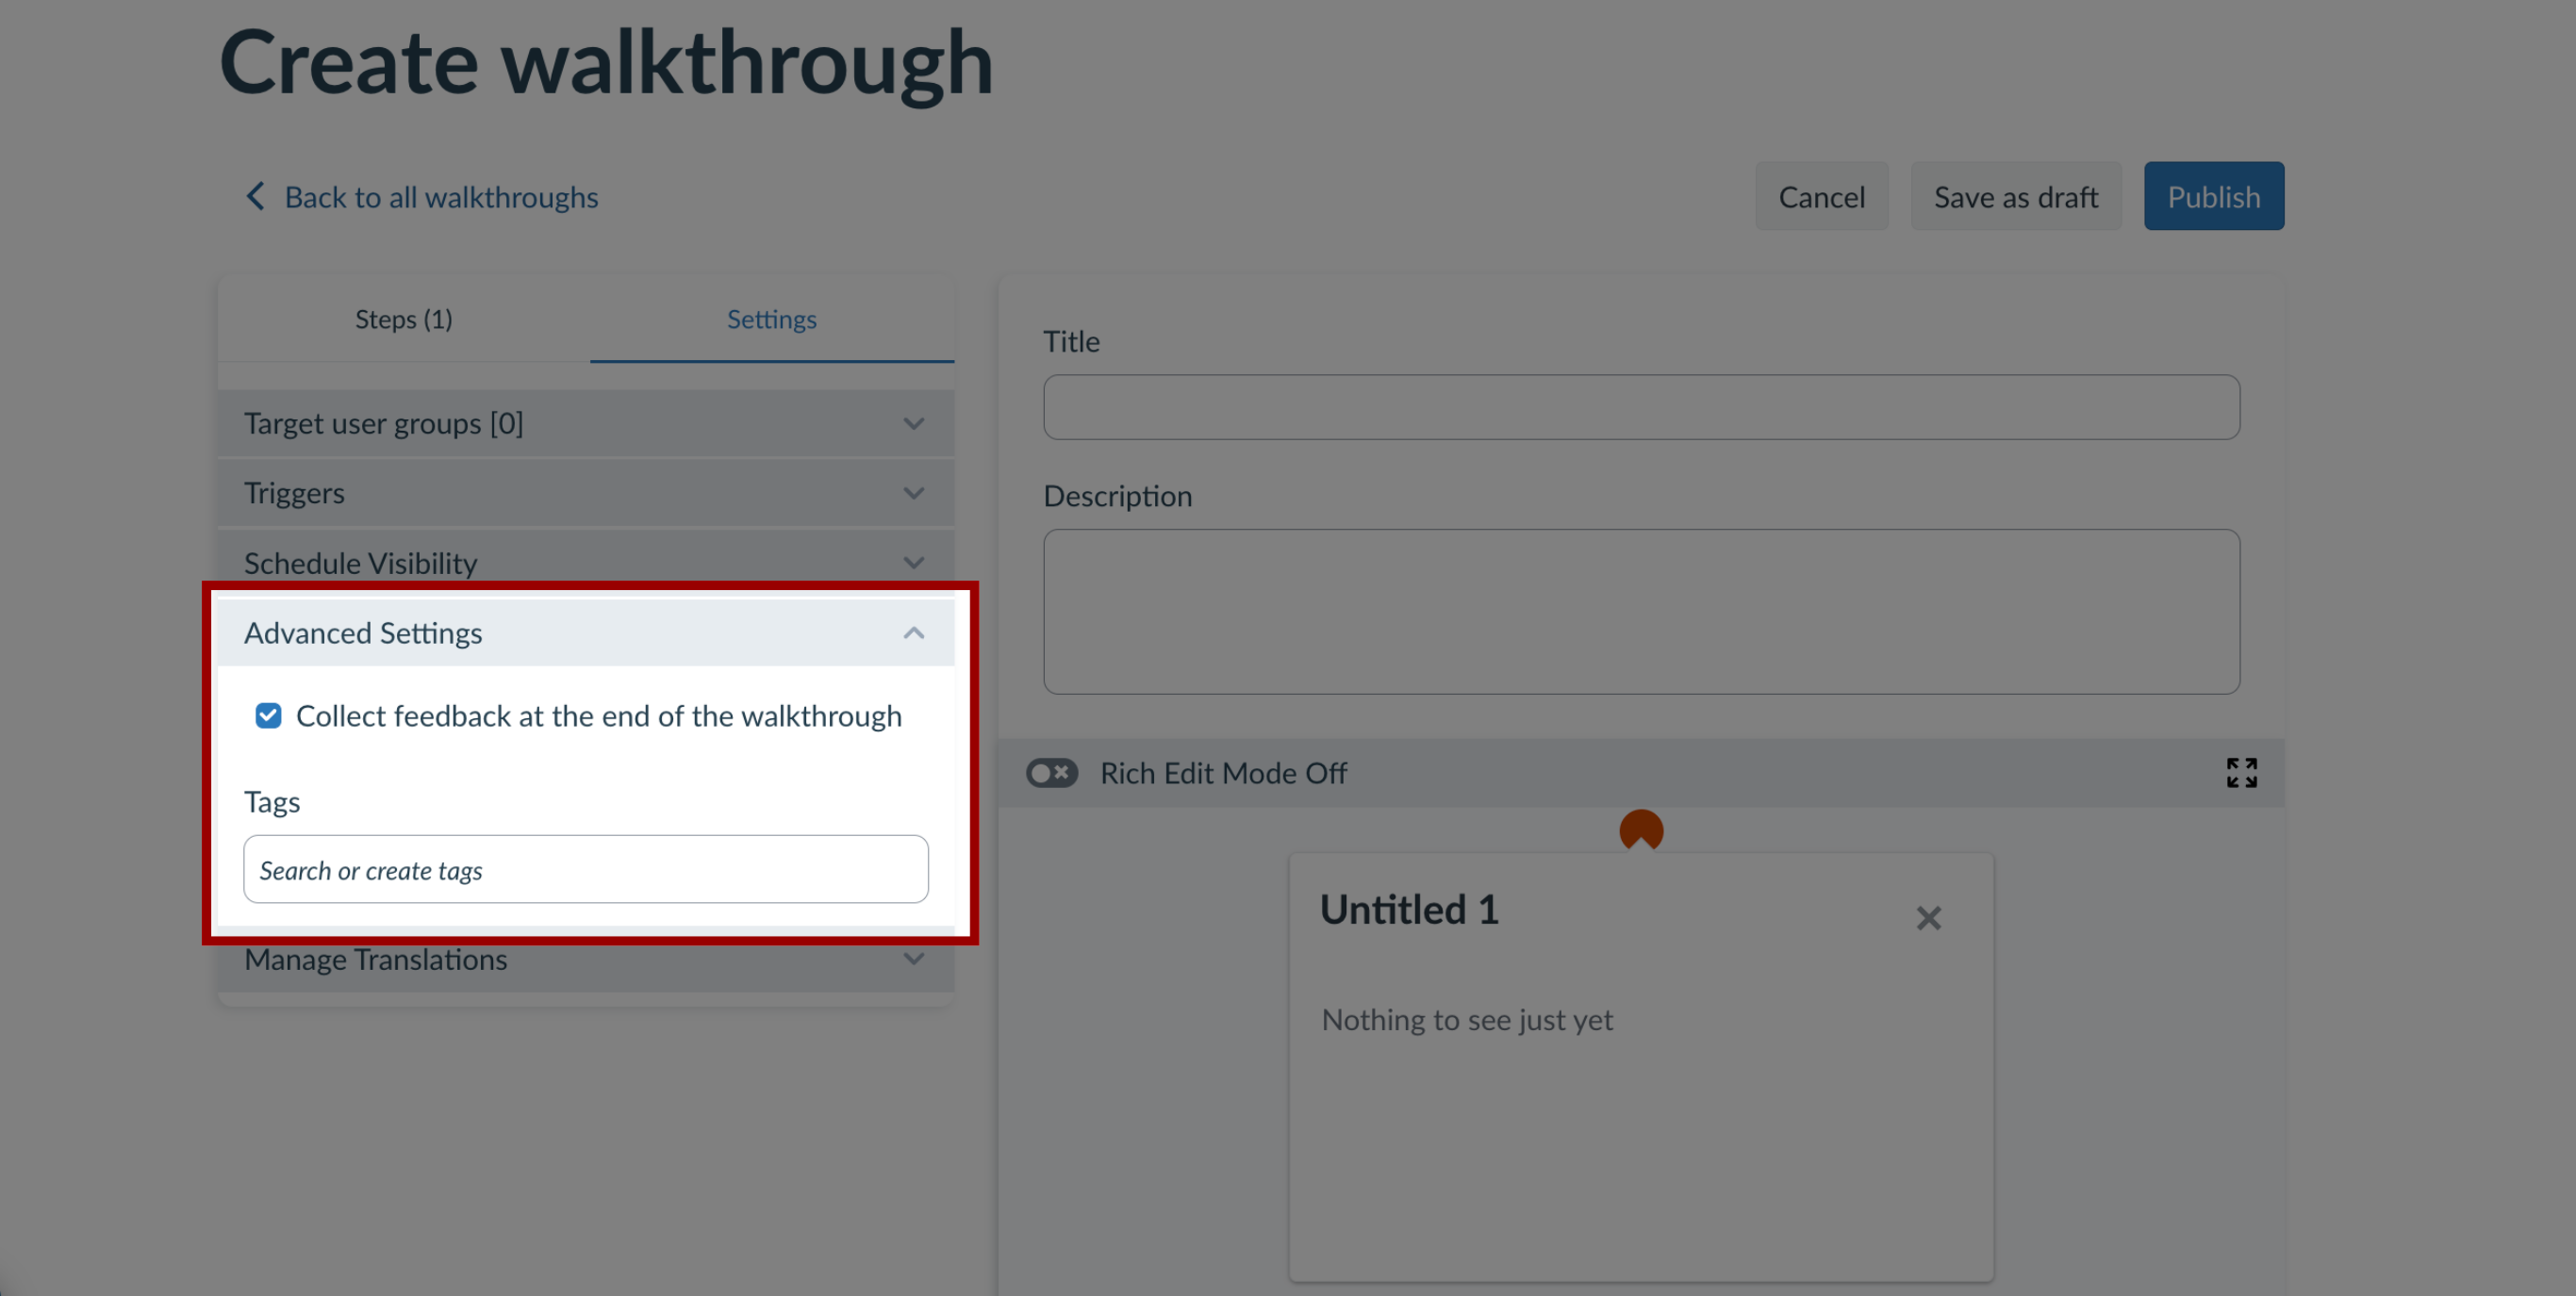
18. Advanced Settings
To collect feedback from the Walkthrough, open the Advanced Settings section and click the Collect feedback at the end of the walkthrough checkbox.
To add tags, search or create tags in the Tags field.
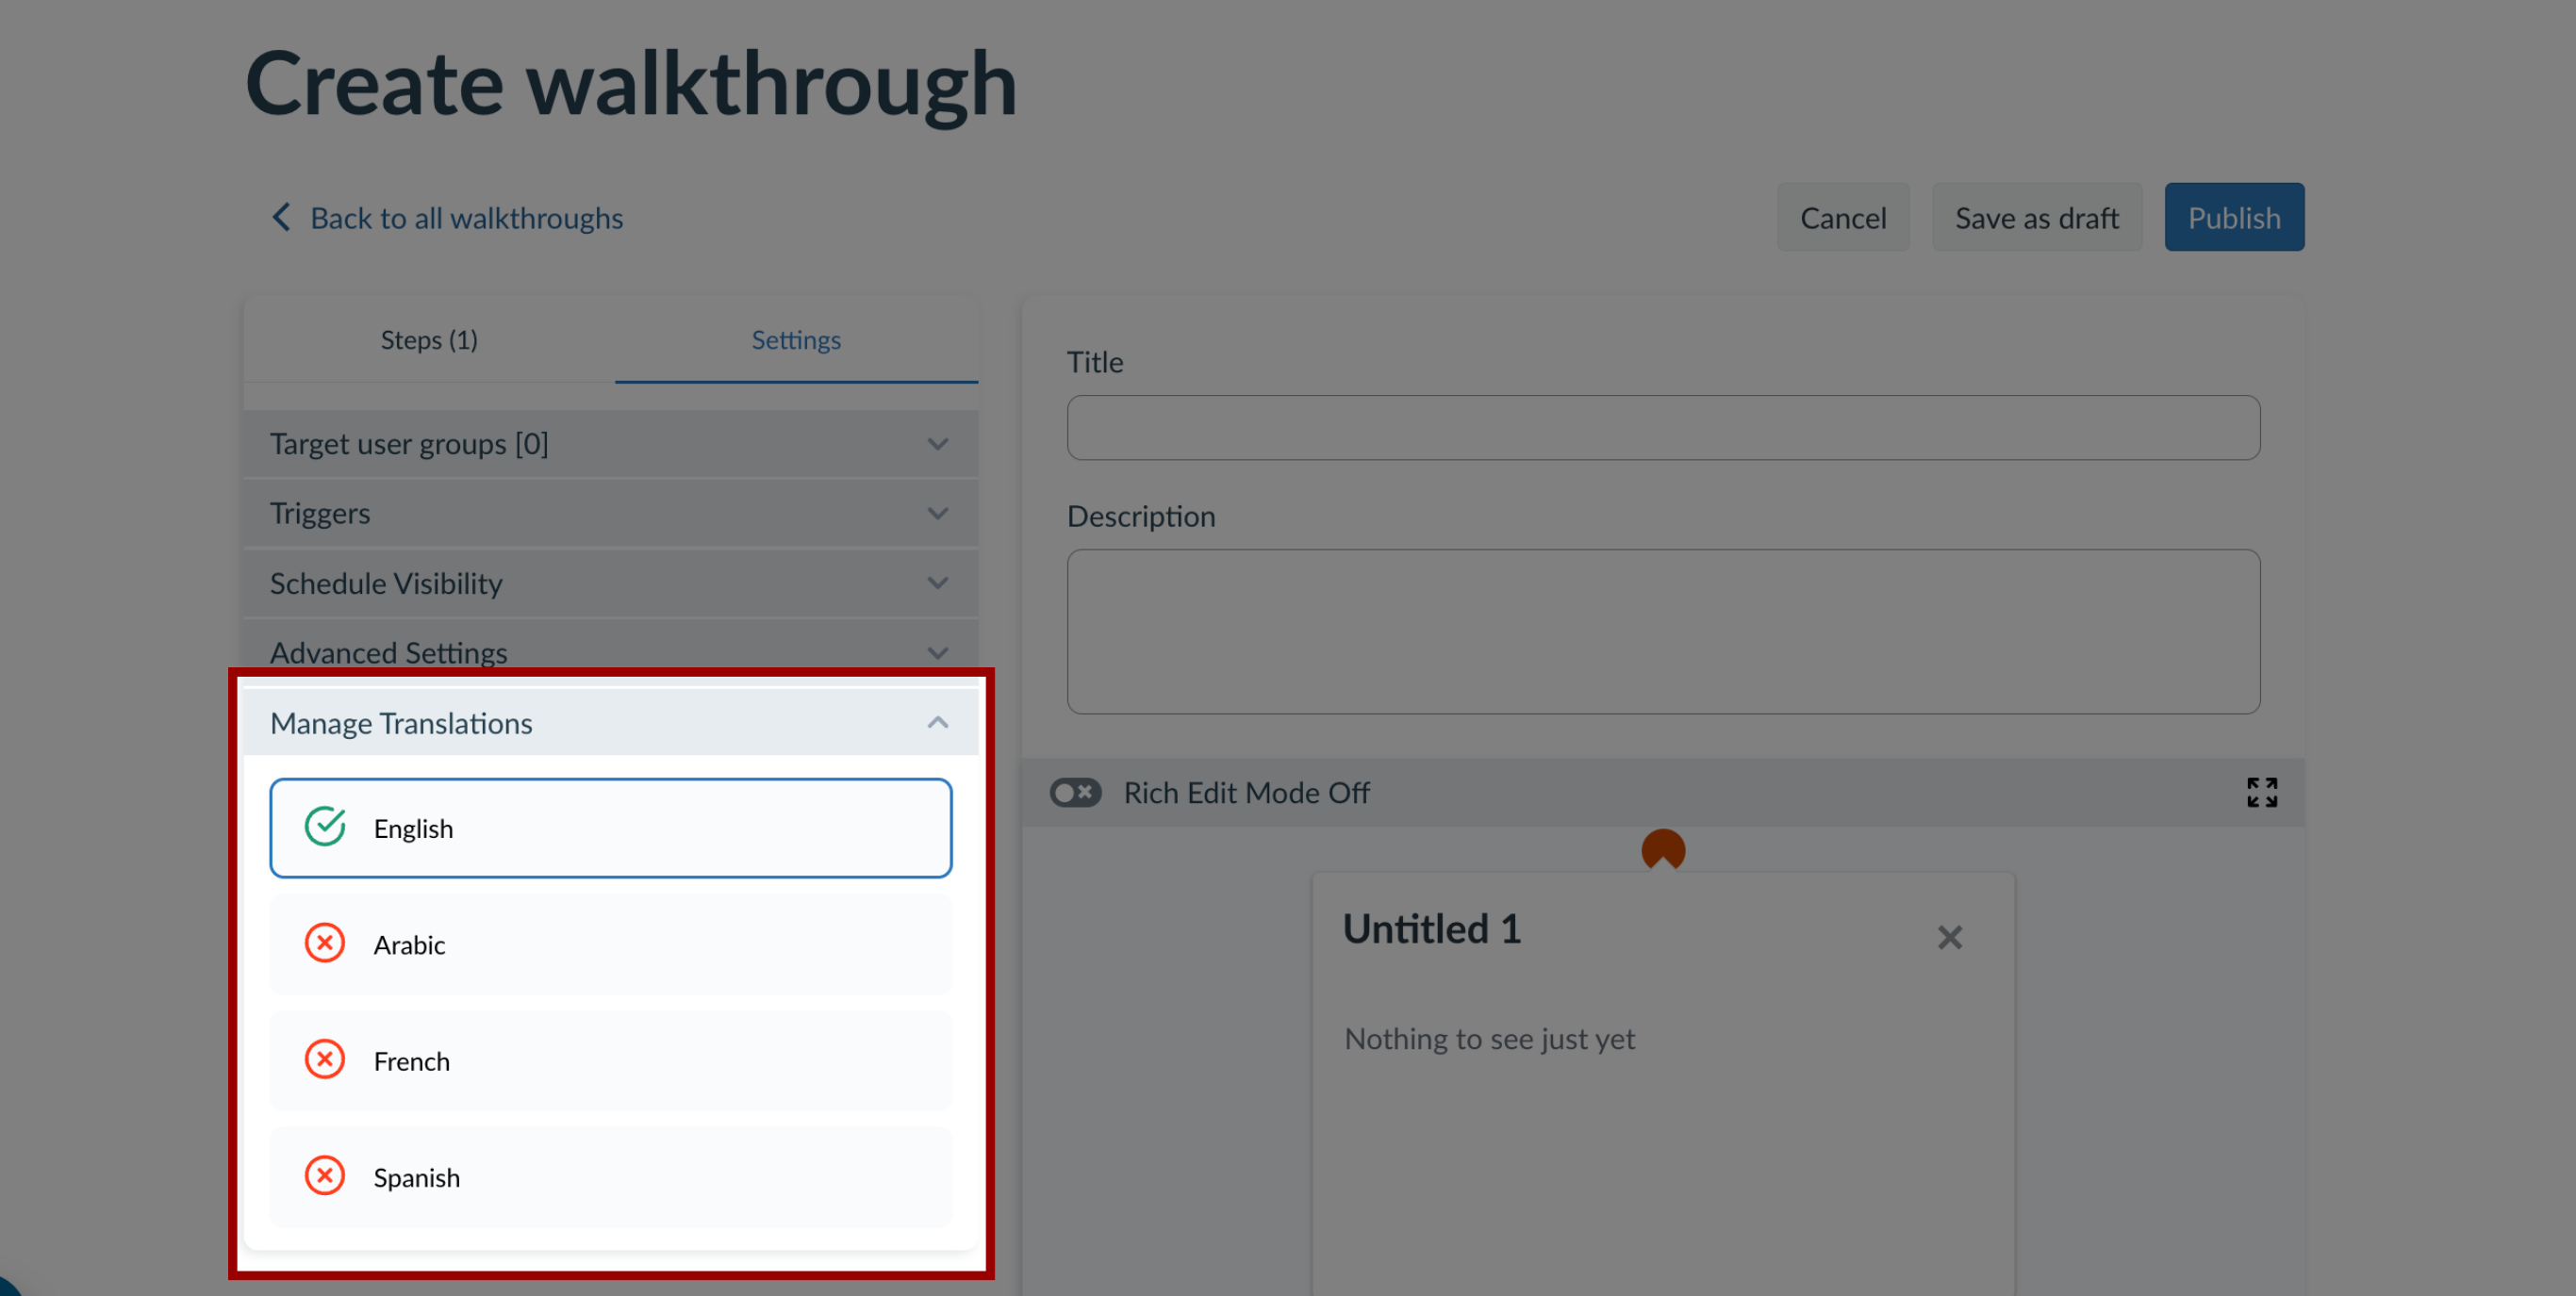
19. Manage Translations
To add translations, open the Manage Translations section and click the languages to translate your walkthrough in.
20. Publish Walkthrough
To create a draft of your walkthrough steps to publish later, click the Save as Draft button.
To publish and make your walkthrough steps visible, click the Publish button.